Assessment – 2
ITIL vs COBIT5
Information Technology Infrastructure Library is a framework used to enable the IT services which is managed across their lifecycle whereas COBIT is used in enterprise IT governance to generate highest added value to the organization from IT investments.
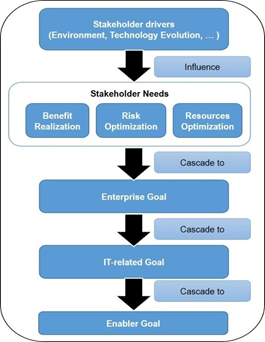
For an instance, even if COBIT and ITIL are completely different from each other, abc company can use COBIT and ITIL both toghether to enhance the processes of IT sector. ITIL includes Standard Operational Management Procedures and Processes to manage IT services. COBIT includes Covering the Enterprise End-to-End, Meeting Stakeholder needs, Separating Governance from Management, Applying a single Integrated Framework, and Enabling a holistic Approach. In a nutt shell, COBIT connects business goals to IT goals.
To build, monitor and improve the implementation in enterprise companies, COBIT provides the following resources:
- Frameworks
- Control Objectives
- Management Guidelines
- Process Description
- Maturity Models
COBIT 5 provides enterprise companies with the following resources to build, monitor, and improve its implementation:
- Frameworks
- Process Descriptions
- Control Objectives
- Management Guidelines
- Maturity Models
All these features helps in reducing the cost, structuring the general processes in IT company, and it also helps in establishing and maintaining the privacy standards. Helps to keep balance between benefits and risks.
ITIL explicitly covers ITSM (IT service management) which allows implementation with other frameworks and guidelines.
COBIT 5
Control Objective for Information and Related Technology 5 (COBIT5)
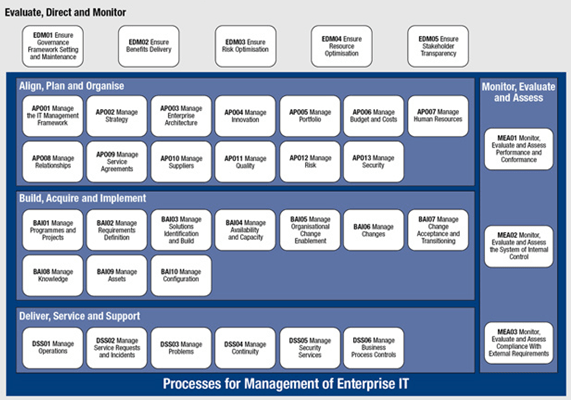
For the governance and management of any IT organization COBIT5 is used as business framework. It was developed by the Information System Audit and Control Association (ISACA). This COBIT5 was accepted and is implemented at many organization. COBIT5 is said to be the upgraded version of the COBIT 4.1. COBIT5 represents the combination of large framework, resources and standard.
Rather than writing theory about Cobit5, i think it would be better if I talk about an example of any organization.
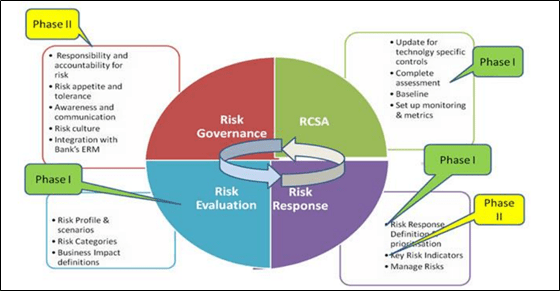
Let us take one of the example in which the QWE bank implements the COBIT5 framework because the bank was not having any procedure to mitigate the risk. Previously the issue was handle at small level only because the bank has not converted all the process online but now as all the process was converted online bank faced the issue in which all the customer data is stored online and the attackers tries to attack the system. Somehow bank manged to defend the attack.
But the bank realized that there should be predefined process in which there should be defined procedure to act during such issue. So, for all this issue the bank has agreed on accepting the COBIT5 process from ISACA.
COBIT5 represents the 5 main domain which is listed below :
- Resource Management
- Value delivery
- Risk Management
- Strategic Management
- Performance Management
The main objective of the QWE bank was that to implement new model which was implemented by central bank which is to make all the things online. So, the bank decided to implement the COBIT5. The accepted COBIT5 process was followed by different IT model which was necessary for the bank which is shown in below figure.
QWE bank also used the bank management process in which old method of COBIT5 seven enablers was used in the sequence as listed below :
- Principles, Policies, and Framework
- Processes
- Organizational structure
- Culture, ethics and behaviour
- Information
- Service infrastructure and application
- People, skills and competencies
The bank created process capability assessment test which was based on the process of COBIT5 as shown in below figure.
Based on the assessment result the bank also performed the risk assessment test in which the bank need predefined process and for that the bank has developed risk management model where each role and responsibilities was separately discussed. This model is shown in below figure.
Now the bank just need to follow the above mentioned two structure through some management process. And it can be done by the help of RACI model.
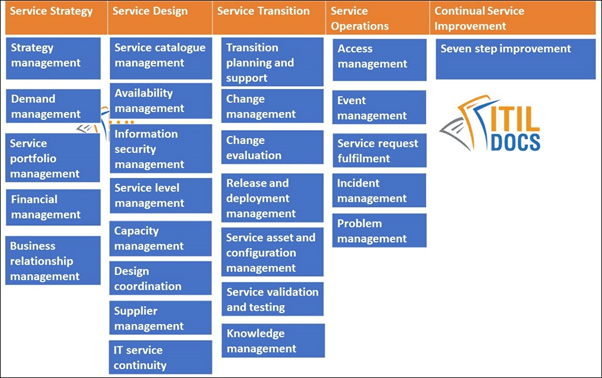
ITIL
Information Technology Infrastructure Library (ITIL)
What is ITIL?
ITIL is the process and mainly a framework in which they are delivering the best information and technology practices of IT service. ITIL will any IT organization to mange different kind of risk, relationship with customer, can help to built a stable IT infrastructure. ITIL was firstly introduced in 1980’s by United Kingdom government. ITIL has total 4 version out of which ITIL version 2 has two release.
The main focus of ITIL is on how the organization is working with the incident or the ticket that is been generated during the different processes. To learn about the ITIL it is necessary to take on the case studies which is available from this link https://www.axelos.com/content-hub . Let us take on the example to learn about the ITIL. An organization XYZ is offering the video to the customer and this video file contain the audio file also which connect the customer to the artist. Thuis XYZ organization was not able to mange the human resource as the growth of the company was going on the up scale.
Due to this, the company did the agreement with the other company ABC Ltd who provide the IT service. Previously in XYZ company all the workload was manged by the one single team because the process was not reaching to the next team as they were no process in an organization to pass the process to next team. There were no management done based on the distribution of responsibilities of the emplyoee on different process. XYZ company was using On-premise enterprise resource planning (ERPs) in which company was handling the resources software at physical level. On-premises resource is very handy to the staff of the company. This ERP can be easily be customised by the internal staff.
The main disadvantage of On-premises is that it gives the cost of installation as a whole in one time. As the scope of the customer requirement and the growth of the XYZ company is increasing, it was difficult to mange all the process and the separation of responsibilities was also difficult so the company ABC cam into picture which provide cloud based ERP which uses the ITIL process to run the flow of an organization.
Cloud-ERP is type of software which is hosted on the service provider platform and can be accessible online with the help of web-browser. This cloud based ERP can be used based on the need of the organization to achieve the business goal. More the company use the software, more they have to pay. Security is the top most priority of ERP provider.
When ABC company introduce ITIL in the form of cloud-ERP than initially the XYZ company was not able to perform the process properly. The only need of ITIL is for managing the process through organization and separation of duties. Initially the company feel that implementing the ITIL has slowed them down but the process was able to complete properly and efficiently. Then after having the grip on the process the company was able to perform the task to achieve the business goal.
The missing point that help the organization to work implicitly was the different process adopt by an organization of ITIL which are listed below.
Change Management : This process is an event in which the system is been partially modify to obtain the business goal. This process follow the standardized procedure to make the work flow easy when the change in an organization is going on. The main aim of this process is to reduce the back-out activities and to minimize the change in previous service. And the proper care should be taken in using the resources.
Demand Management : This the crucial process in which the planning should be made during the peak demand of the service by the customer. In this process the higher level authority of IT like service level agreement team will try to meet the expectation of the customers and various clients. Mostly it is of two types : Micro-level and macro-level.
Incident Management : This process looks after the quality of the service and tries to aim on the limitation of the service level agreement.
Request Fulfilment : This process aims to fulfil all the demand of the customer and even this process tries to fulfil every minor request like changing the password or configuration of password.
Managing Flow
The biggest challenge faced by an organization when the growth was at peak is to prioritize the work and this can be achieved by the ITIL process which was adapted by the XYZ organization by having the agreement with ABC Ltd company.
The process of ticket management was been introduced to the company in which various process was been written in the ticket but then also seapartion of duties was difficult. The step they took in ITIL process is listed below.
- Visualizing the total workload : This was completed with the new concept known as Kanban along with different process of ITIL so due to this the workload was been easily distributed in the system than also the team of XYZ organization was facing problem.
- Managing the workload : The main aim of this process was to introduce the work in progress limit and this limit was distributed as shown in below figure.
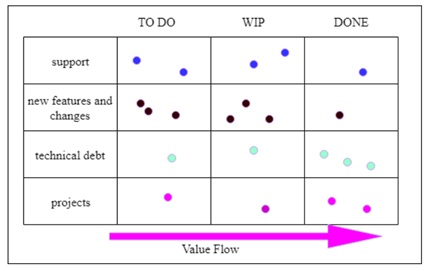
The above figure represent the work that need to be done and left column represent the team of an organization in which it clearly represents that each team only gets three process in one column and not more than that. And this help the XYZ organization to work on their peach eve if the requirements by different customer was increasing and growth was going high.
As the different process of the ITIL was introduced with cloud ERP, XYZ company was easily able to differentiate the workload among the emplyoee of an organization and the work flow was going on the smooth track by implementing ITIL.
Different process of ITIL is shown in below figure.
ITSM Frameworks
Information Technology Service Management helps the organization in building structure of the lifecycle of IT services. It is a pursuit of managing, implementing and delivering IT services to fulfill the demands of organization. In short, we can say that ITSM is the art of making business run.
ITSM Modules :
- Incident Management
- Problem Management
- Change Management
- CMDB
- Asset Management
- Contract Management
- Procurement
- Product Catalog
- Change Management
- Expense Line
- Incident Alert Management
- Incident Management
- On-Call scheduling
- Problem Management
- Release Management
- Request Management
- Service Catalog
- Service Desk
- Service Level Management
- Service Portfolio Management
ITSM Frameworks:
According to Forbes survey the following frameworks are most popular
ITIL : 47 % of the organizations used ITIL which were part of the survey.
COBIT : The organizations focusing on governance and connecting business goals to IT, 36% used COBIT.
eTOM : Mostly used by telecom service providers
MOF : Microsoft Operations Framework, provides another framework for managing IT lifecycle.
Emerging Technology
What is Emerging Technology?
The developed technologies which are not used fully or still unrealized, is called emerging technology. The features that defines the technology as emerging technology are as following.
- Radical novelty(in application even if not in origins)
- Relatively fast growth
- Coherence
- Prominent Impact
- Uncertainty and Ambiguity
Examples of Emerging Technology:
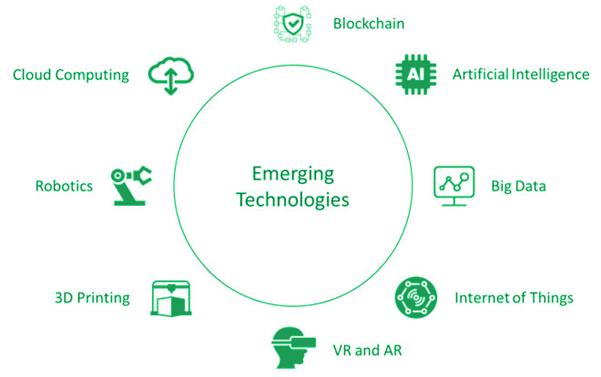
IoT (Internet of Things) : IoT is essential to business, it helps working smart and gain complete control over network. It provides real-time look into how the system actually is working, delivering understanding of supply chain, performance of machines and logistics operations. IoT helps companies in reducing labor cost by enabling automated processes.
Serverless Computing : Rather than spending innumerable hours on solving business problems by code, in serverless computing architecture code execution is managed by a cloud provider. Which means there is no need of using traditional method of developing applications and locate them on servers. It reduces the load of managing, provisioning and maintaining servers while deploying the code.
VR (Virtual Reality) : Virtual reality is used create simulated environment. It gives the live experience to users. Users will have experience of real world without even being at the same place. Instead of watching something on the screen, a person can interact with 3D world with the use of virtual reality.
Blockchain Technology : Blockchain technology is disperse, decentralized digital ledger which is used to keep data of transactions across computers in order to avoid data alteration of all subsequent blocks. It is an incorruptible digital ledger which provides the feature like financial transactions, economic transaction.
Digital Twin Technology : Digital Twin technology is a virtual model of a service, process or product. According to Thomas Kaiser, the senior vice president of SAP, “ Digital Twins are becoming a business imperative, covering the entire lifecycle of a process and forming the foundation for connected products and services. Companies that fail to respond will be left behind.”
5G :
5th generation mobile network.
Other generations of mobile network
1G – delivered analog voice
2G – Introduced digital voice (CDMA)
3G – Mobile Data (CDMA2000)
4G – LTE in the era of mobile internet.
Biometrics :
Traditionally, most of the companies and government sectors were using paper based signature method for keeping the record of employees, collectors etc. It has been replaced by the biometric technology. Using biometrics, an organization can avoid the use of paper based data and can have more manageable and easy to understand records of employees. There are manifold types of biometric technology. It is basically the science of analysing human body characteristics.
Types of Emerging Technology:
- Behavior Bio-metrics
- Keystroke Recognition
- Voice Recognition
- Fingerprint Identification
- Finger Vein Identification
- Palm Vein Authentication
- Iris Recognition
- Face Recognition
AI – Artificial Intelligence : It works like a dummy of human intelligence which is processed by bare-metal servers. Artificial Intelligence uses reasoning and self-correction for learning processes.There are three types of artificial intelligence
- Artificial Narrow Intelligence ( ANI )
- Artificial General Intelligence ( AGI )
- Artificial Super Intelligence ( ASI )
Nano Technology, 3D Printing, Drones, Robotics, Edge Computing, Quantum Computing etc. are another examples of emerging technologies.
Lab-14 Managing Virtual Machines
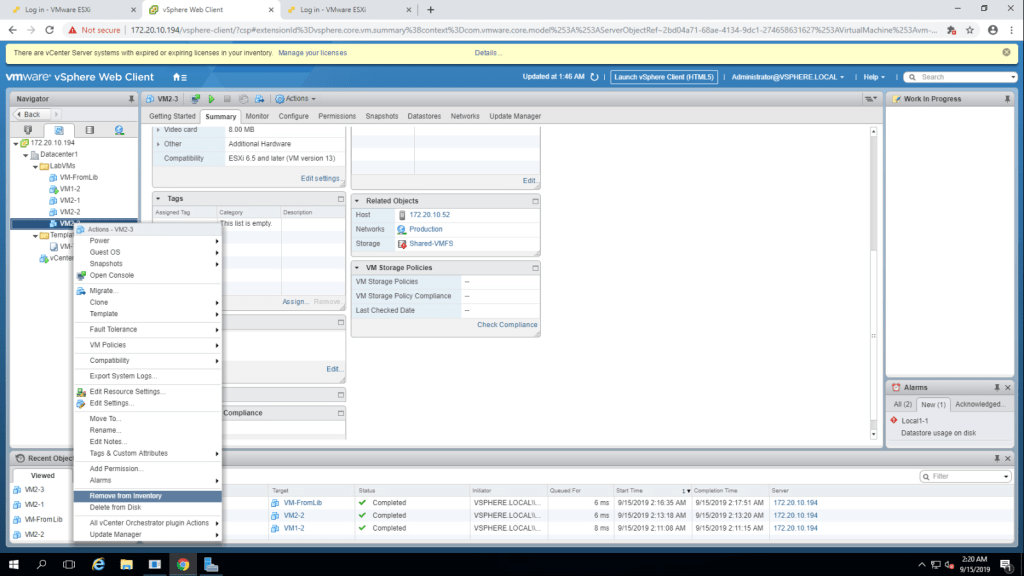
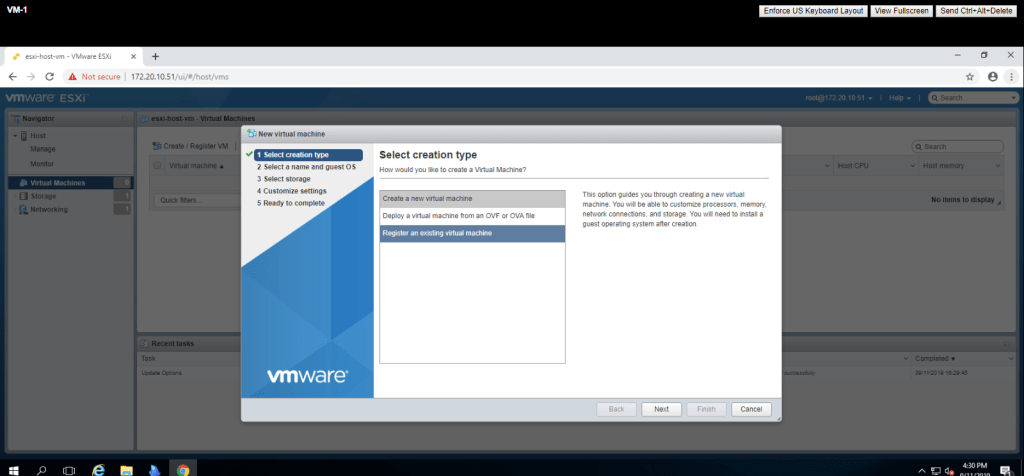
TASK-1 Unregister a virtual machine from vCenter Server Appliance Inventory.
- Go to vSphere Web Client Home page -> VM and Templates -> VM2-3.

VMFS Datastore Name : Shared VMFS and datastore resides on the second esxi 172.20.10.52
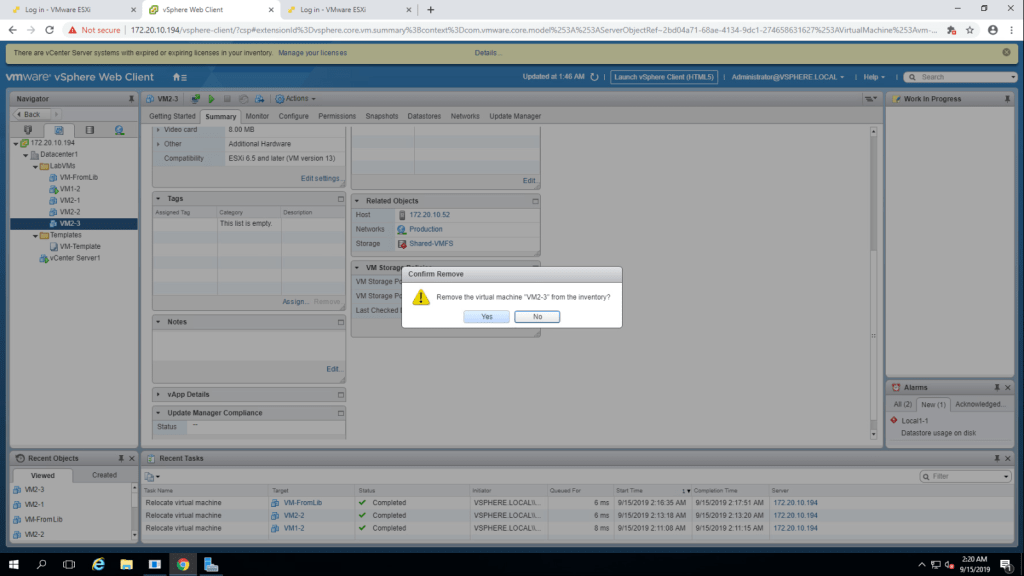
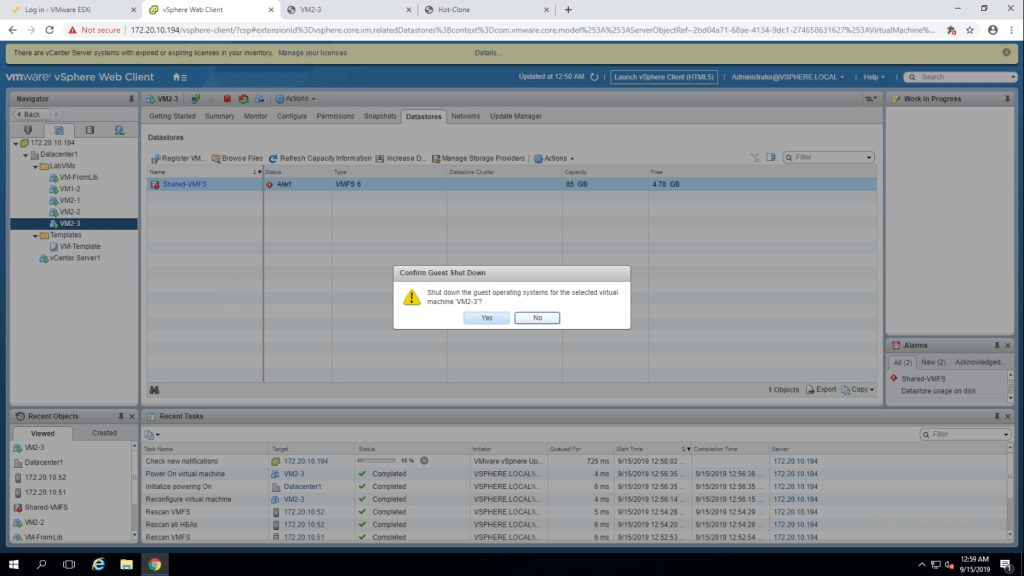
2. Now shut down guest os and then right click on VM2-3 and select Remove from Inventory.
3. Click Yes to confirm. After doing this VM2-3 will no longer be appeared in the inventory.
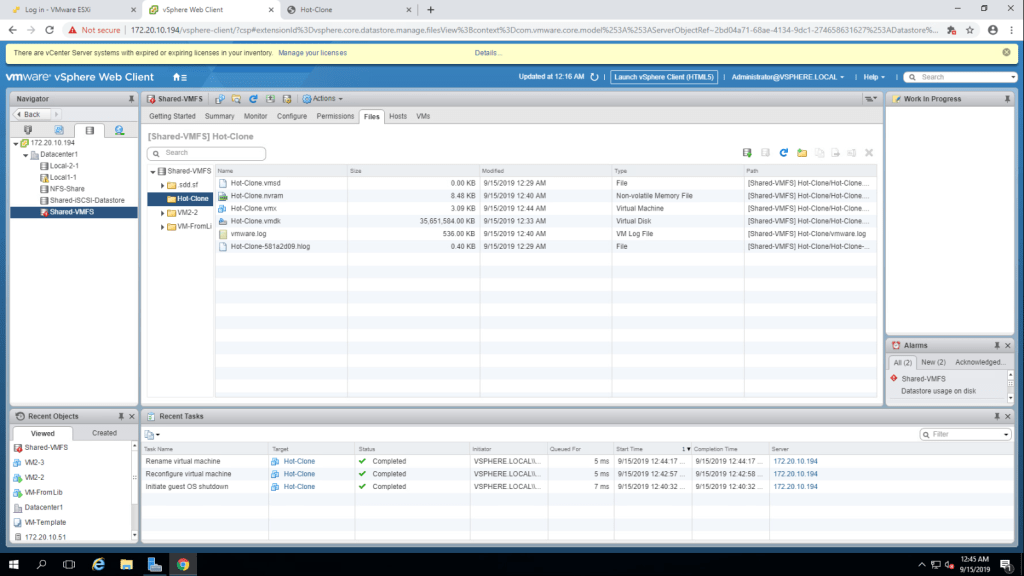
4. Now Right click on your datastore name in the storage menu & then select browse files. Click on host clone folder to view virtual machine files.
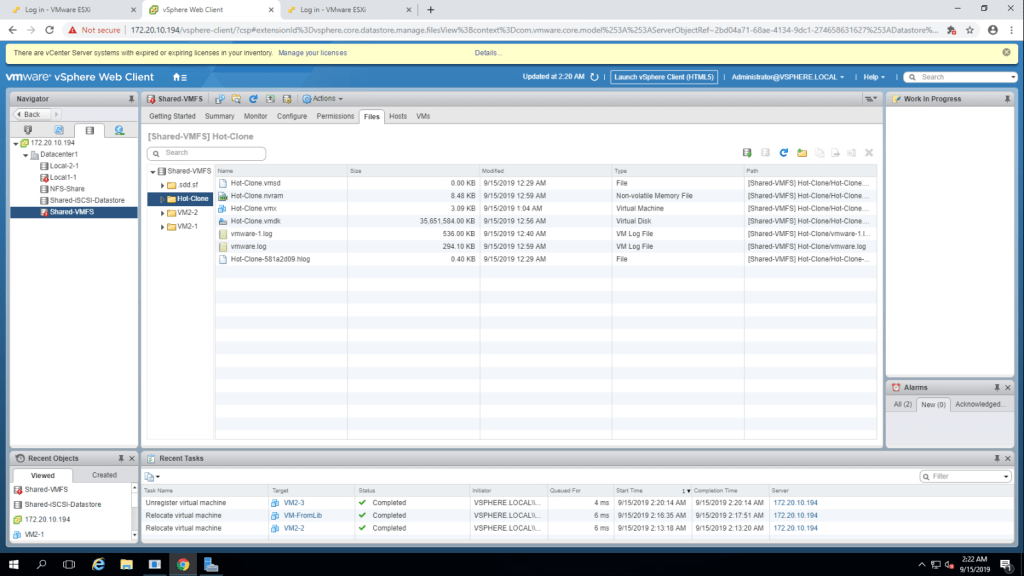
Q. Does folder name VM2-3 exist? A. As we have removed VM2-3 from the inventory, the folder is no longer exist.
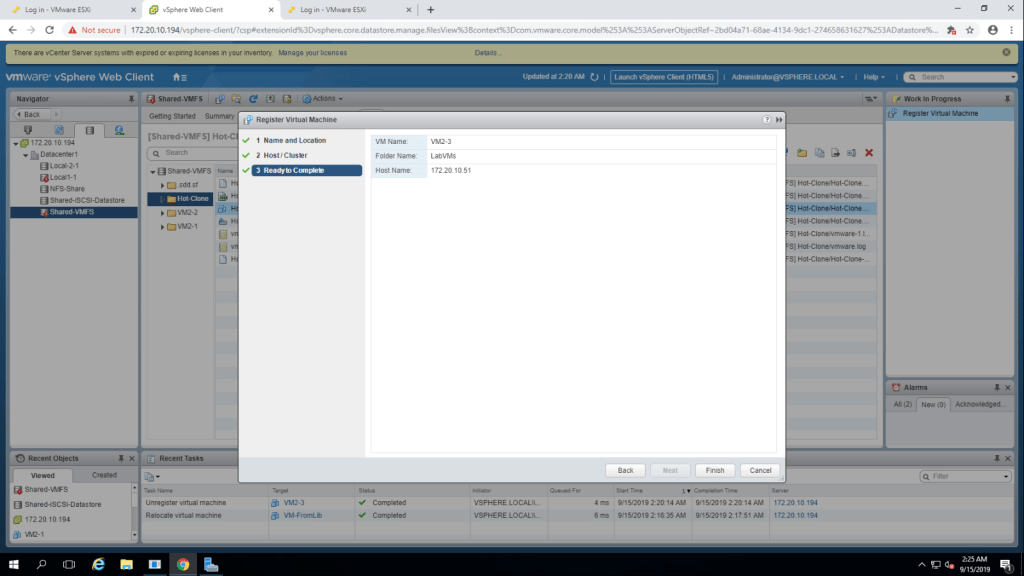
TASK-2 Register a virtual machine in the vCneter Server Appliance Inventory.
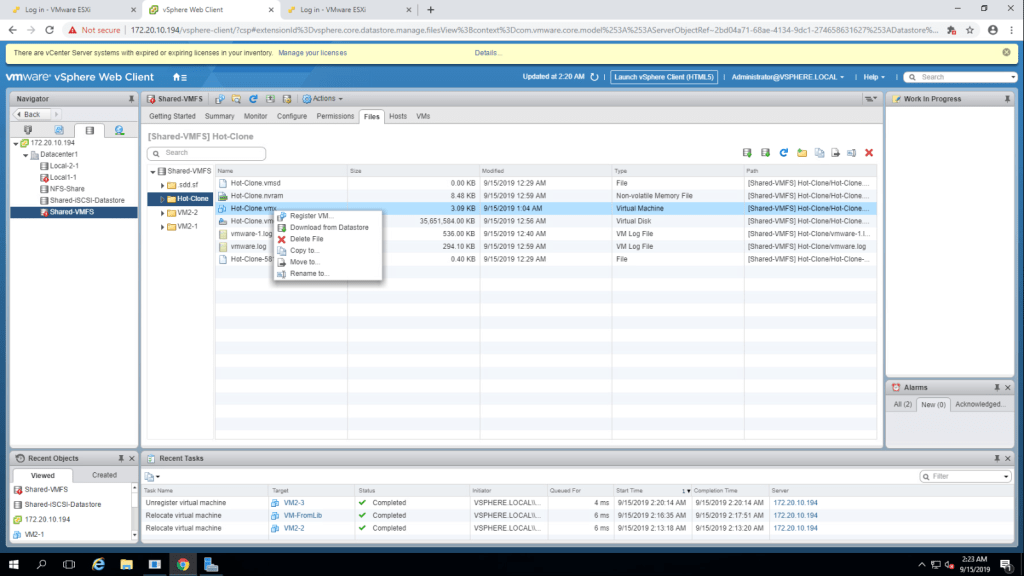
- In the Hot-Clone folder, right click on Hot-Clone.vmx file and select Register VM.
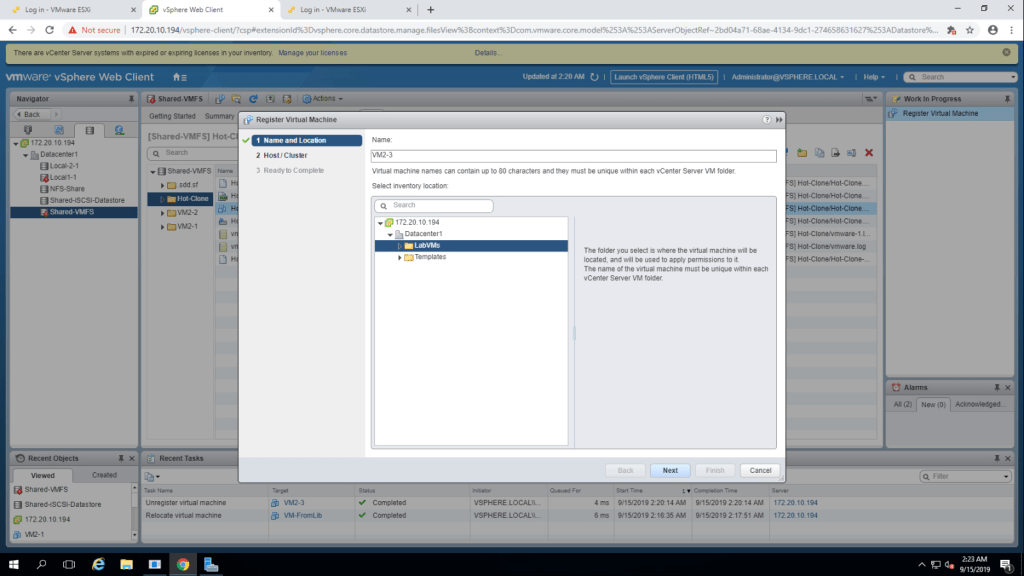
2. In register virtual machine wizard, give the name(VM2-3) and location(LabVMs) and click next.
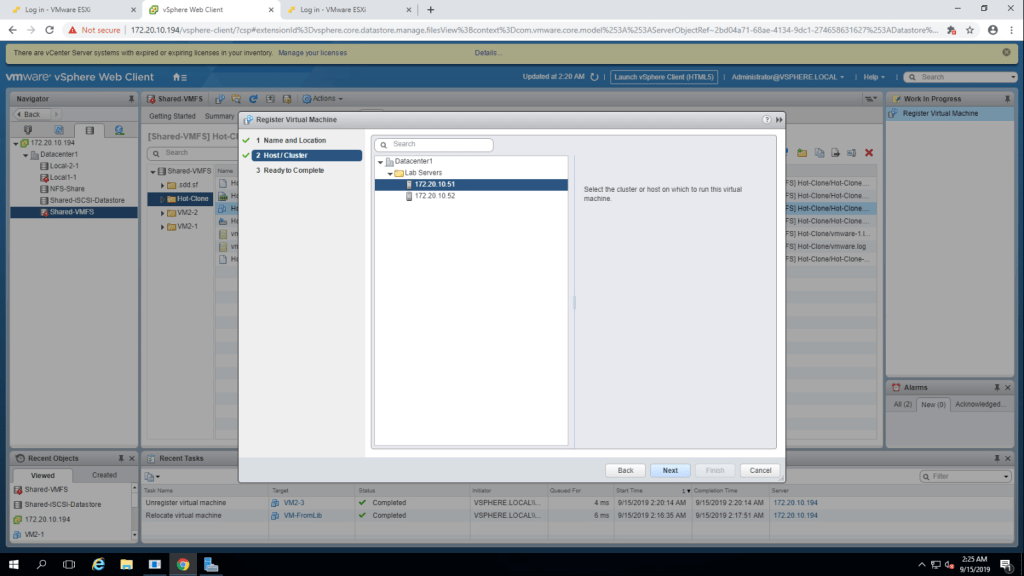
3. From hosts and cluster page, select the host esxi-01(172.20.10.51) and then next.
4. Review the summary and click finish.
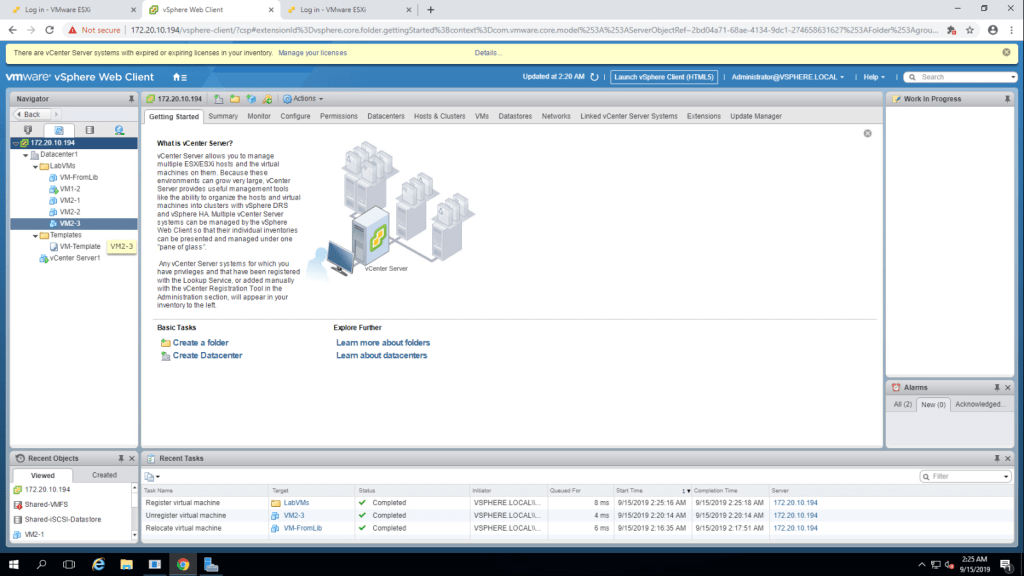
5. Verifying that the VM2-3 is in LabVMs folder.
TASK-3 Unregister and delete Virtual machines from datastore.
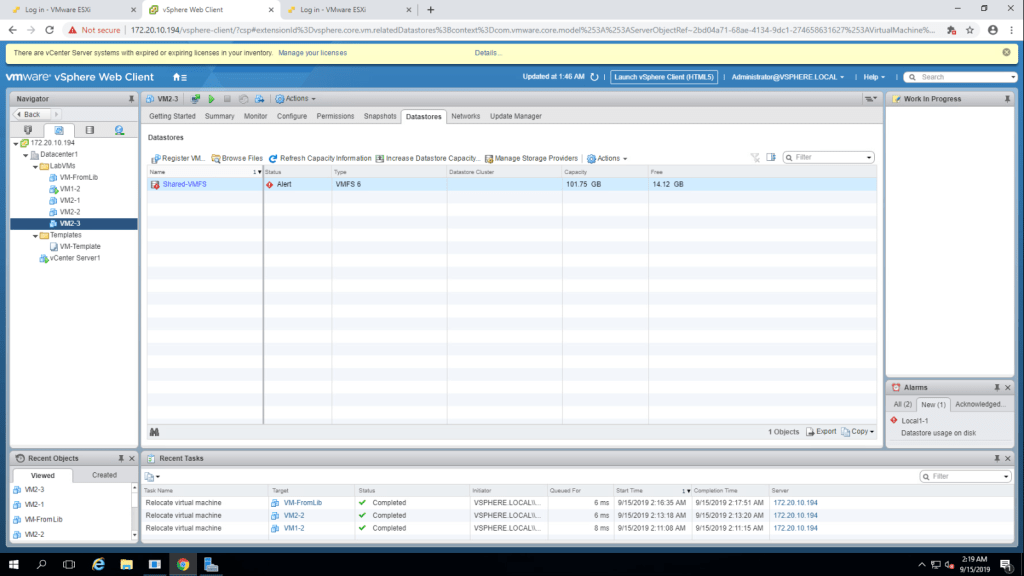
- Home -> VM and Templates -> VM2-3 , and then go to datastore tab and record the data store name on which virtual machine resides. My Virtual Machine Resides on Shared VMFS datastore.

2. Right click on VM2-3 and select delete from disk option.
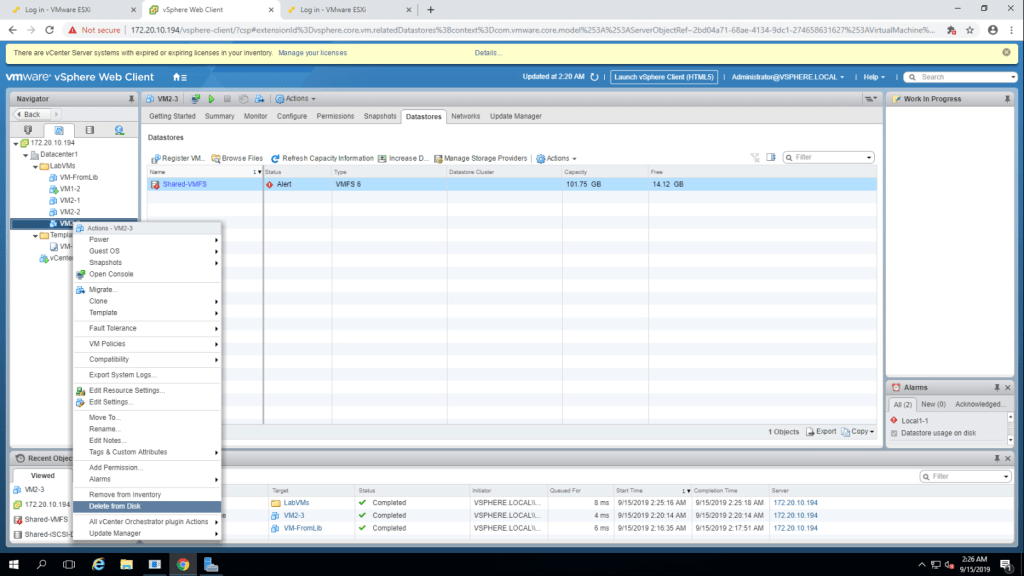
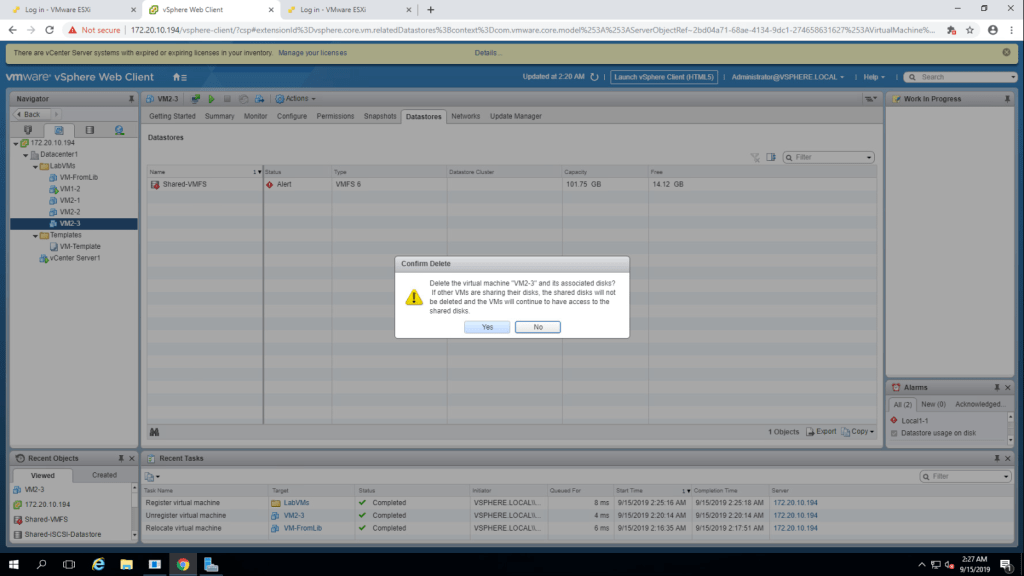
3. It will show one message whether to delete that virtual machine or not. click yes.
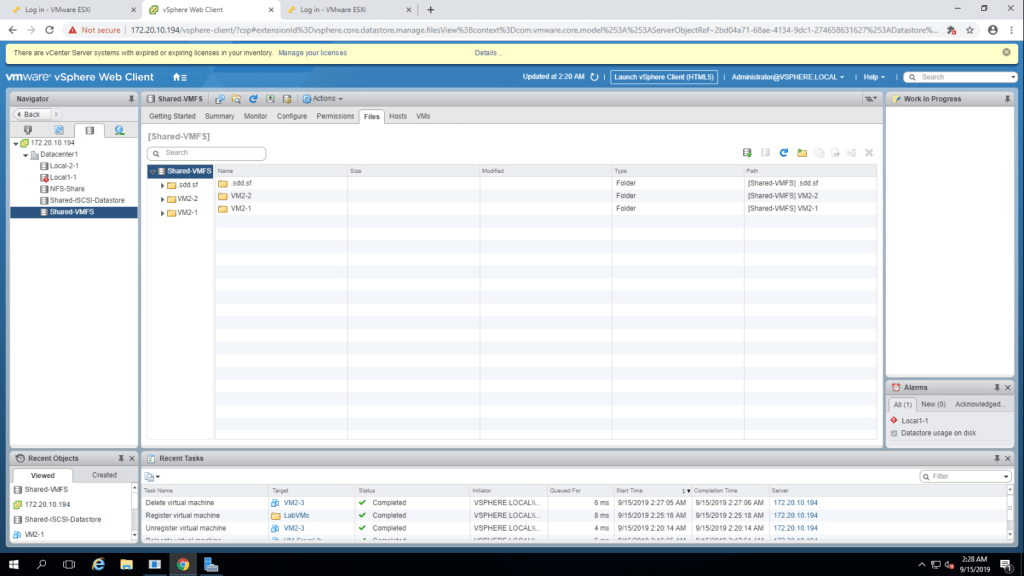
4. Now go to shared VMFS and then select brows files ,just to verify that VM2-3 no longer exists on the inventory
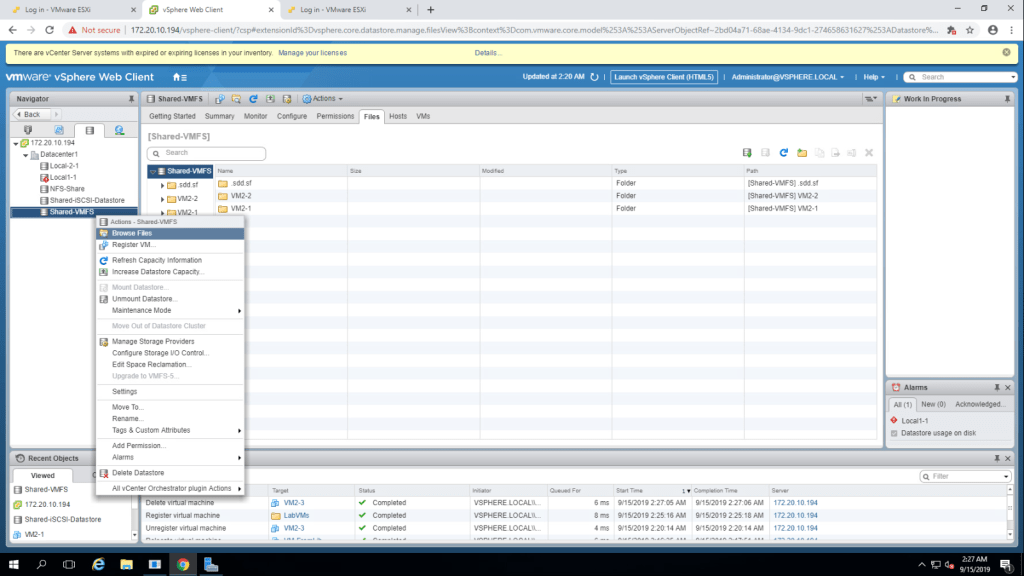
5. You can see that VM2-3, no longer exists in the datastore.
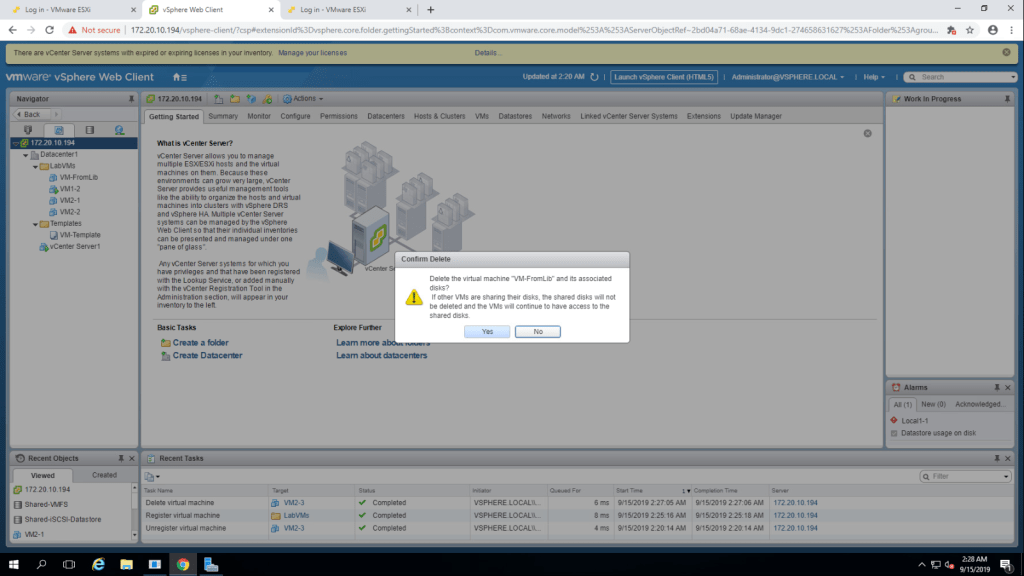
6. Now right click on VM-FromLib and then select delete from disk
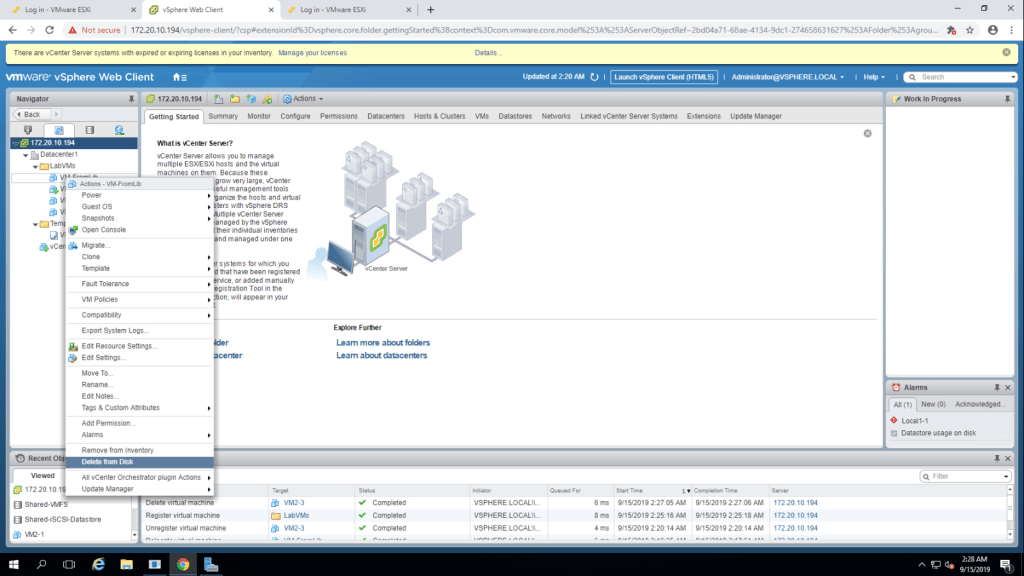
7. Click yes to confirm the deletion.
TASK-4 Take Snapshots of a virtual machine.
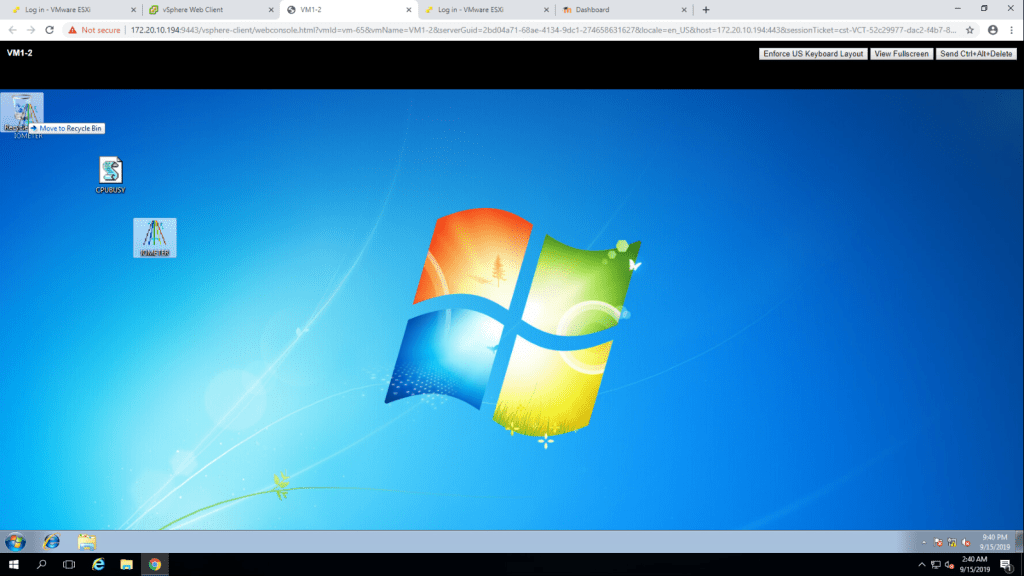
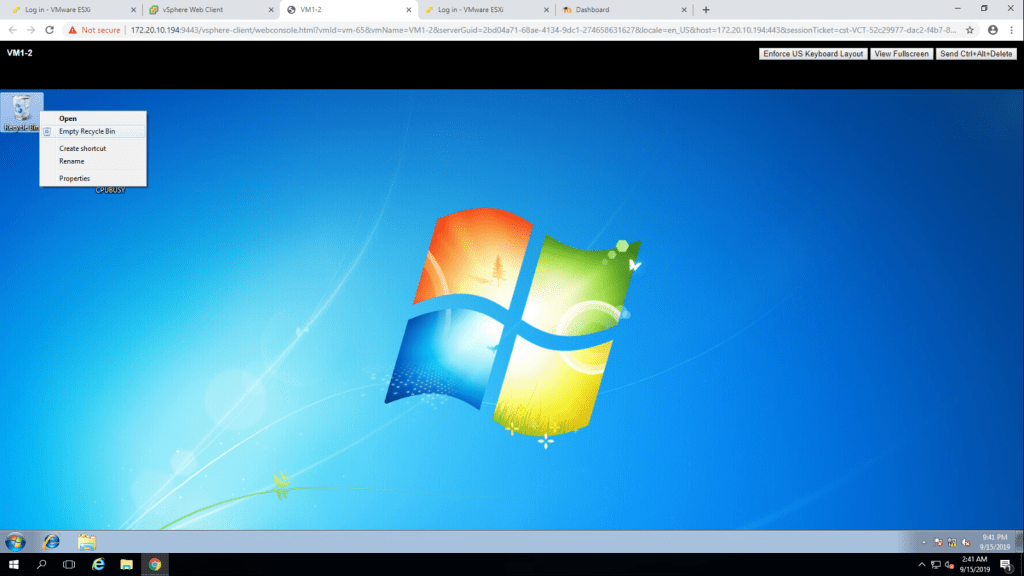
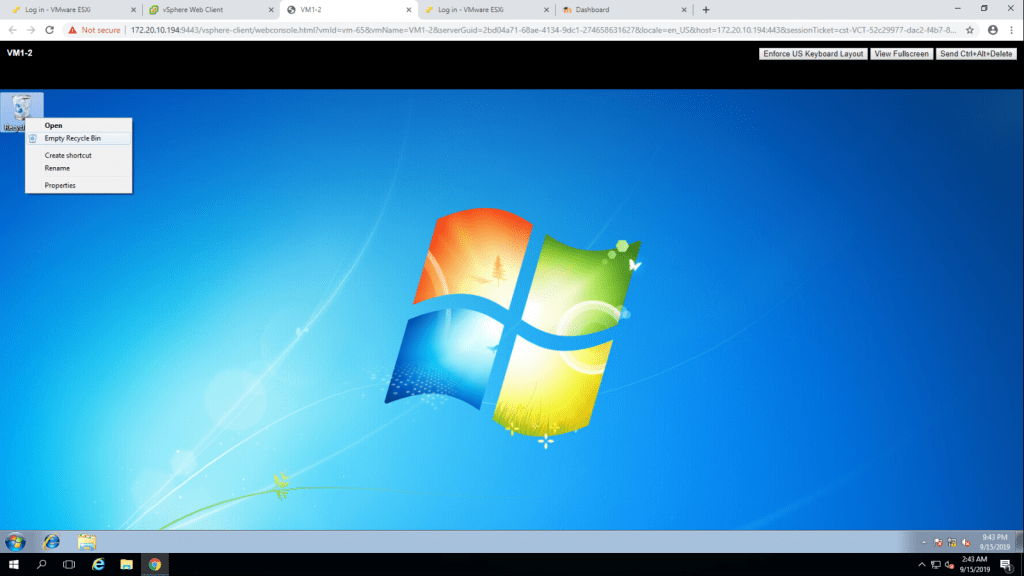
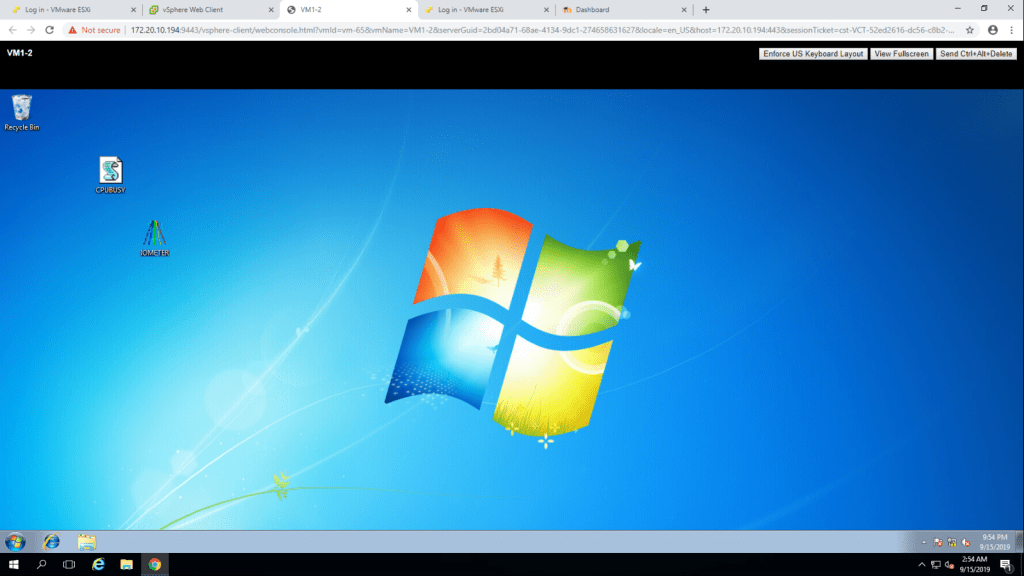
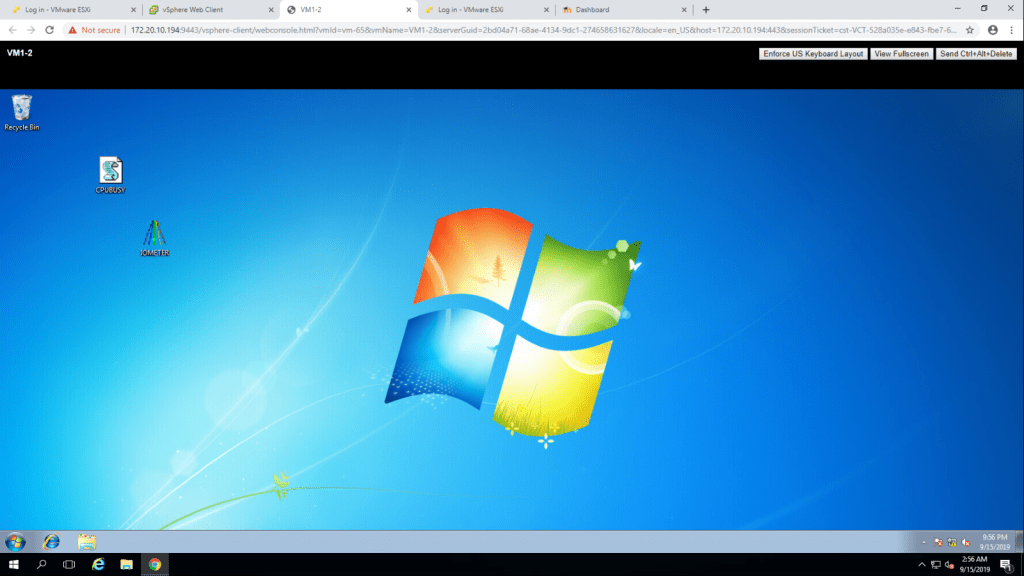
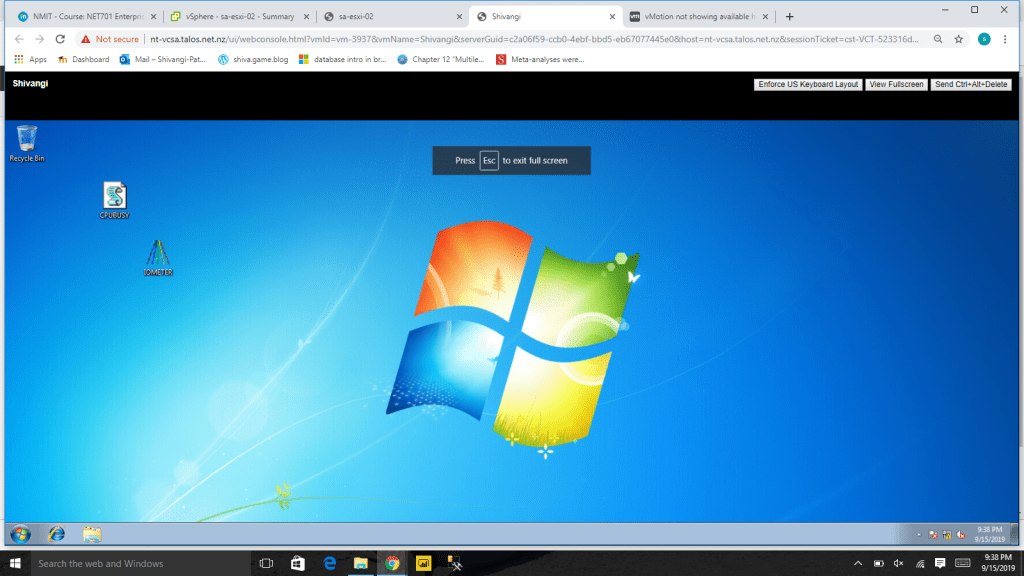
- Launch console of VM1-2 and login as administrator. Move IOMETER file to recycle bin.
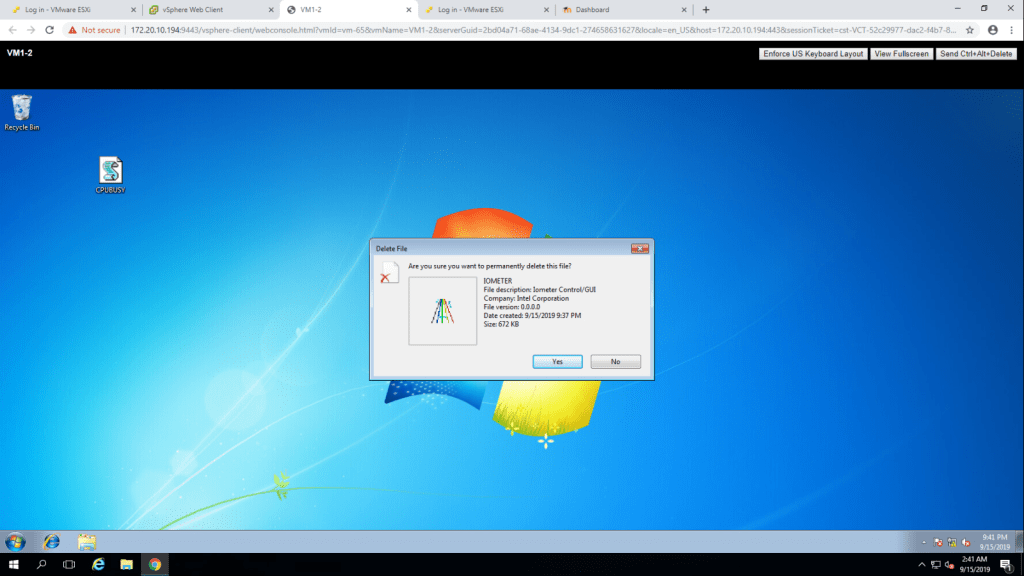
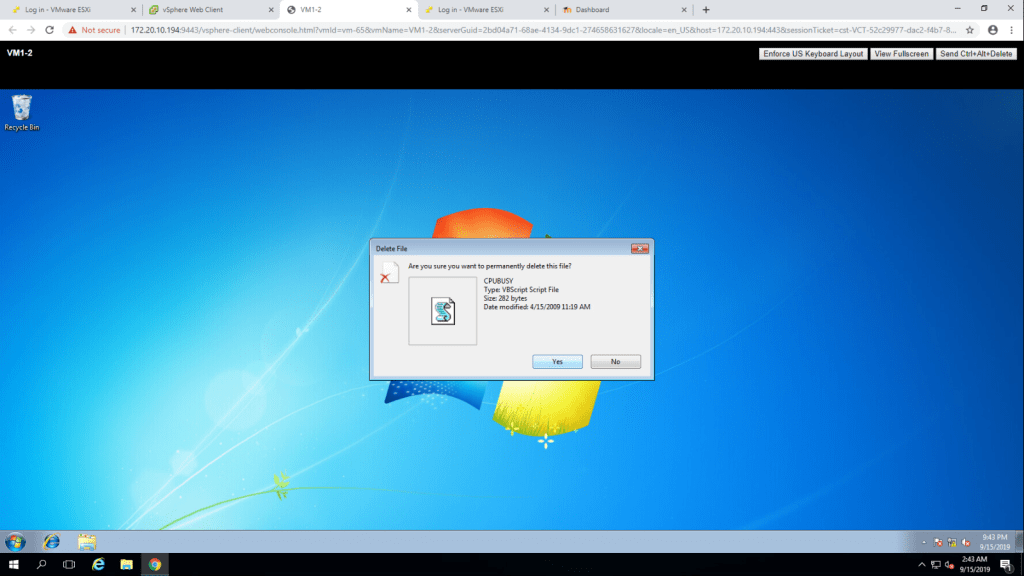
2. Then right click on recycle bin and select ‘Empty Recycle Bin’.
3. Click yes to delete file. This will permanently delete the IOMETER file.
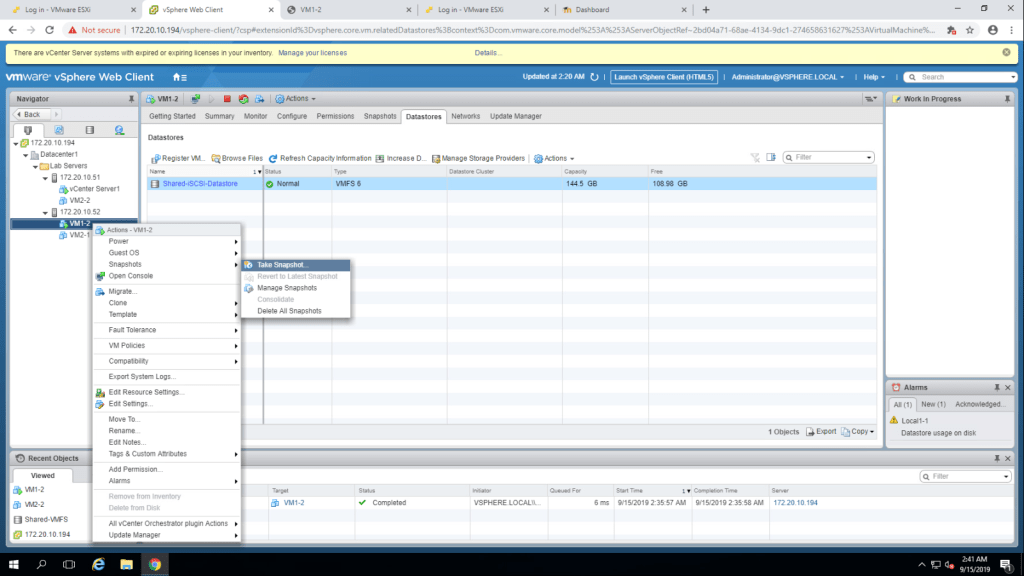
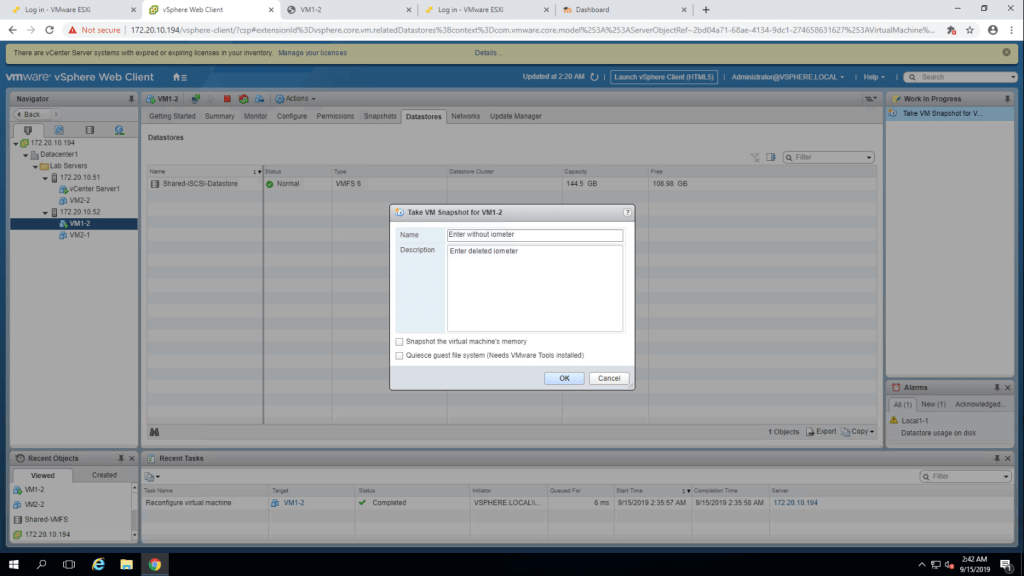
5. To take a snapshot of VM1-2, Right click on VM1-2 -> Snapshots -> Take Snapshot.
6. Now type a name without iometer and in description box, type deleted iometer and then ok.
7. Now move CPUBUSY file to recycle bin from the desktop.

8. Follow the same step as we did to remove iometer file permenantly.
9. confirm the deletion. and then take a snapshot named without cpubusy the same way we created without iometer snapshot.
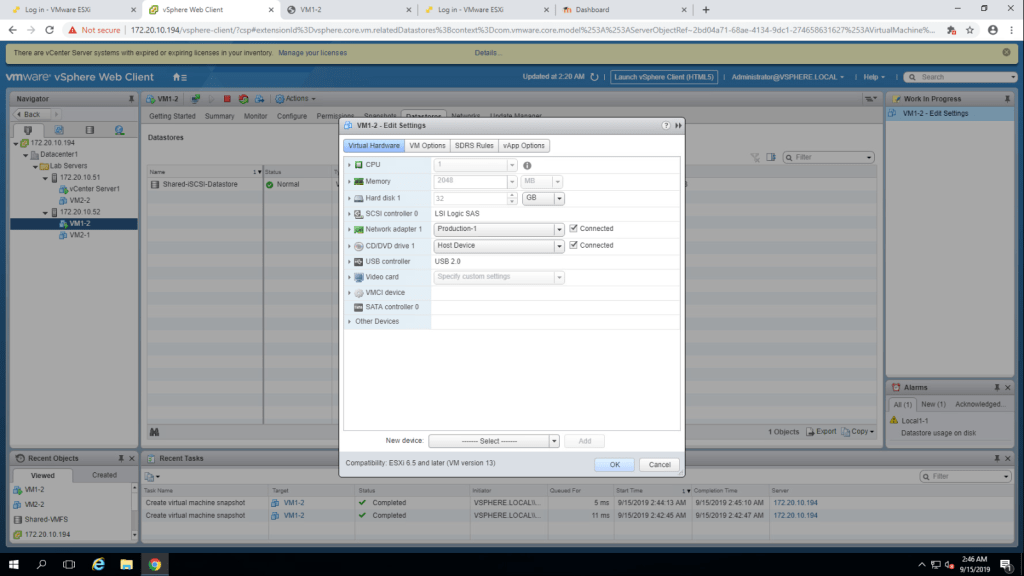
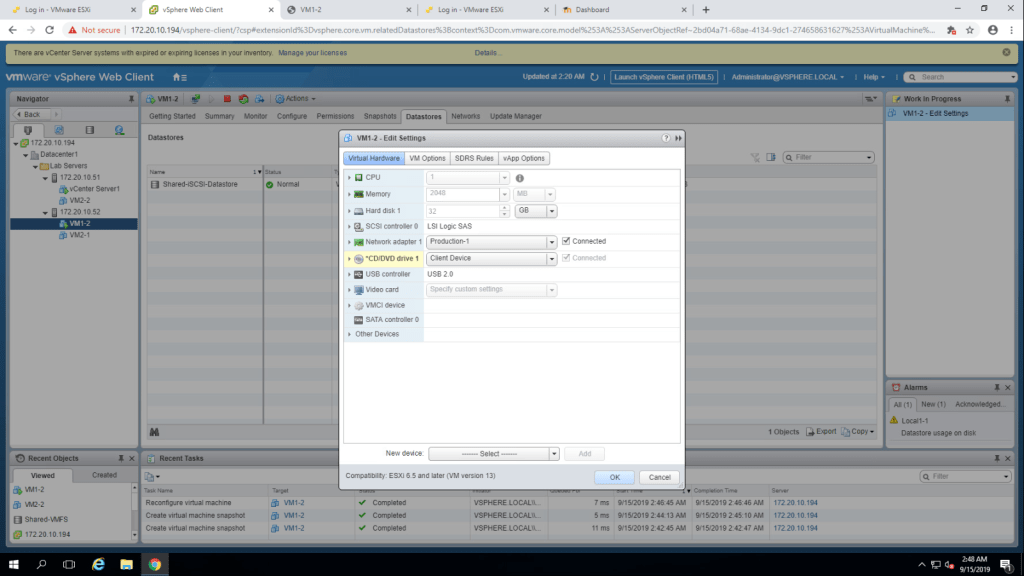
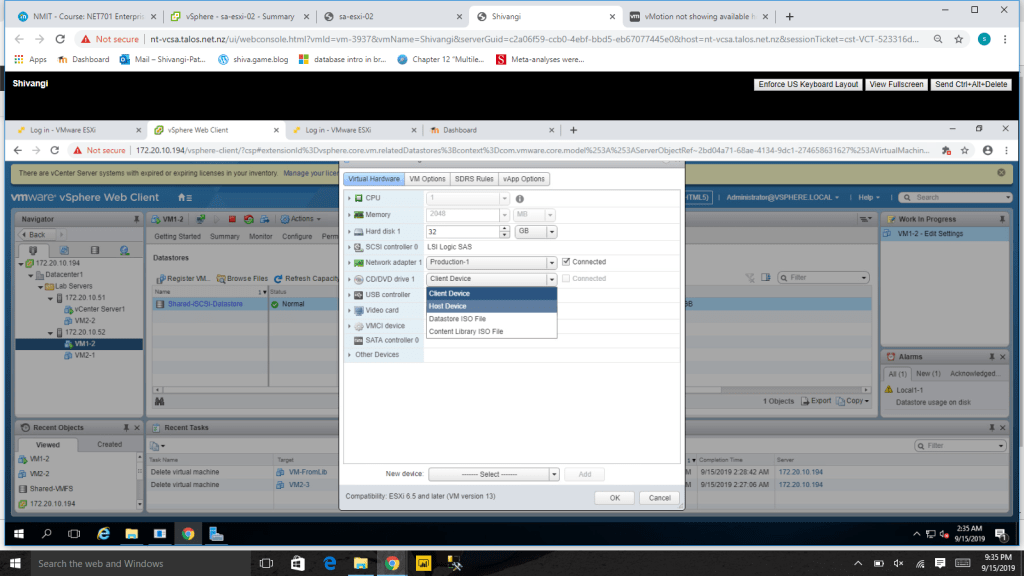
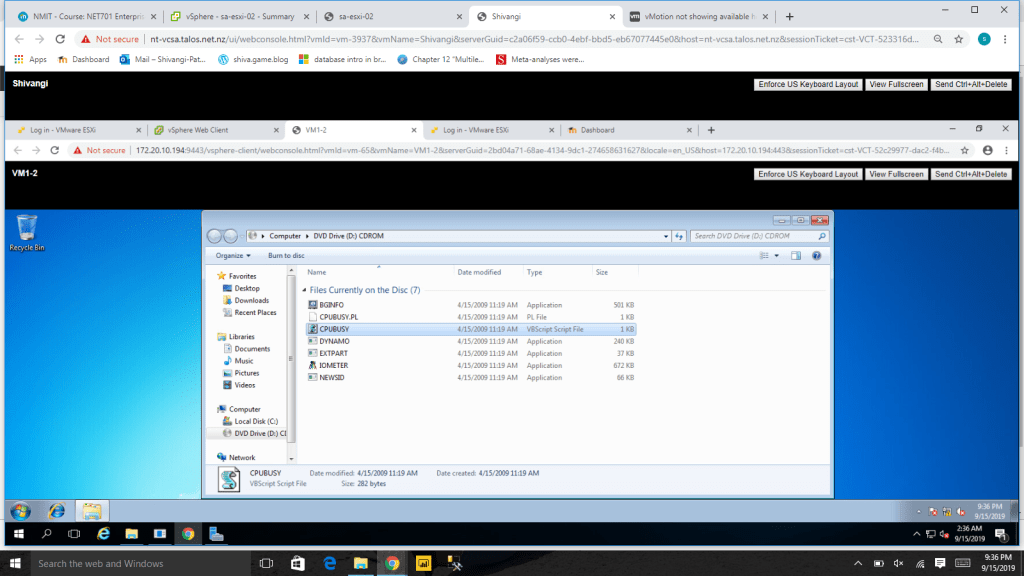
10. now go to VM1-2 virtual machine edit settings. expand cd/dvd drive 1 and select host device(because it is nested configuration) and check on the connected check-box. then ok.
11. Go to VM1-2 web console, and open dvd drive to view files
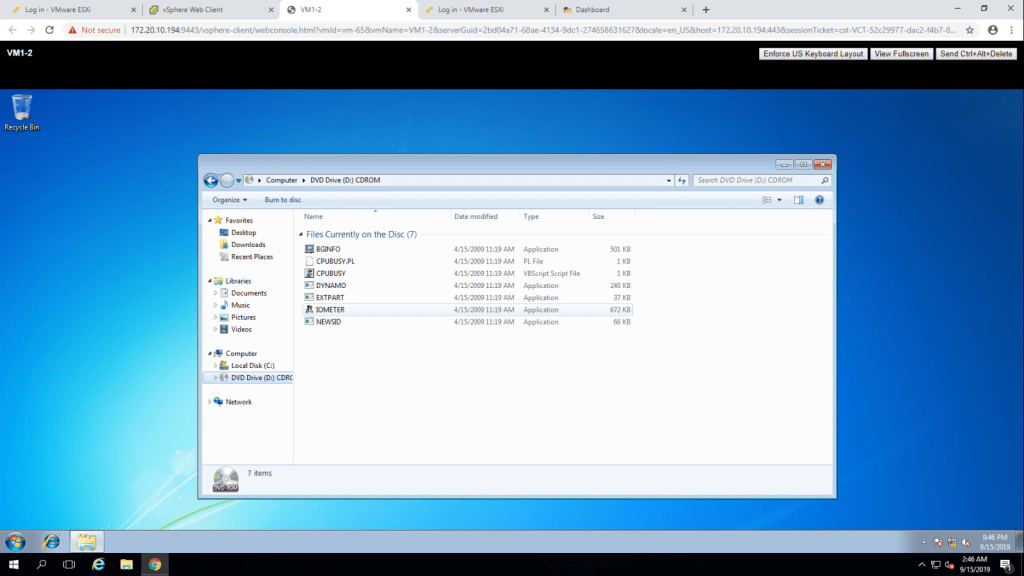
12. Copy CPUBUSY file to desktop

13. Again go to edit settings of VM1-2 and select client device in cd/dvd drive 1 and click ok.
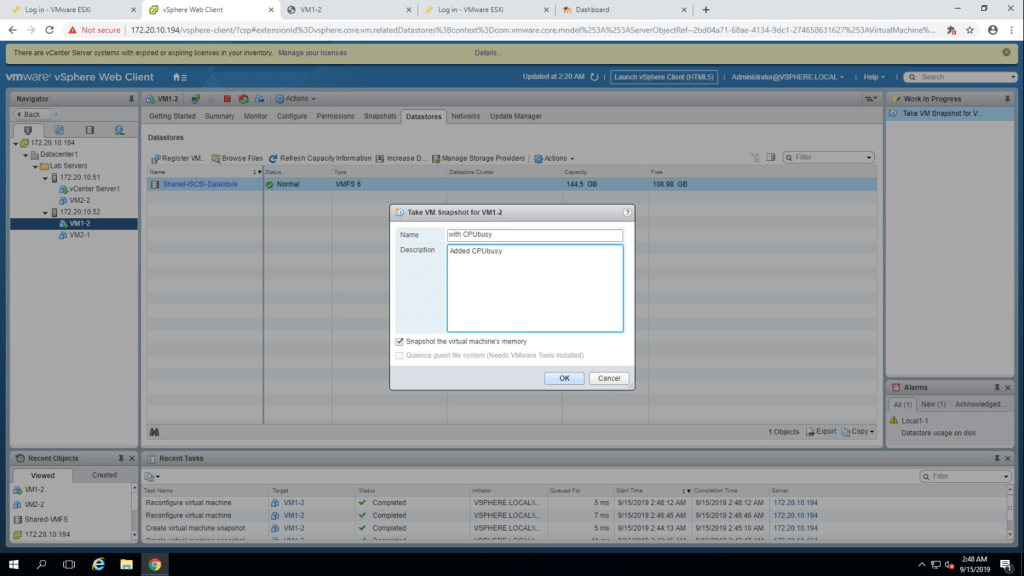
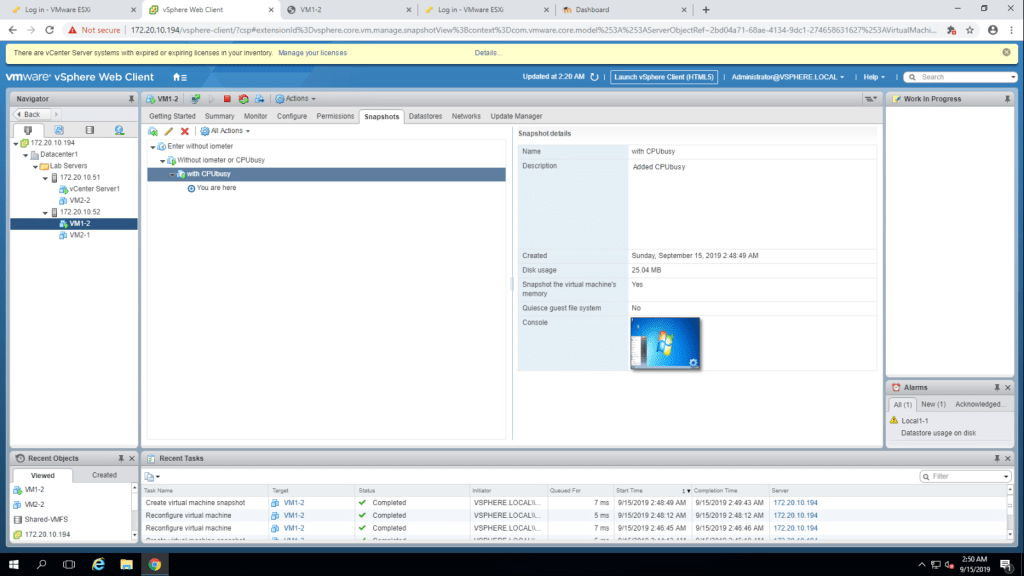
14. Now take snapshot of VM1-2, named with CPUBUSY.
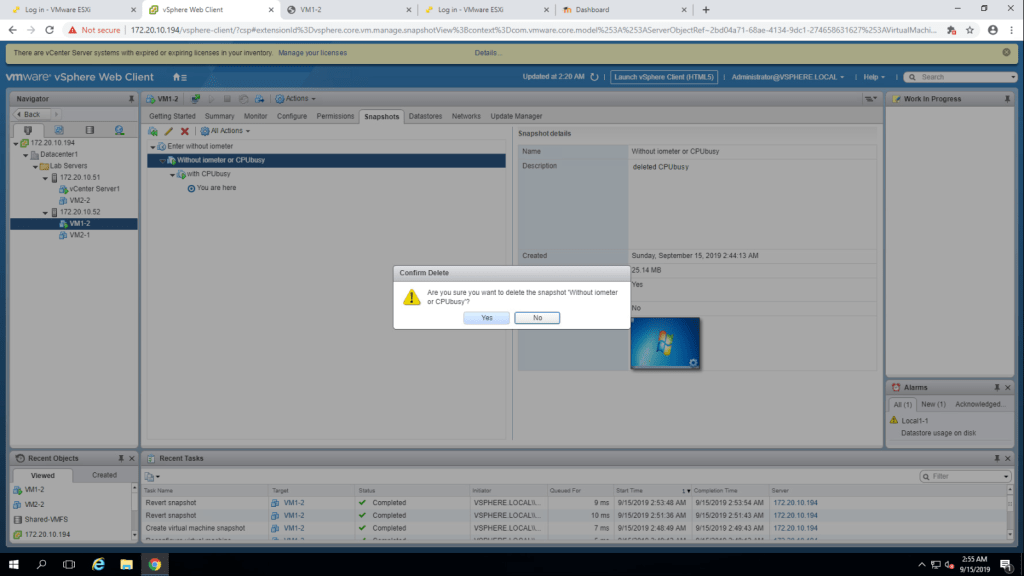
15. right click on VM1-2 and select Snapshots -> Manage Snapshots.
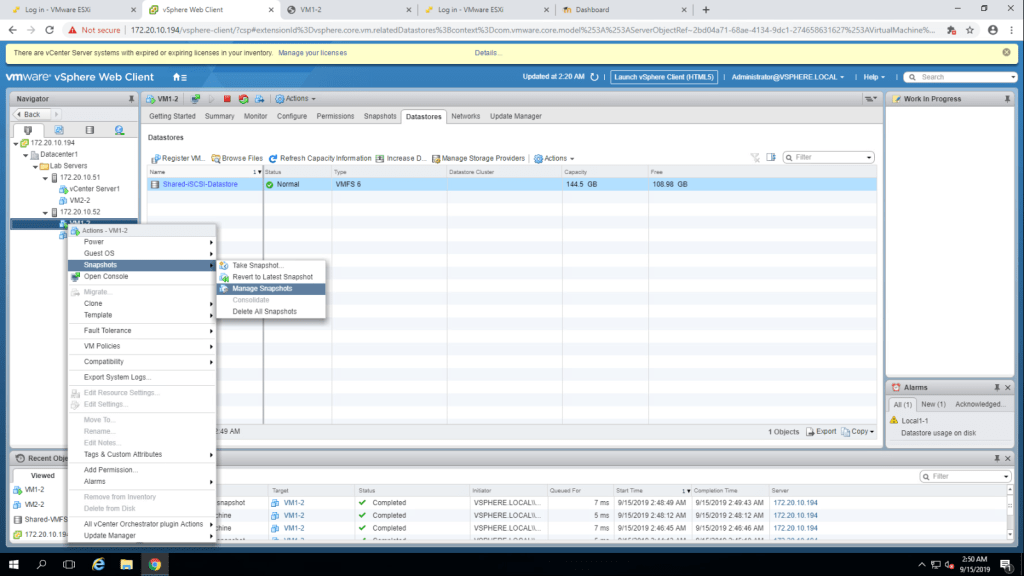
16. It will show three snapshots as shown in the following screenshot.
TASK-5 Revert the Virtual Machine to the snapshot.
- Select ‘without iometer or cpubusy’ snapshot and then go to all actions and select revert to option.
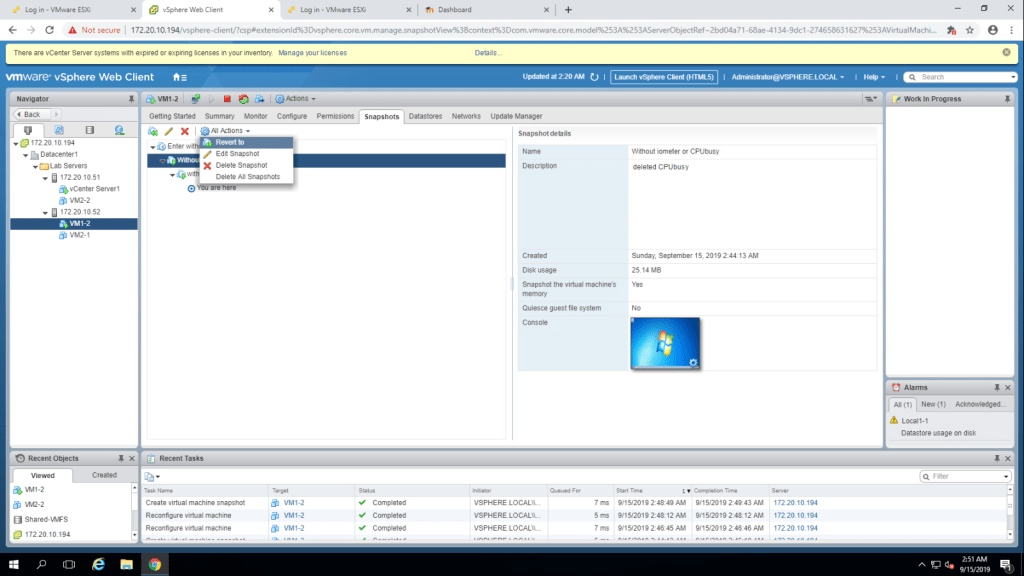
2. to confirm the process, click yes.

Q. Did the virtual machine power off? Why?
3. Go to VM1-2 web console and check whether those files are available on desktop or not.
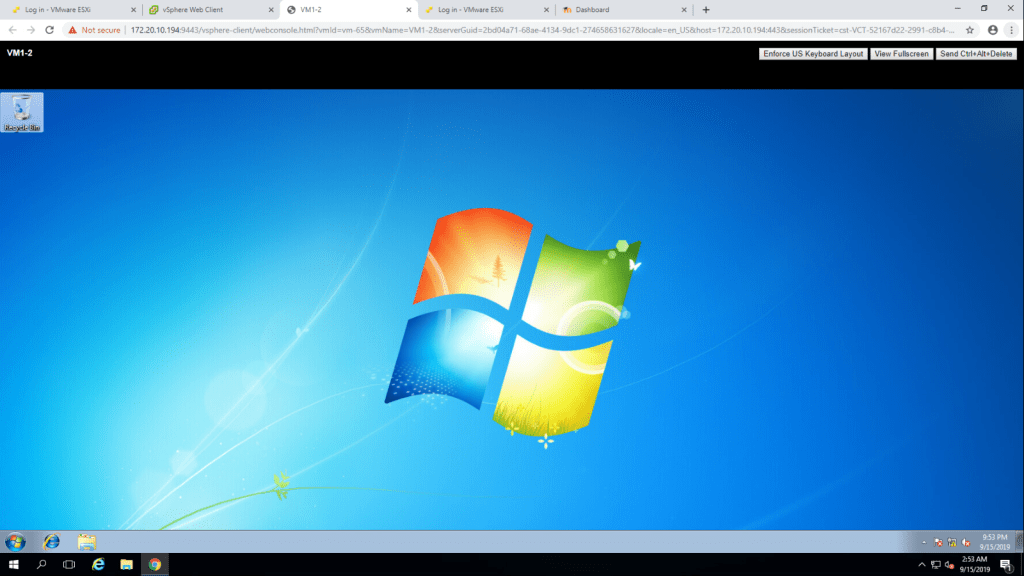
Q. Is either IOMETER or CPUBUSY on desktop? A. No, as we reverted to the snapshot where the file has been permanently deleted.
4. Now revert virtual machine state to ‘with cpubusy’
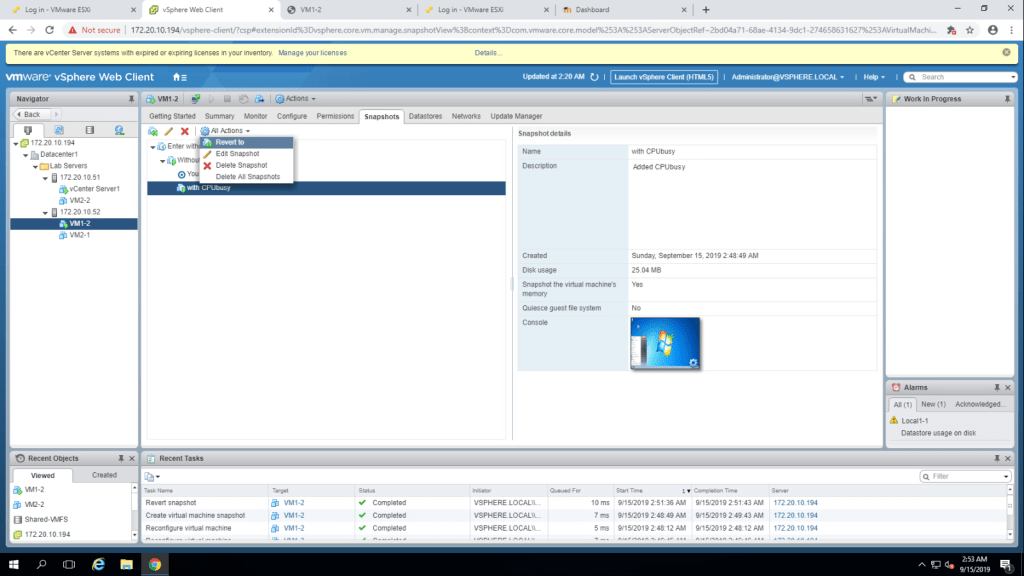
5. Click yes to confirm.

6. Now you can see both CPUBUSY and IOMETER file on the desktop.
Q. Is CPUBUSY on the desktop? A. Yes Q. Is IOMETER on the desktop? A. Yes
TASK-6 Delete an individual snapshot.
- In the snapshot tab of VM1-2 , select without iometer or cpubusy and click on the delete button.

2. Give confimation to delete the snapshot.
Q. Did the Virtual Machine Power Off? Q. Is the Virtual Machine Console, is the CPUBUSY file on the desktop?
TASK-7 Delete all Snapshots.
- Right click on VM1-2, Select Snapshots -> Delete All Snapshots.
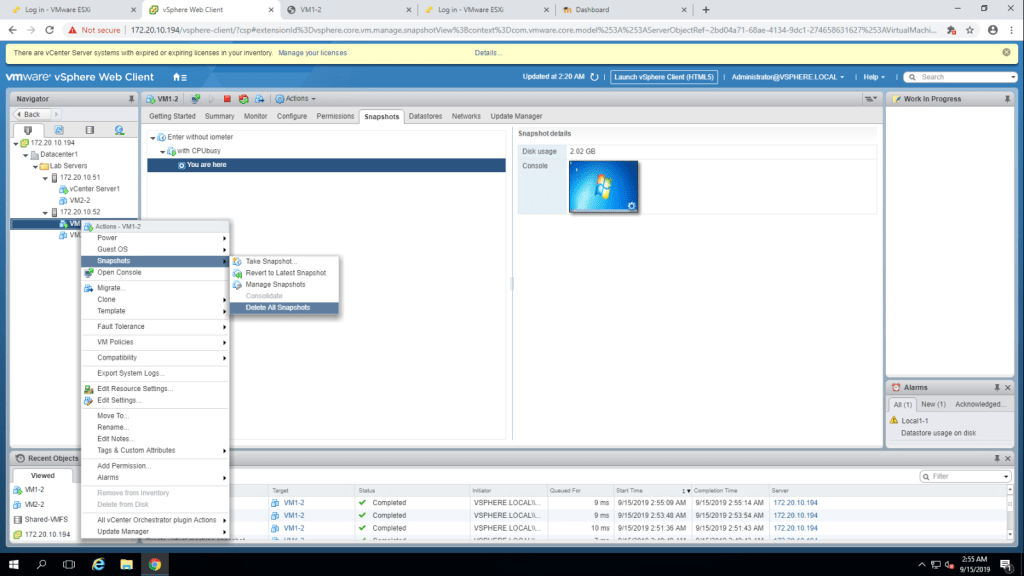
2. Click Yes to delete all the snapshots.
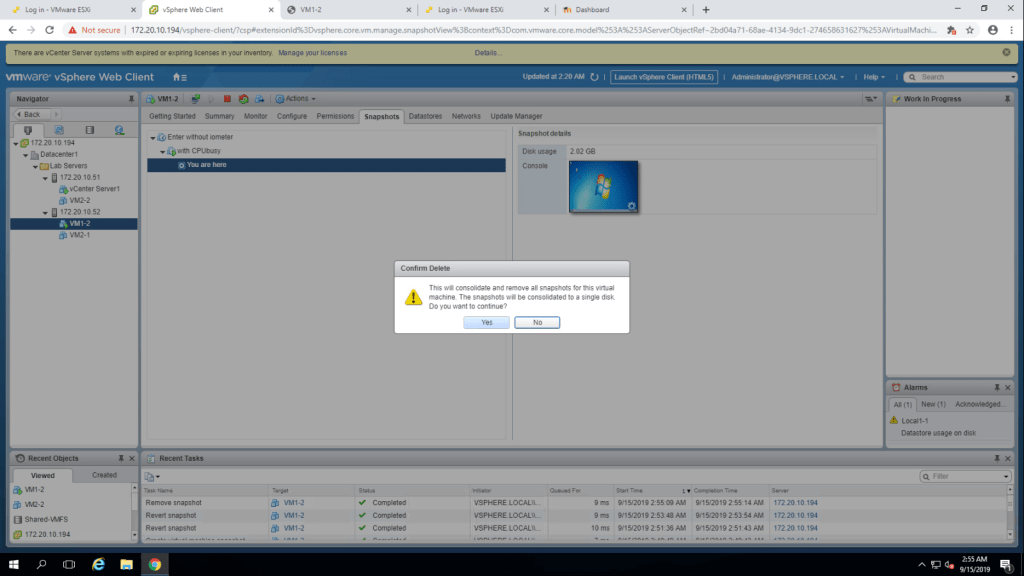
Q. Were all the snapshots deleted? A. Yes Yes, There is a file on desktop.
Now return to VM1-2 web console
Lab-13 Migrating Virtual Machines
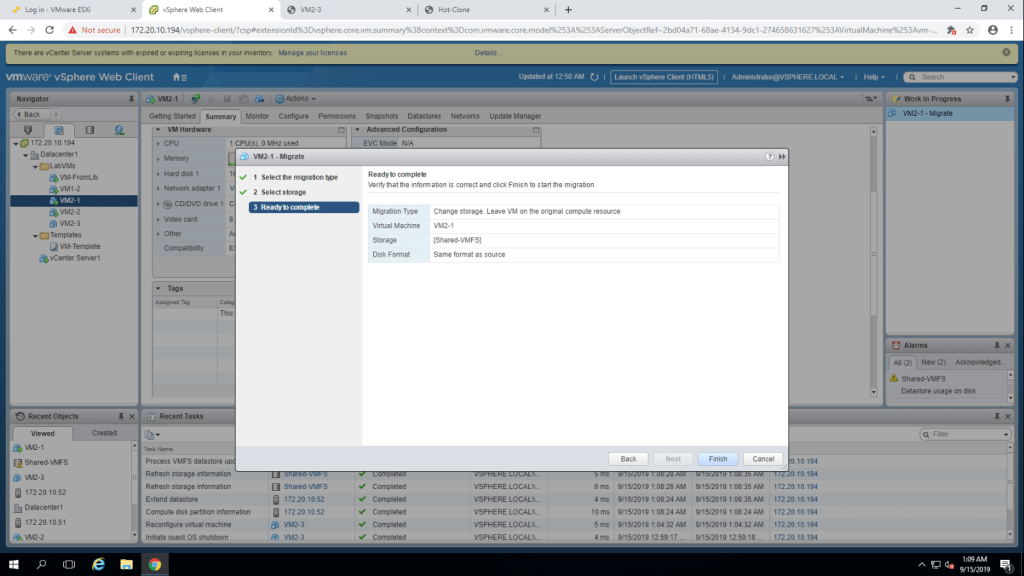
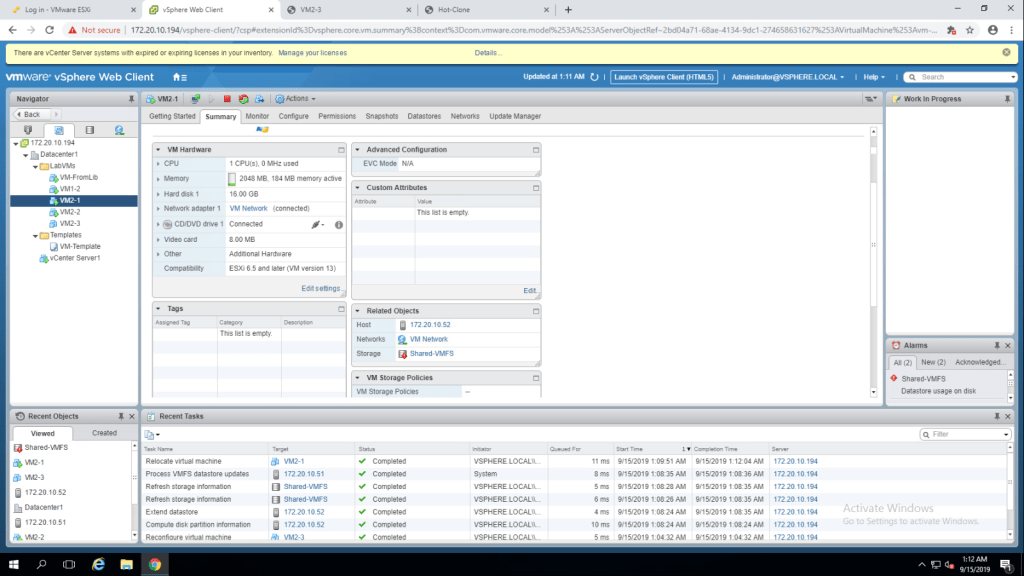
TASK-1 Migrate Virtual Machine Files from the local storage to the local storage to the shared storage.
- Go to VM and Templates , select VM2-1 and record the name of storage. In My case, its Local2-1. Then right click on VM2-1, select Migrate option.
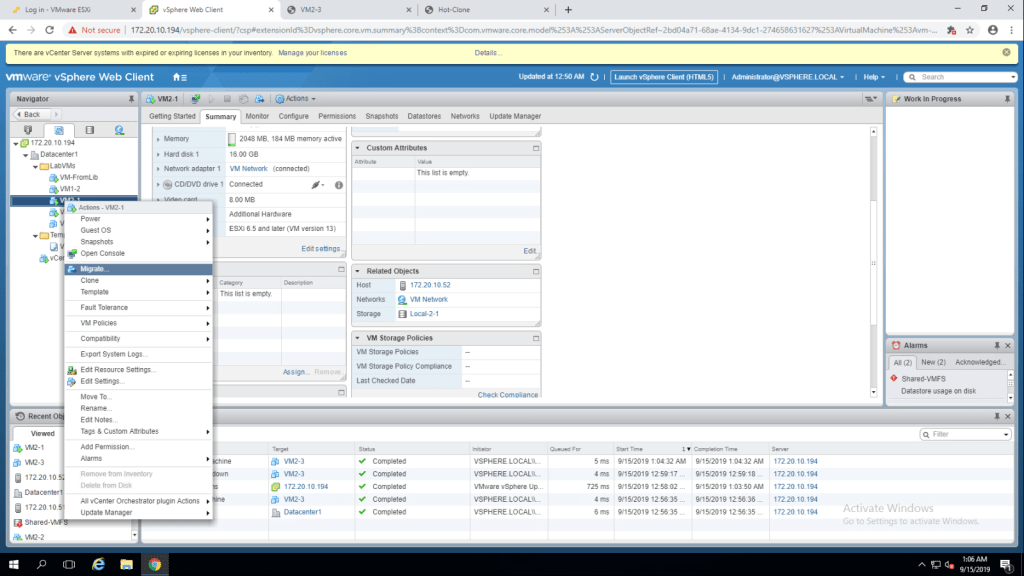
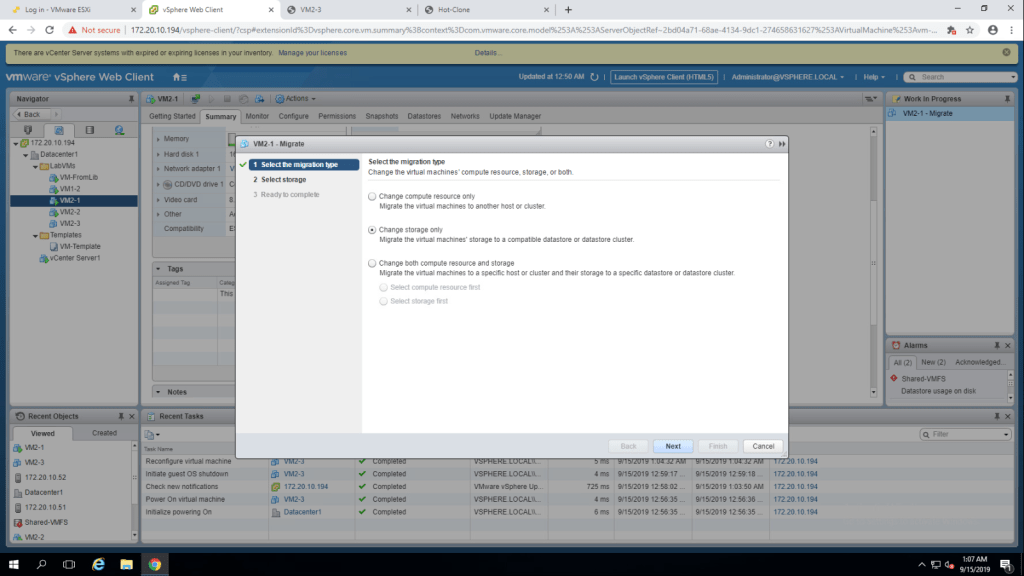
2. Select Change storage only option and click next.
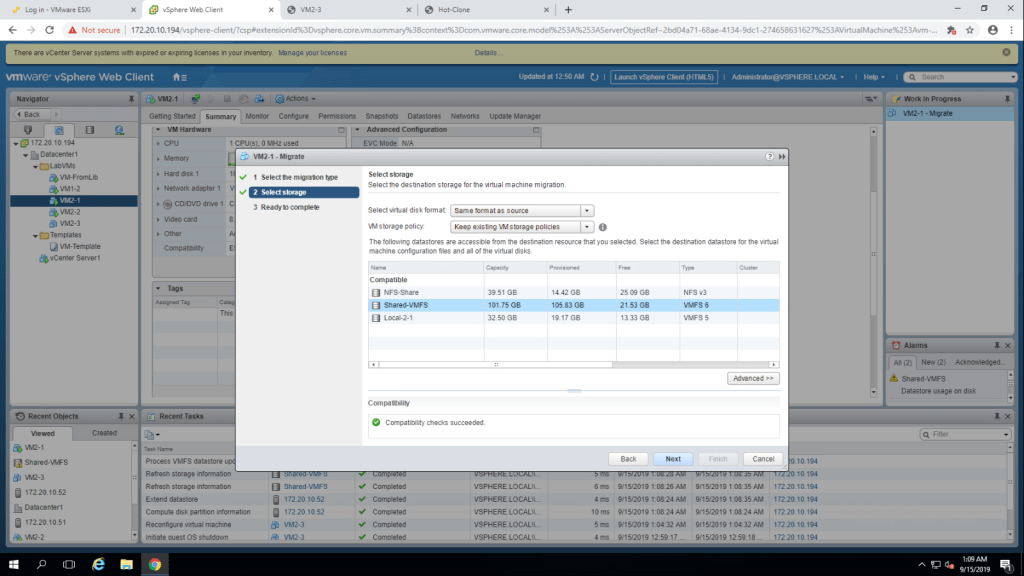
3. select Shared-iSCSCi Datastore as destination storage, I have selected SharedVMFS. then click next.
4. click finish.
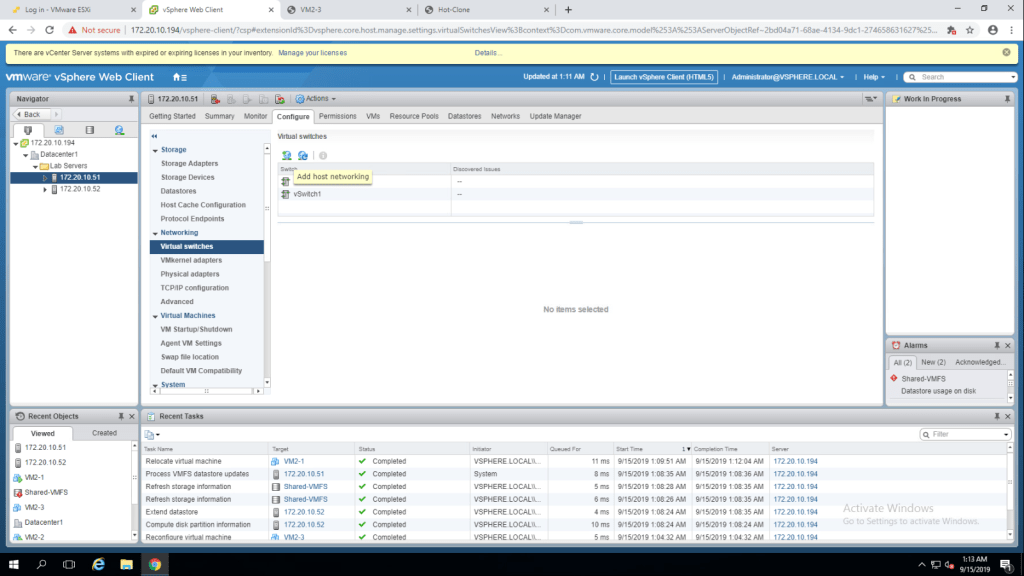
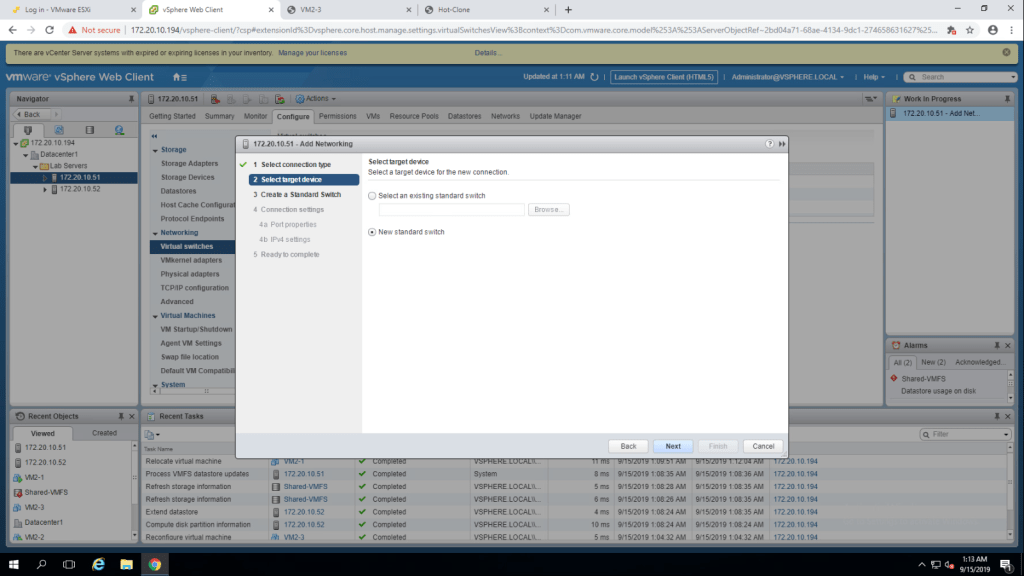
TASK-2 Create a Virtual Switch and VMkernel Port Group for vSphere vMotion MIgration.
- Go to hosts and clusters, select 172.20.10.51 and then click on configure tab, select Virtual switches.
2. Click on Add Host Networking. select VMkernel Network Adapter and click next.
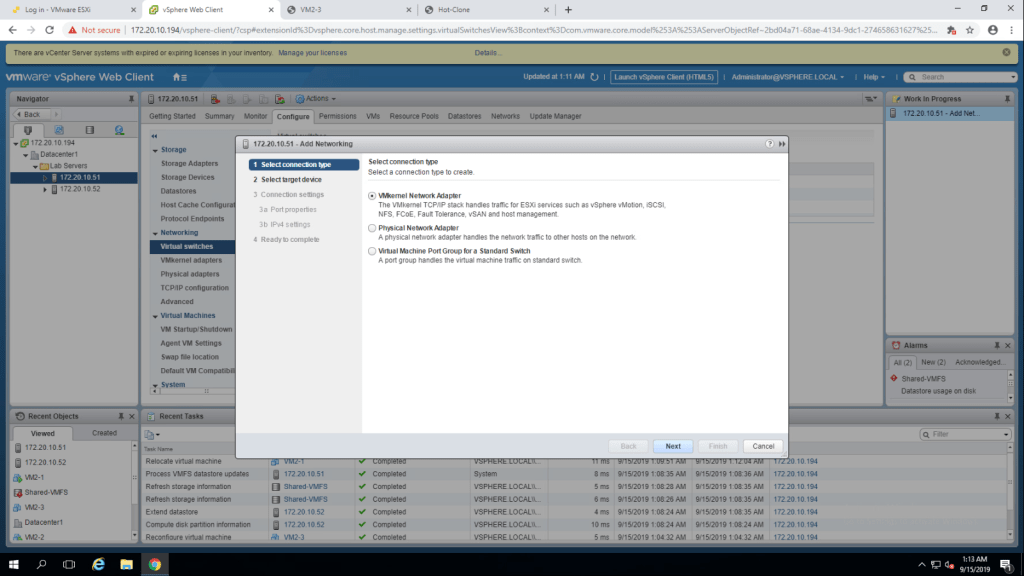
2. select New Standard Switch.
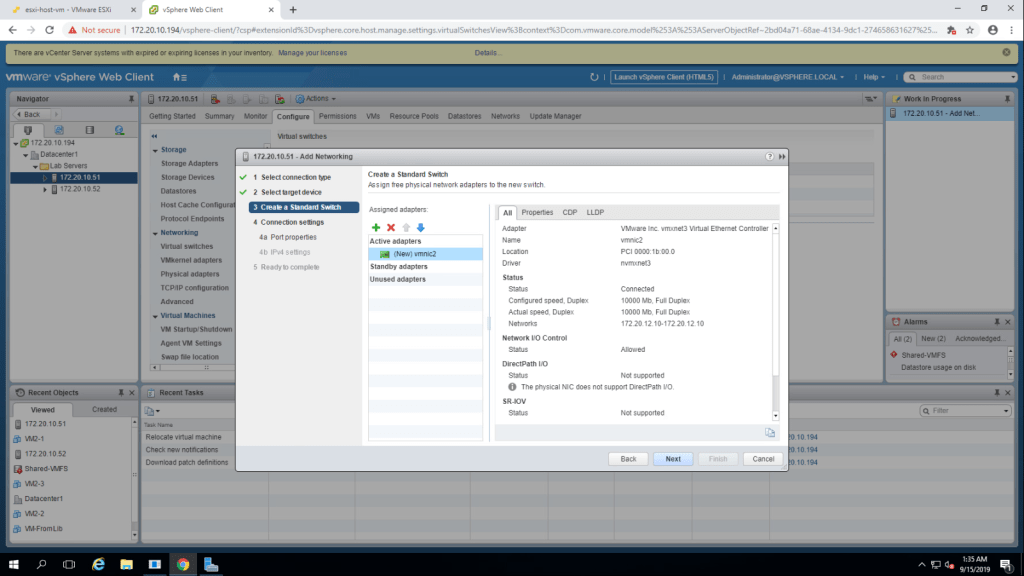
3. Select vmnic2 for the vSphere Motion Network and click ok.

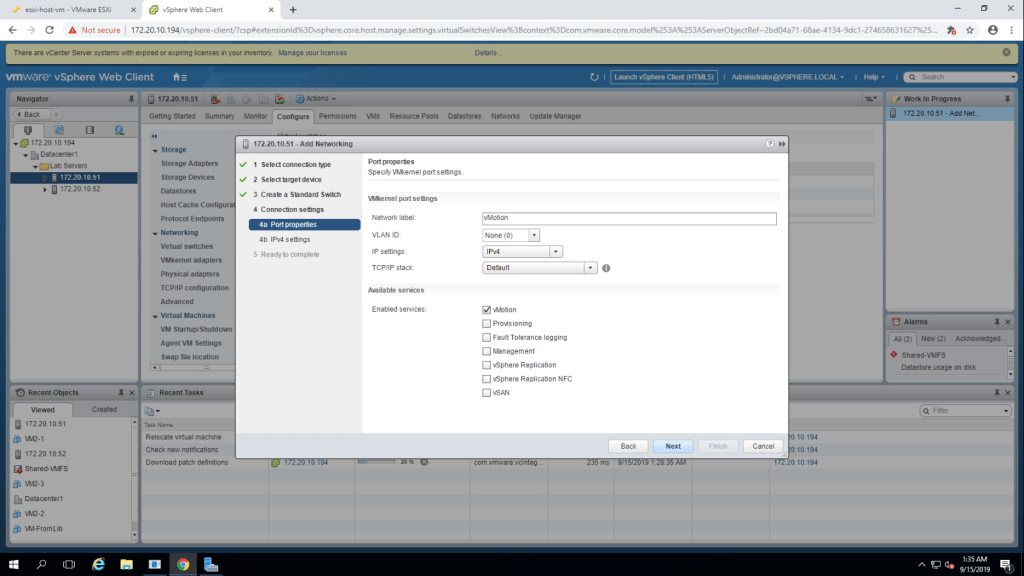
4. Summarize the information and click next.
5. Type vMotion as Network Lable and select the vmotion checkbox then click next.
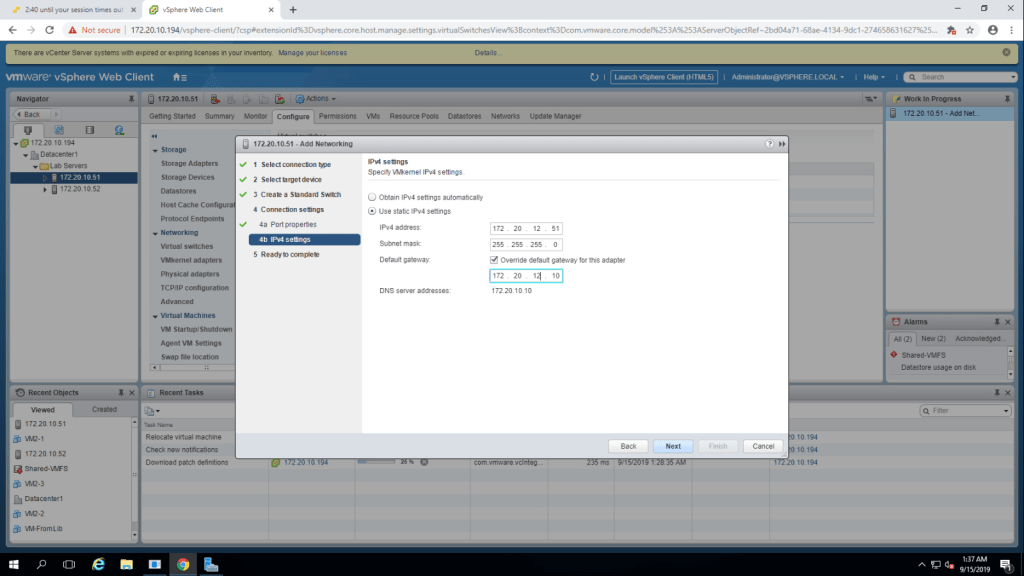
6. Set IPv4 address:: IPv4 – 172.20.12.11 , Subnet Mask – 255.255.255.0 , Default Gateway – 172.20.12.10 , DNS server – 172.20.10.10
7. Check the information and click finish.

8. You can see the new vMotion Switch has been added.
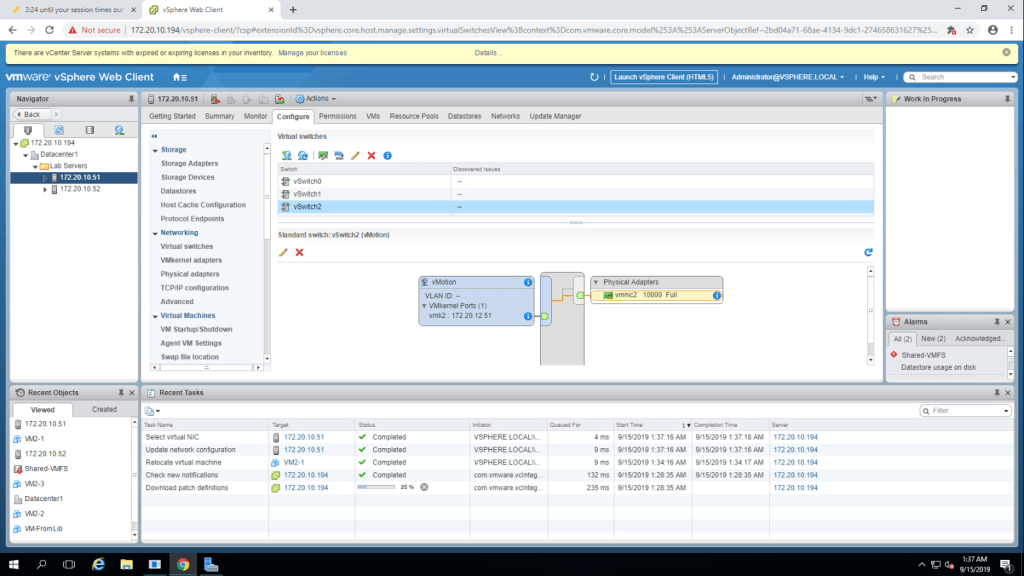
Note: Repeat the task for sa-esxi-02(172.20.10.52). Givve IP – 172.20.12.52
TASK-3 Perform a vSphere Motion Miration of a Virtual Machine on a shared datastore.
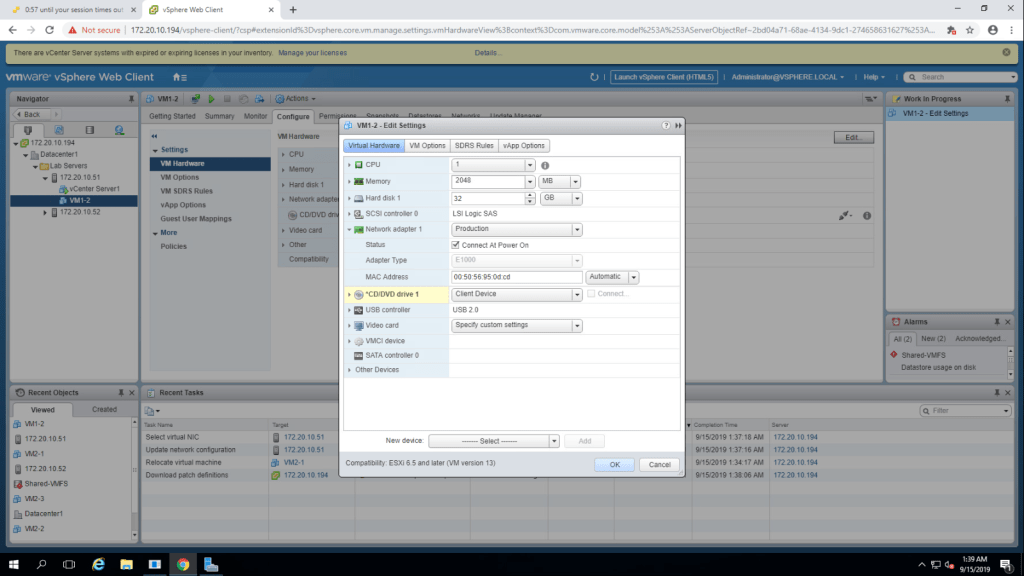
- Right click on VM1-2 and go to edit settings
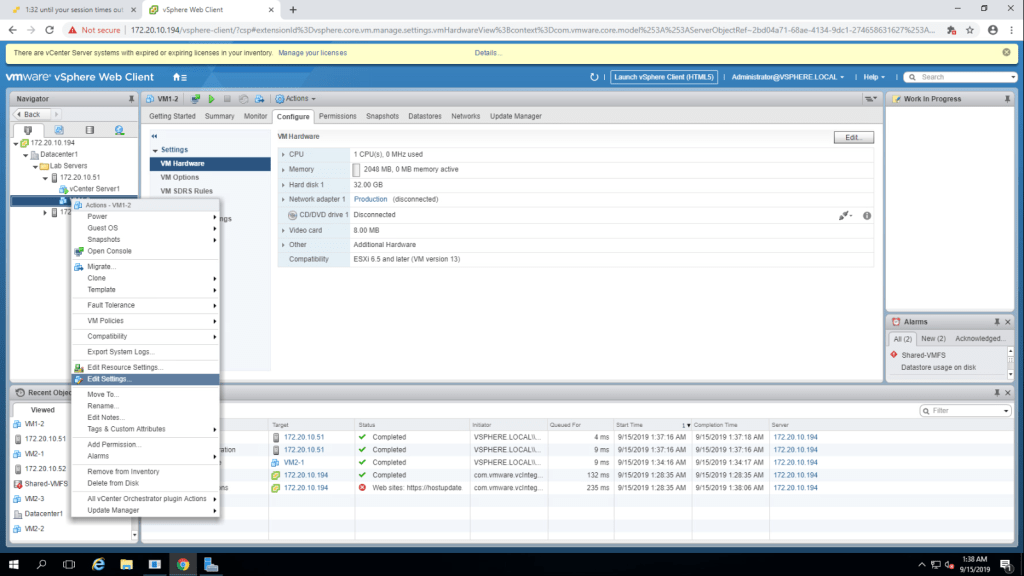
2. Select Client Device from the drop down menu of CD/DVD drive 1.
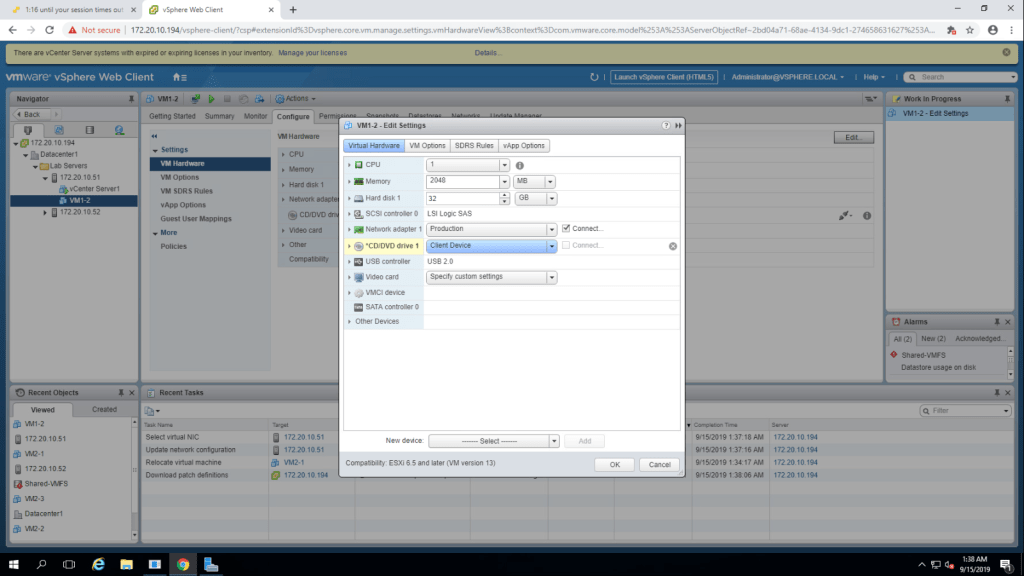
3. Make sure that network adapter is set on production and connect at power on check box is selected. click ok.
Note : We have to do the same steps for all other virtual machines as well.
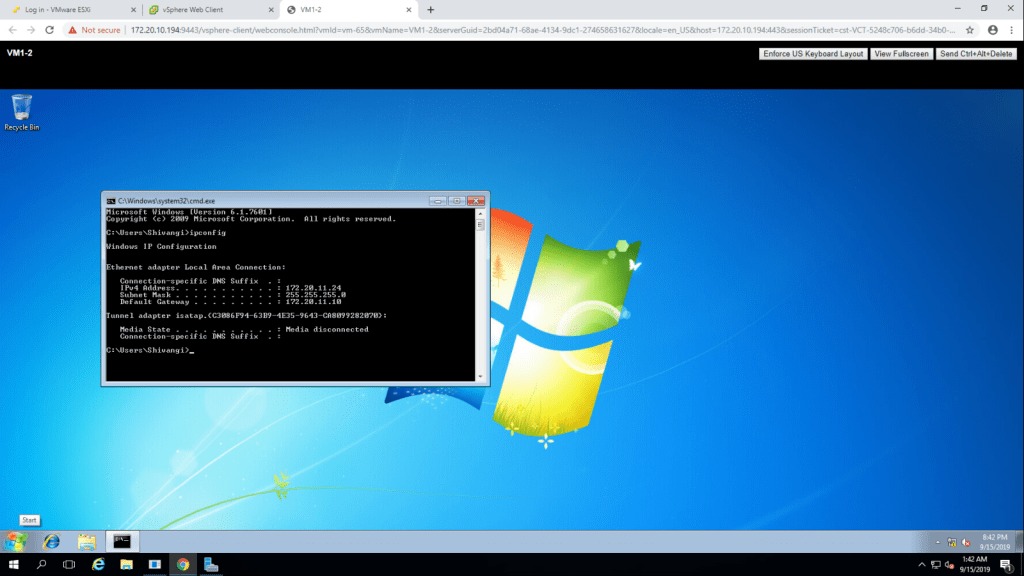
5. Powe on the Virtual Machine and launch web console.
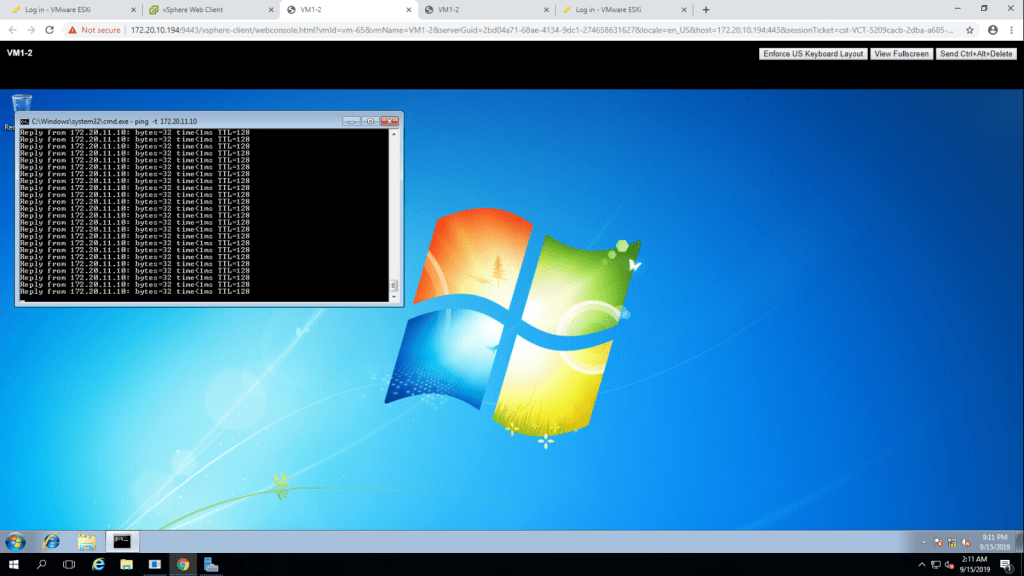
6. Open cmd and run a command ipconfig. Default Gateway IP address : 172.20.11.10
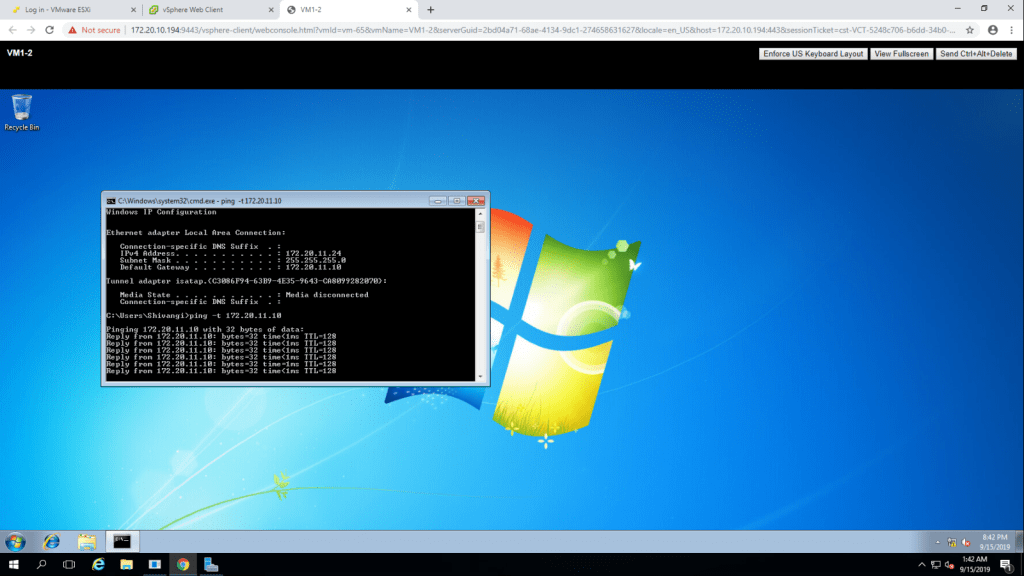
7. Now type a command ping -t 172.20.11.10 and leave it like this.
8. Now start the VM1-2 migration process by selecting migrate option.

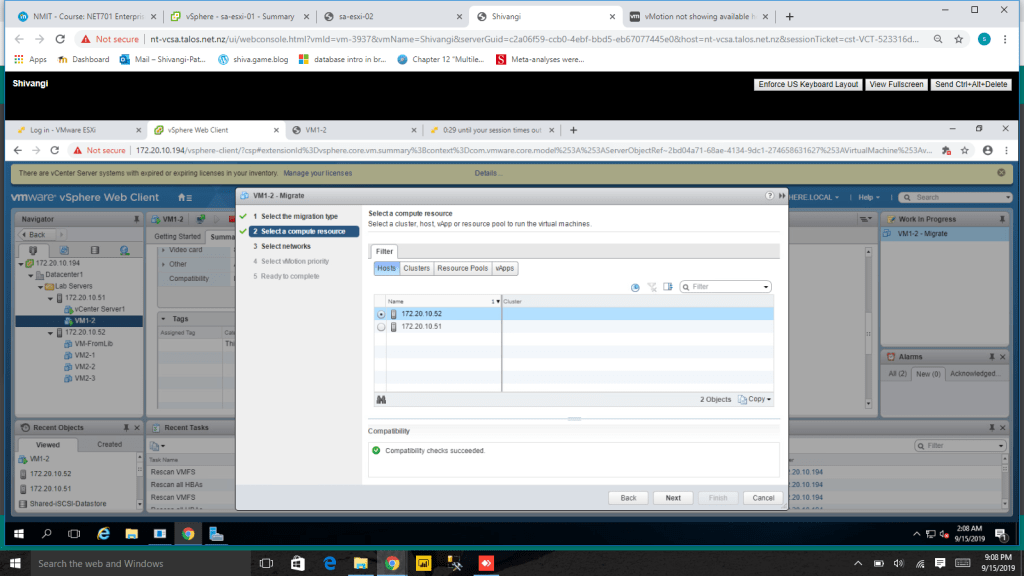
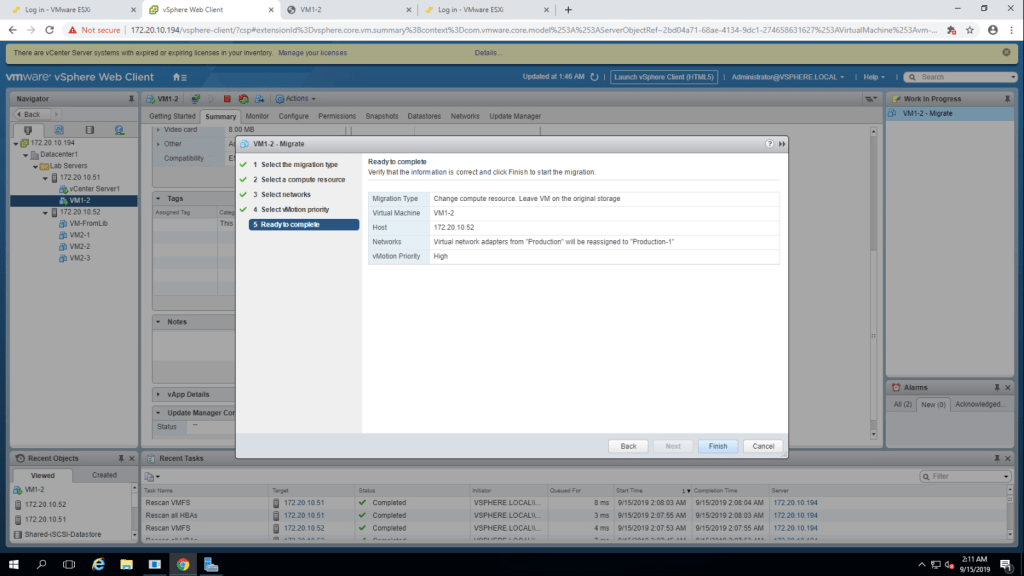
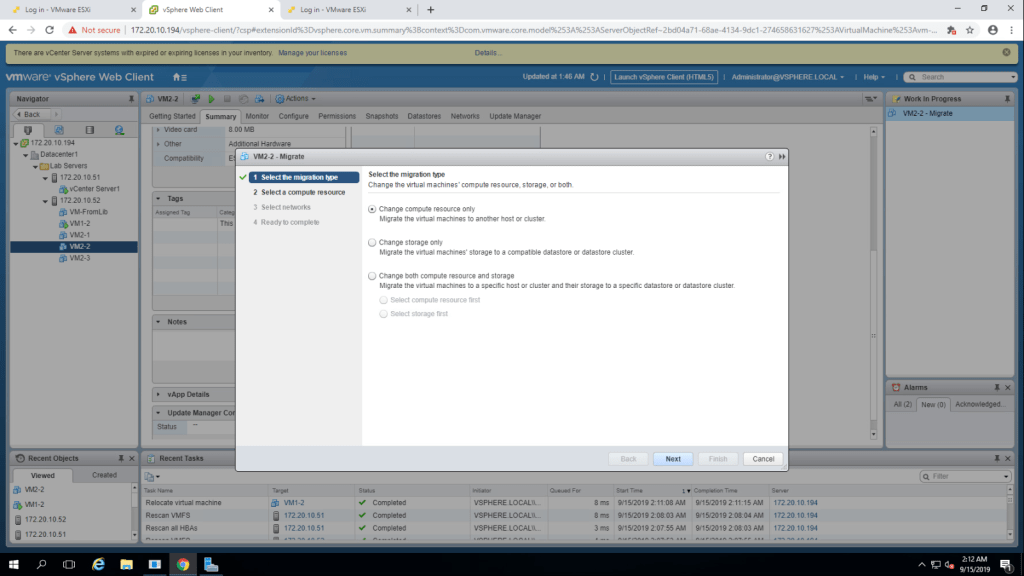
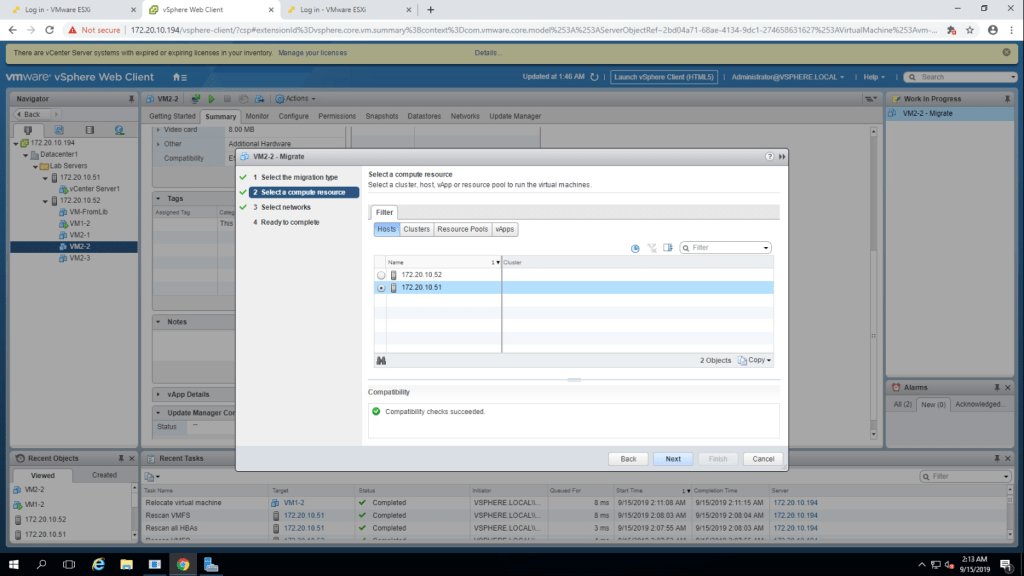
9. Select ‘Change Computer Resource Only’ in Migration type. click next.
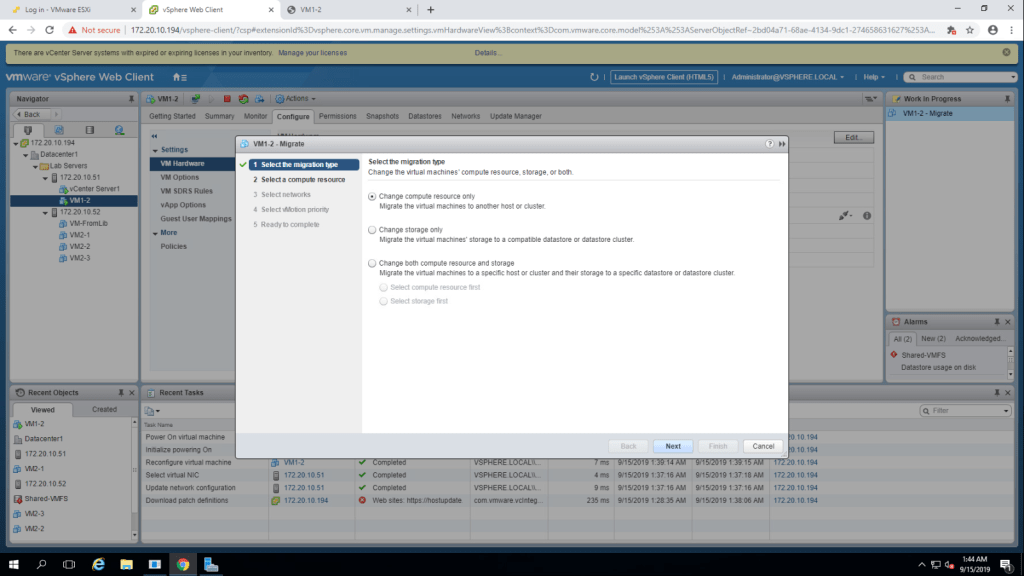
10. select second esxi host(172.20.10.52) in resource page and click next.
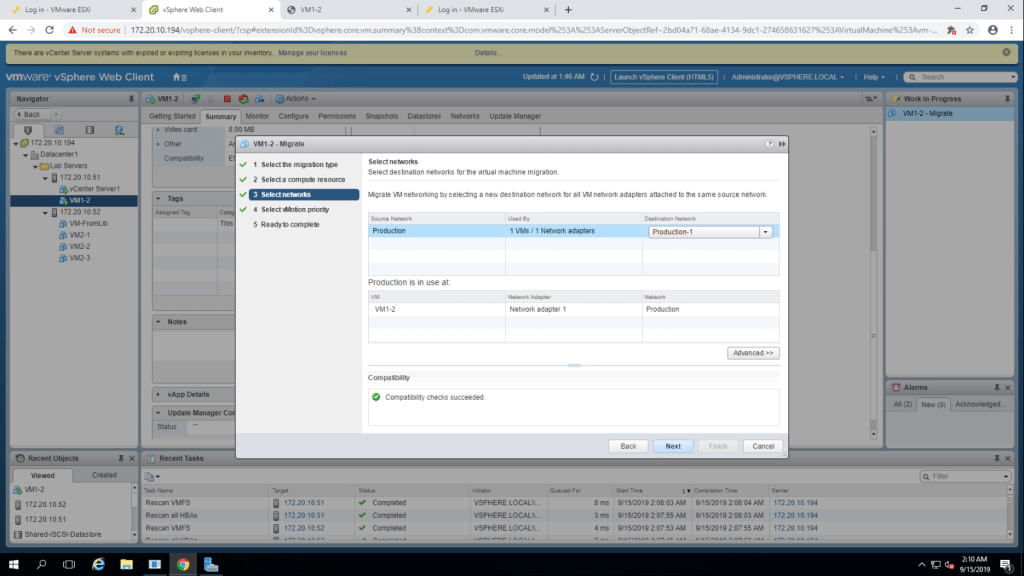
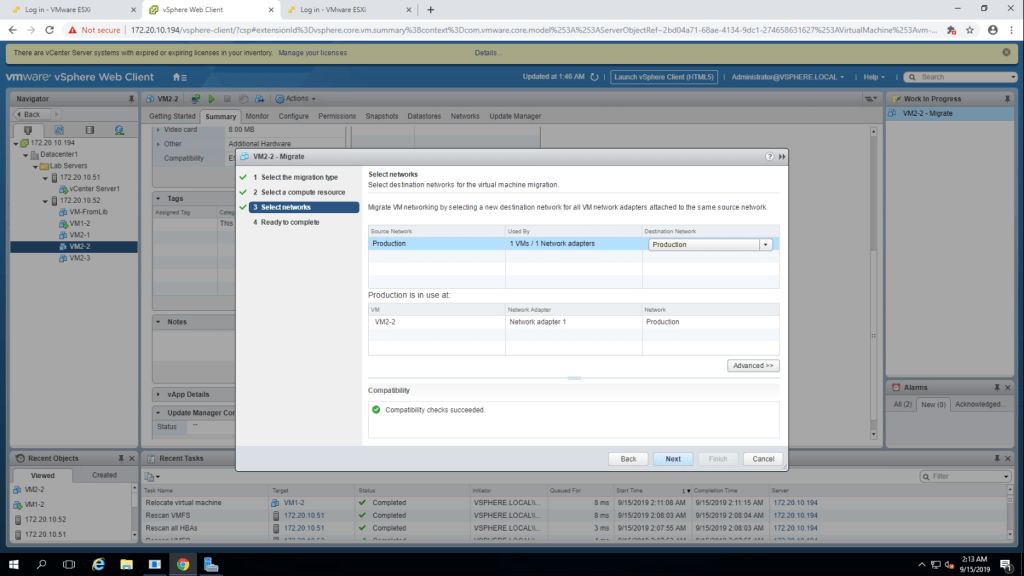
11. Select Production from destination netwrok drop down menu.then next.
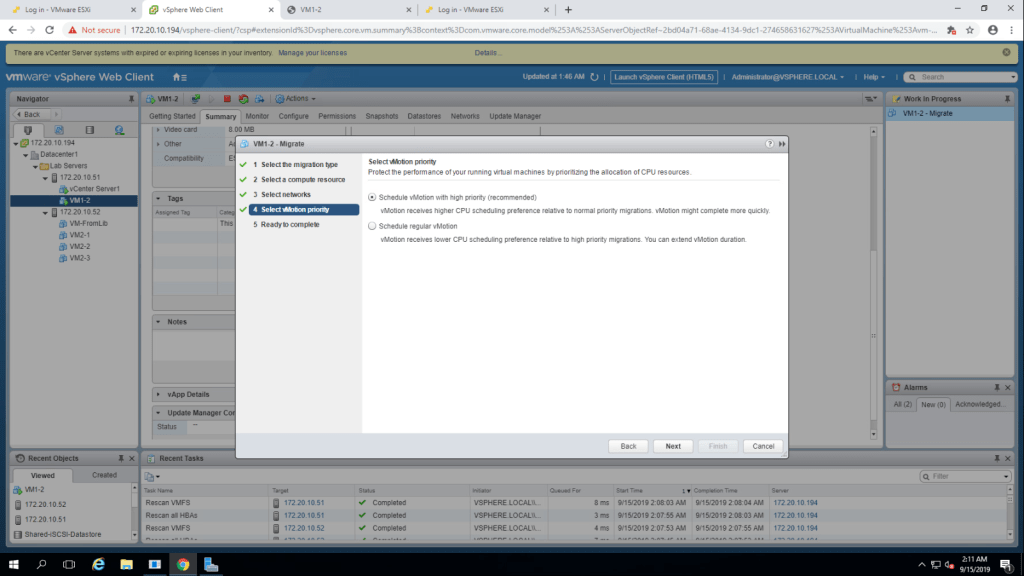
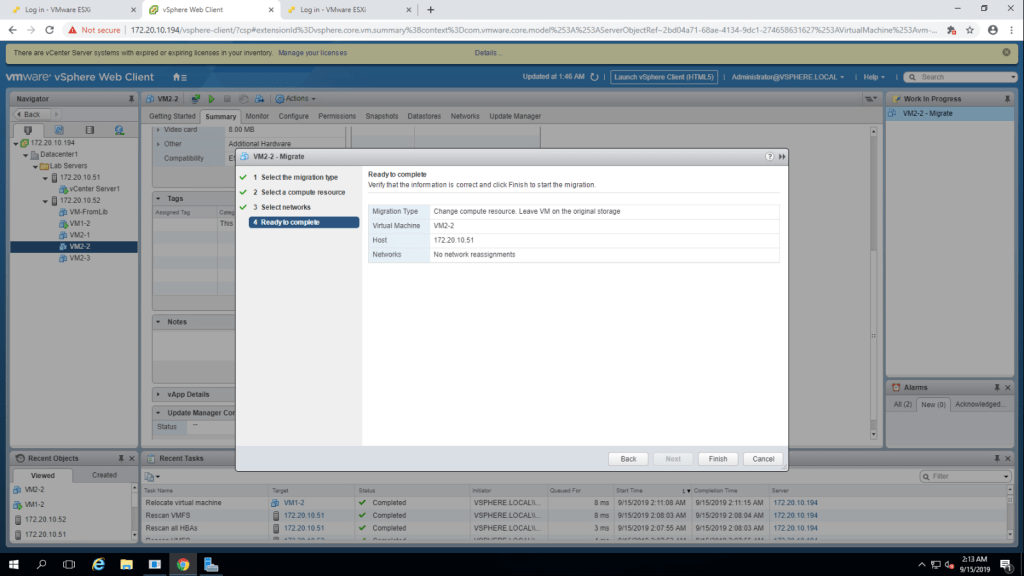
12. In the vMotion priority page, select the recommended settings and click next.
13. Summarize the information and click finish.
13. Check that pings are not dropped. Press CTRL+C to stop pinging.
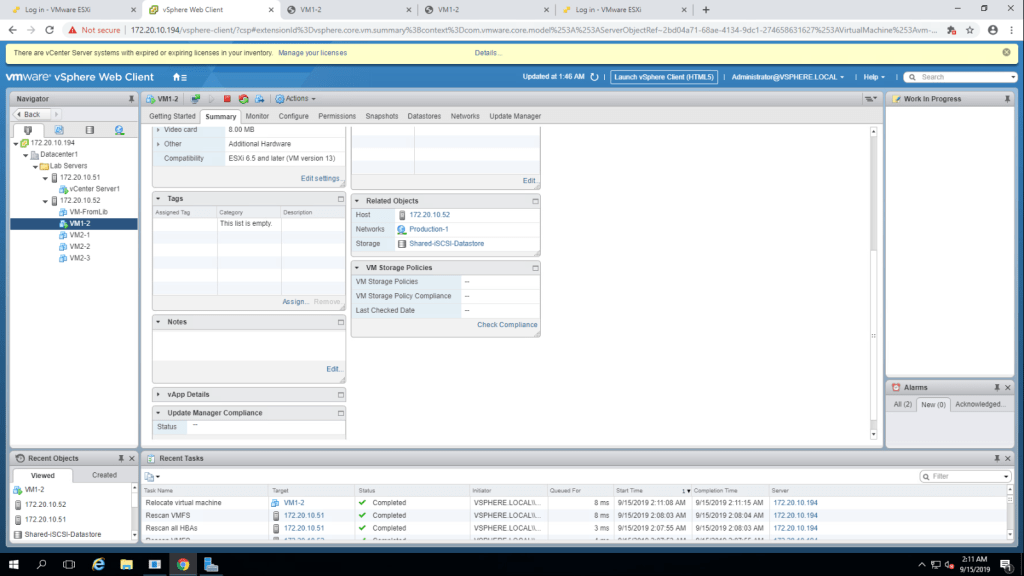
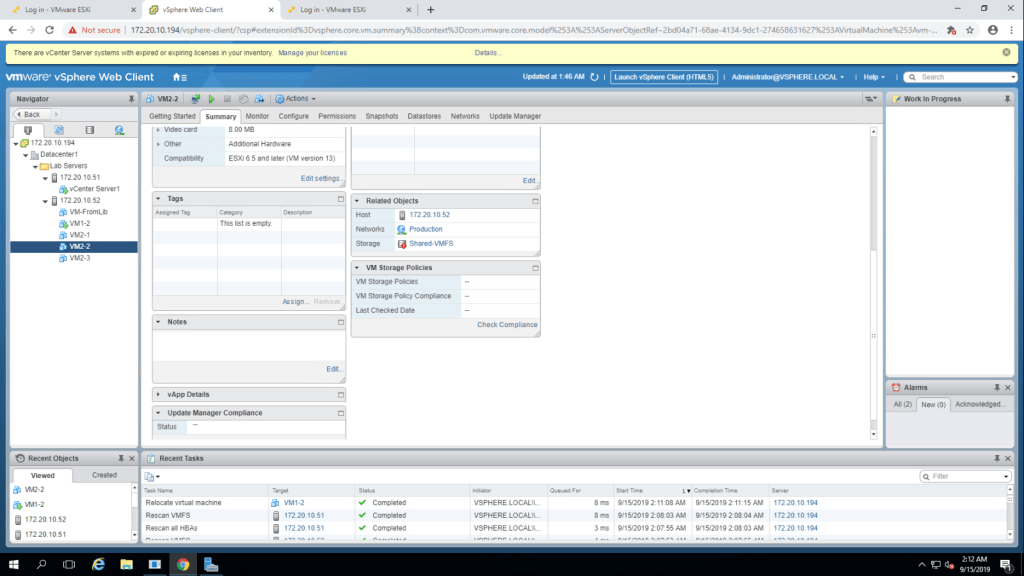
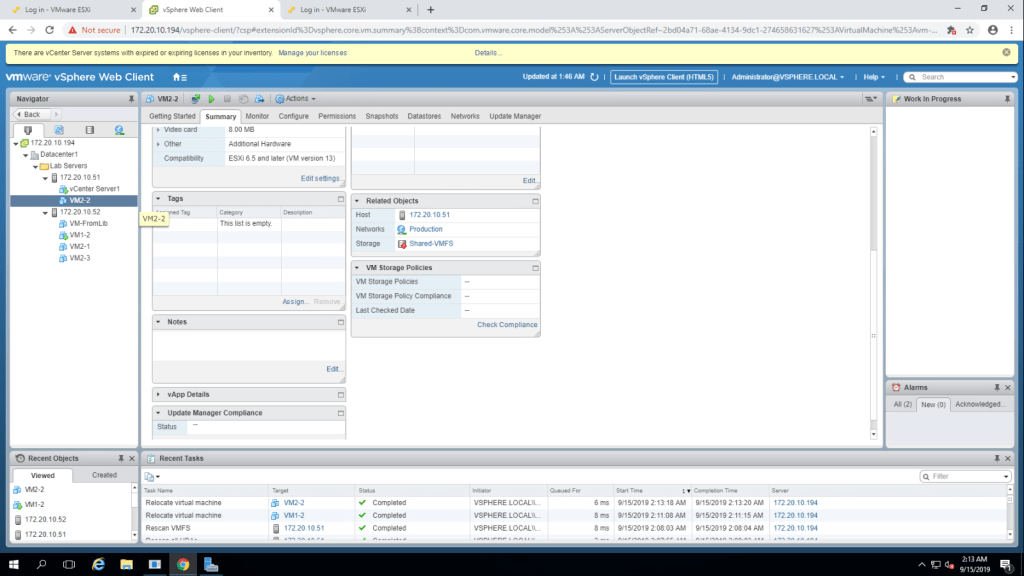
14. Click on the summary tab of VM2-2 & ensure that it is on esxi host2(172.20.10.52).
15. Now drag VM2-2 to 172.20.10.51(esxi-host-01). It will open Migration wizard. In that select Compute resource only.
16. Select esxi host 1 (172.20.10.51) and next.
17. Select production from destination network drop down list and then next.
17. Review the information and click on finish.
TASK-4 Perform a Compute Resource and Storage Migration
- Select Migrate option from the list by right clicking on VM-FromLib.
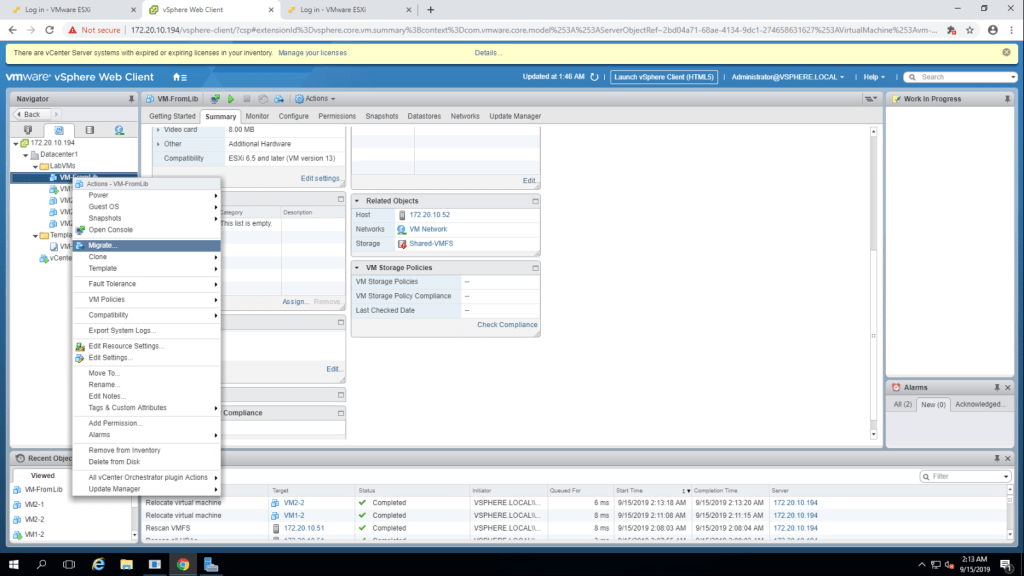
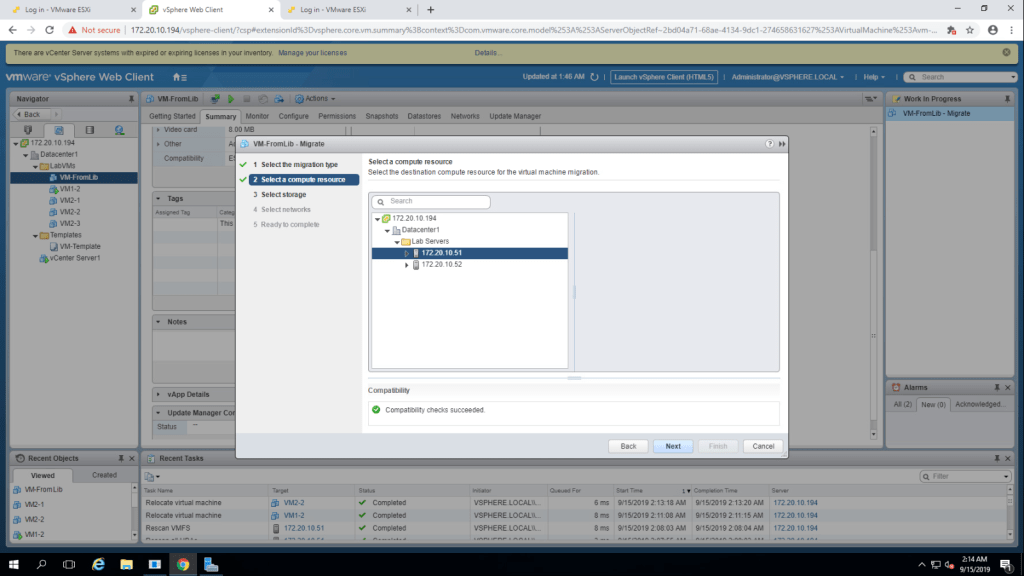
2. In Migration wizard, select migration type – ‘Change Compute Resource and Storage’. and click next.

3. select esxi-1(172.20.10.51) from lab servers and click next.
4. In select storage page, select local1-1 storage and click next.
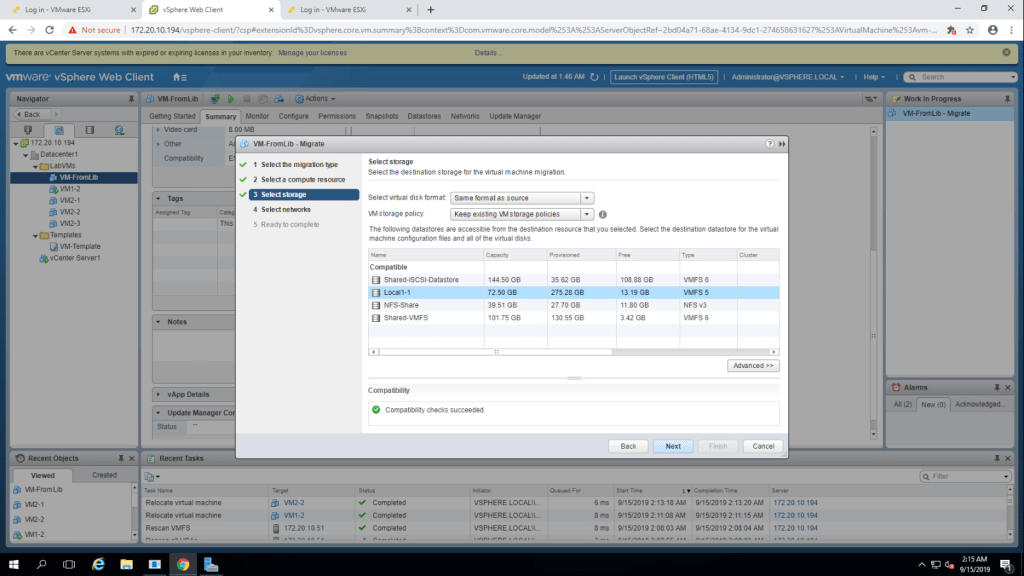
5. Select Production from the drop down menu of Destination Network and click next. In the next step, select recommended settings and click finish.
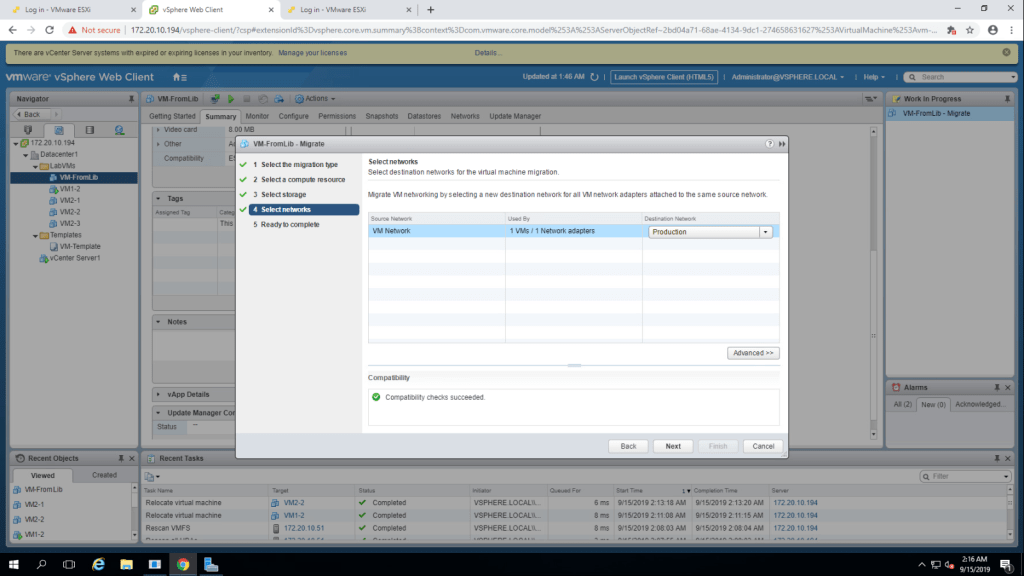
6. Monitor the virtual machine migration process in recent task panel and shut down the guest OS.
Lab-12 Modifying Virtual machines
TASK-1 Increase the size of VMDK file.
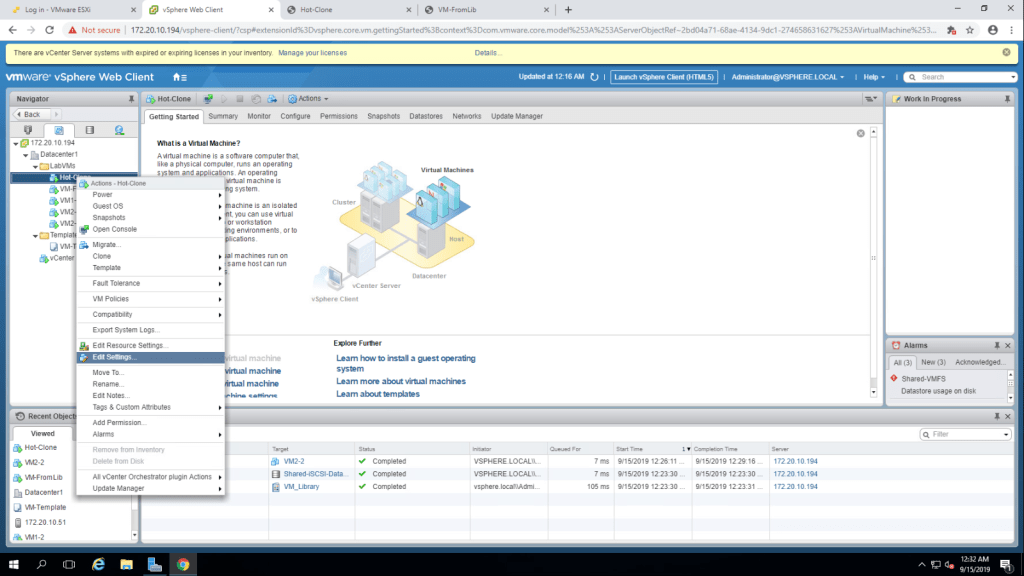
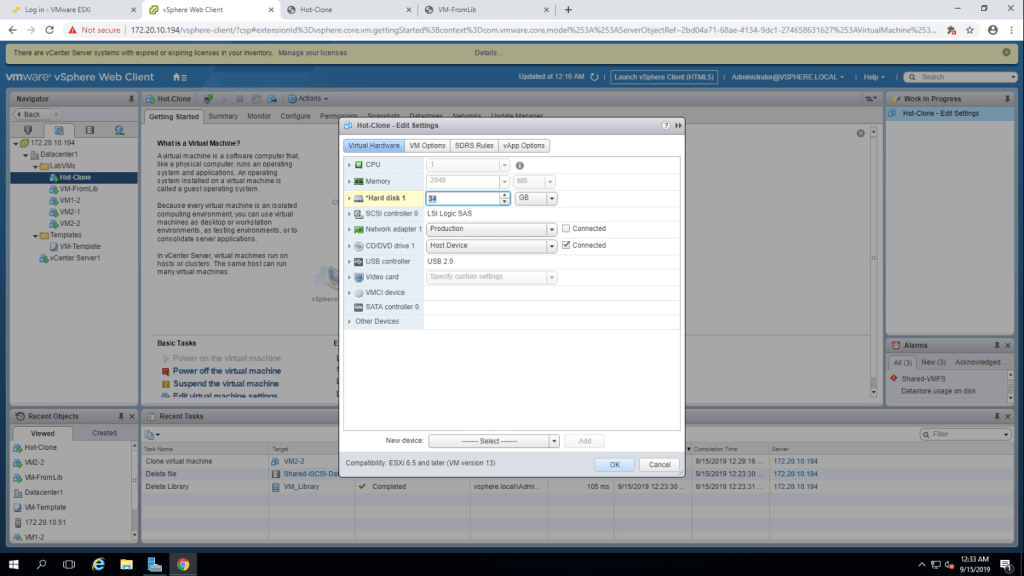
- Right click on hot-clone virtual machine and go to edit settings.
2. Hard disk 1 capacity is 32GB, increase it by 2GB and click ok.
3. Open web console for Hot-Clone. Go to Start -> Right click on Computer -> Manage.

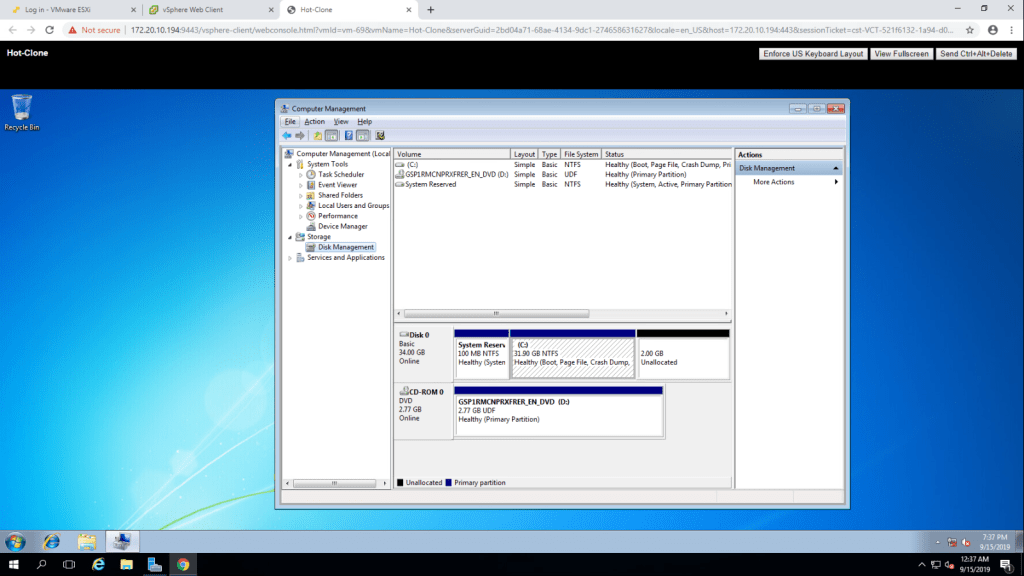
4. Go to Disk Management and select Rescan Disks
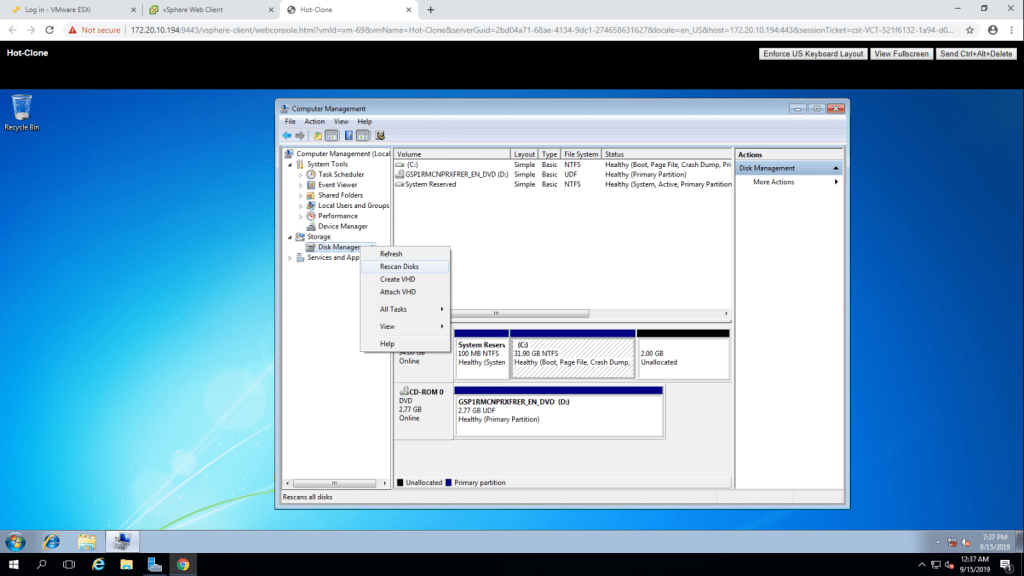
5. It will show 2.00 GB unallocated space in the lower pane.
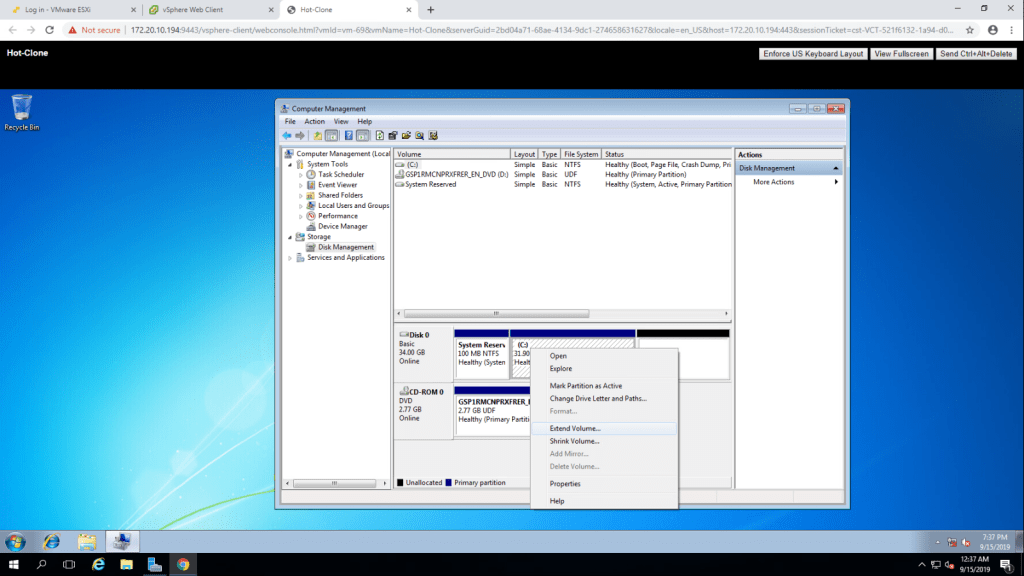
6. Select Extend Volume by right clicking the C drive.
7. It will show Extend Volume Wizard, click next.

8. Select Disk 0 and click next.
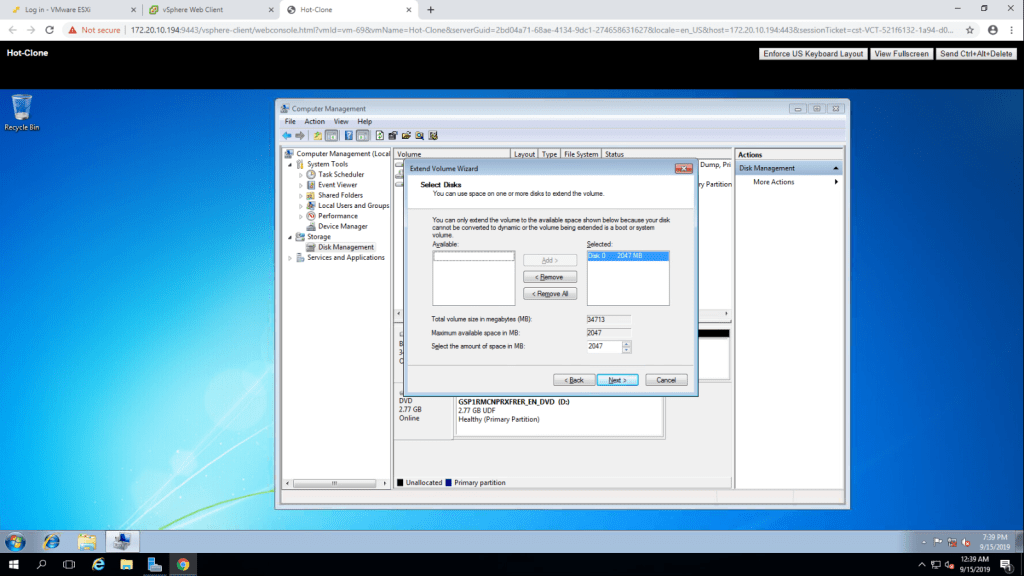
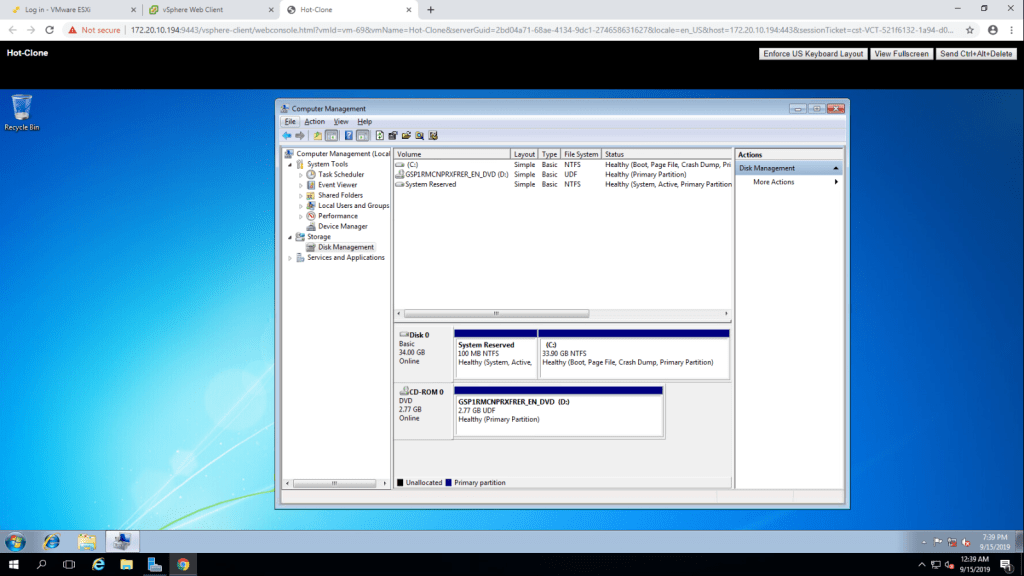
9. You can see that the C: drive is extended.
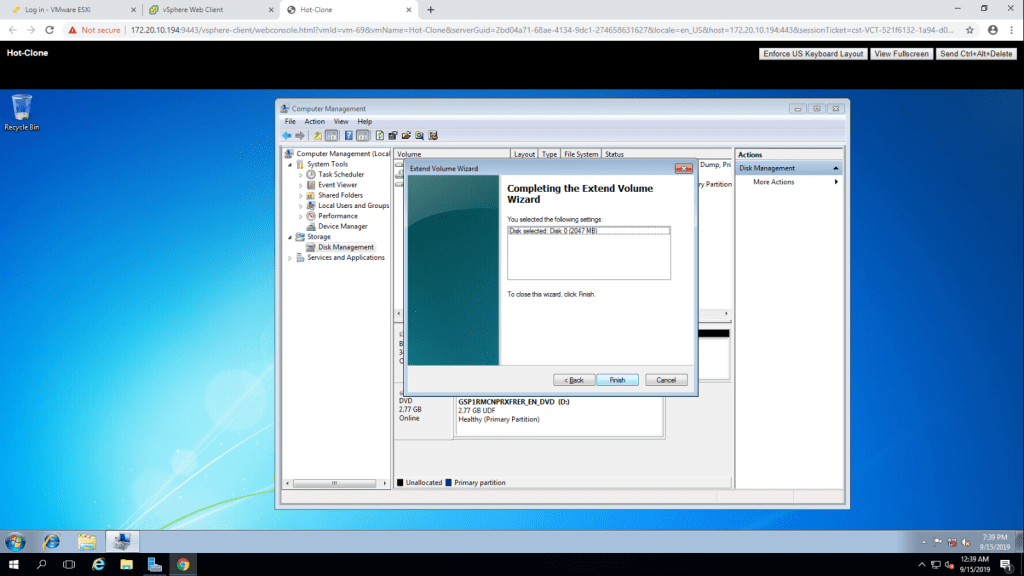
10. Before extending the volume, the size of C drive was 31.90 GB and after doing so it is 33.90 GB.
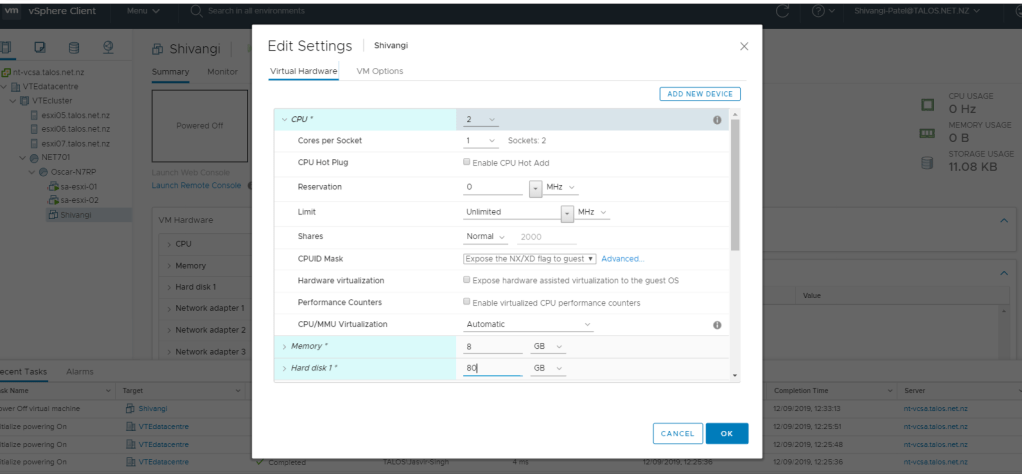
TASK-2 Adjust Memory Allocation on a Virtual Machine.
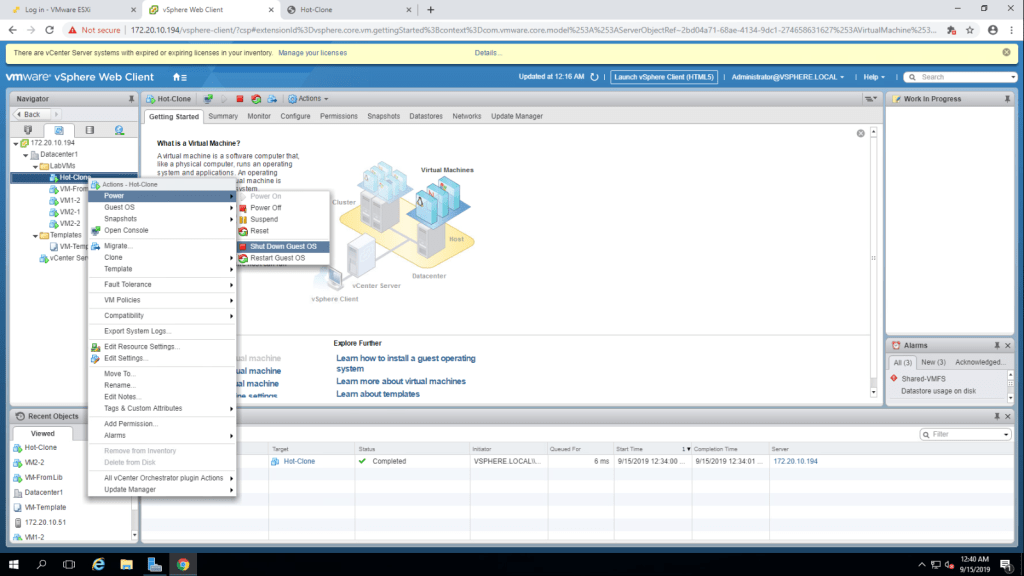
- Shut down Hot-Clone virtual machine.
2. Now go to edit settings of Hot-Clone virtual machine.
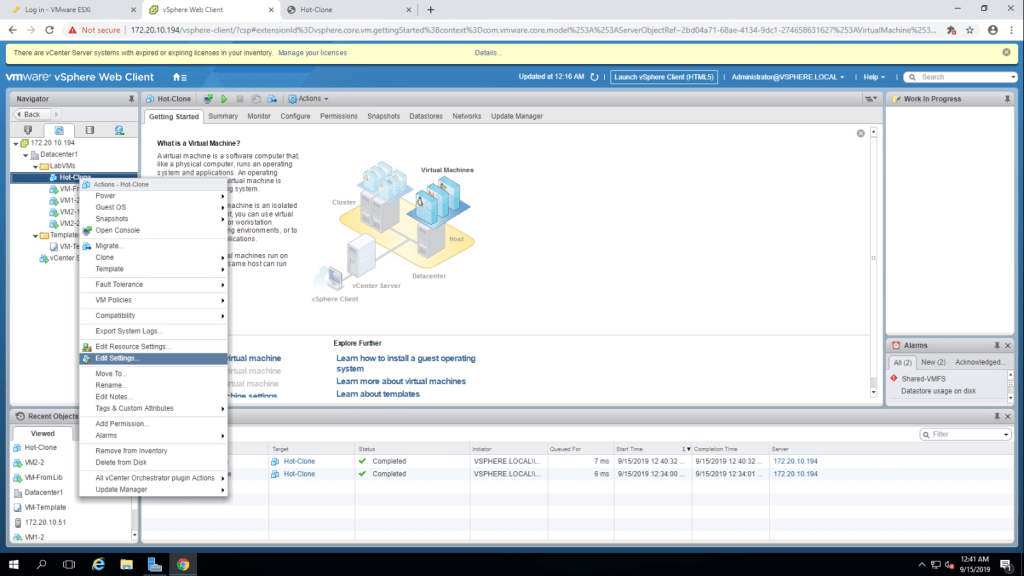
3. Give 2048 MB memory on the virtual hardware tab and click ok.
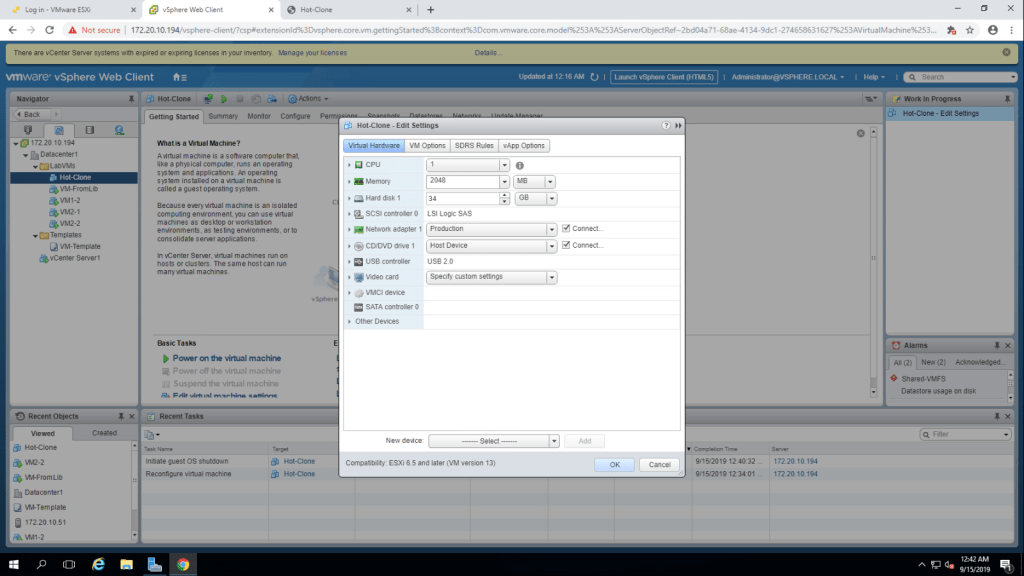
4. Check that the virtual machine memory has been increased.
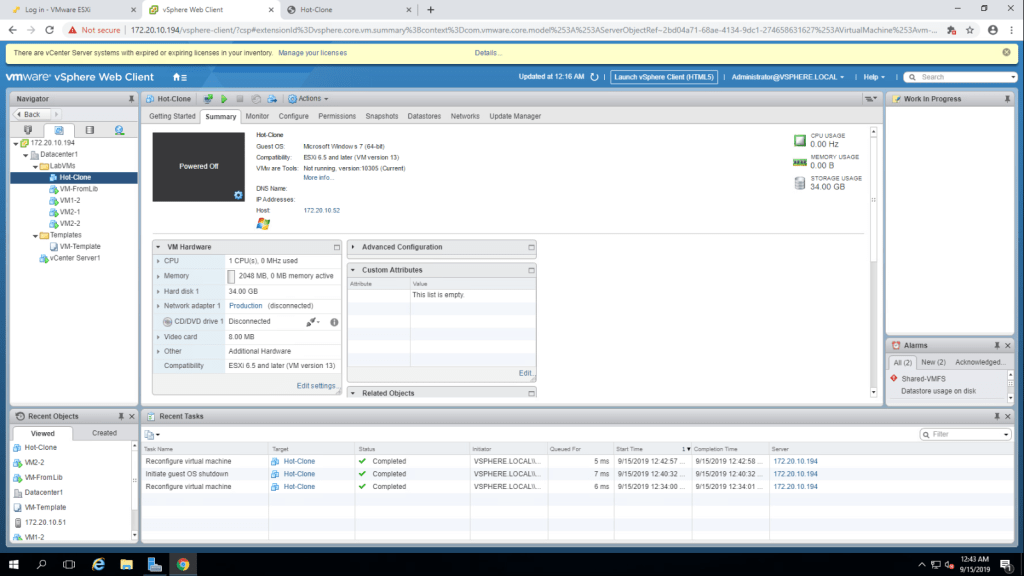
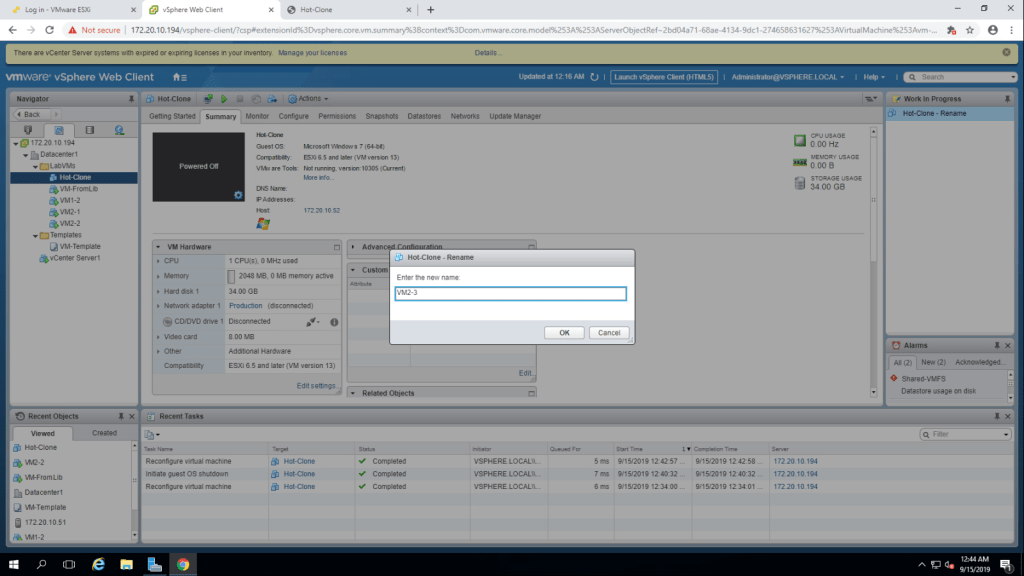
TASK-3 Rename a Virtual machine in vCenter Server Inventory.
- Right click on the Host-Clone virtual machine and select Rename. Then Give new name VM2-3.
2. Select VM2-3 from the inventory and click the datastore tab.
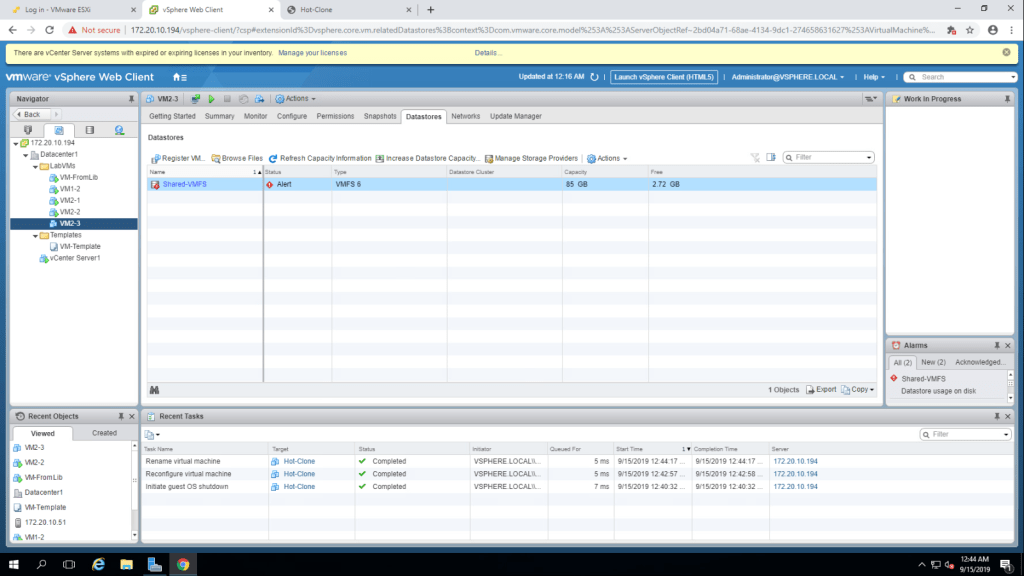
3. Right click on Shared datastore and choose browse files.
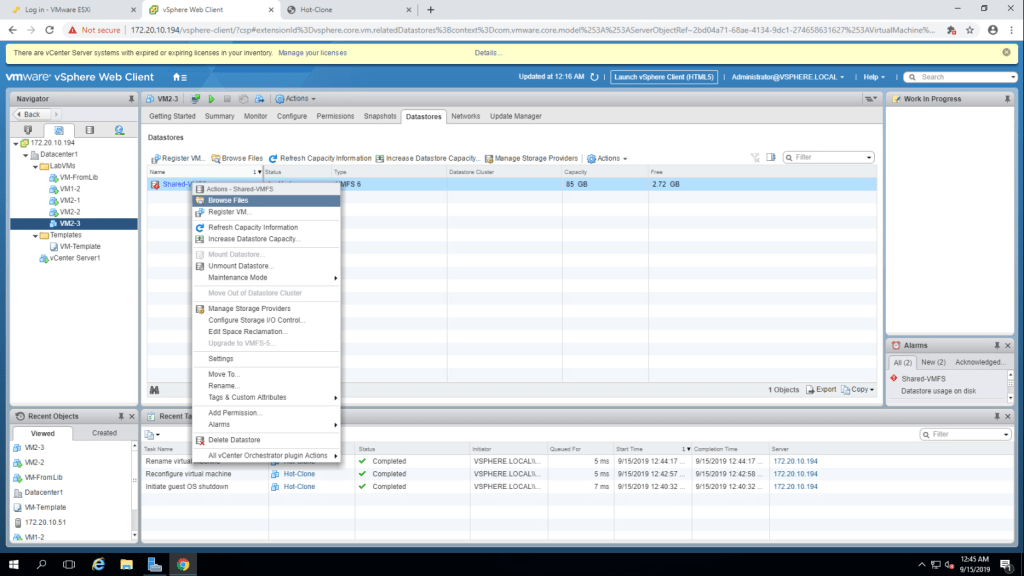
Q. What is the name of VM2-3 virtual machine’s folder? A. Hot-Clone.(The folder name remains the same as we have just changed virtual machine name).
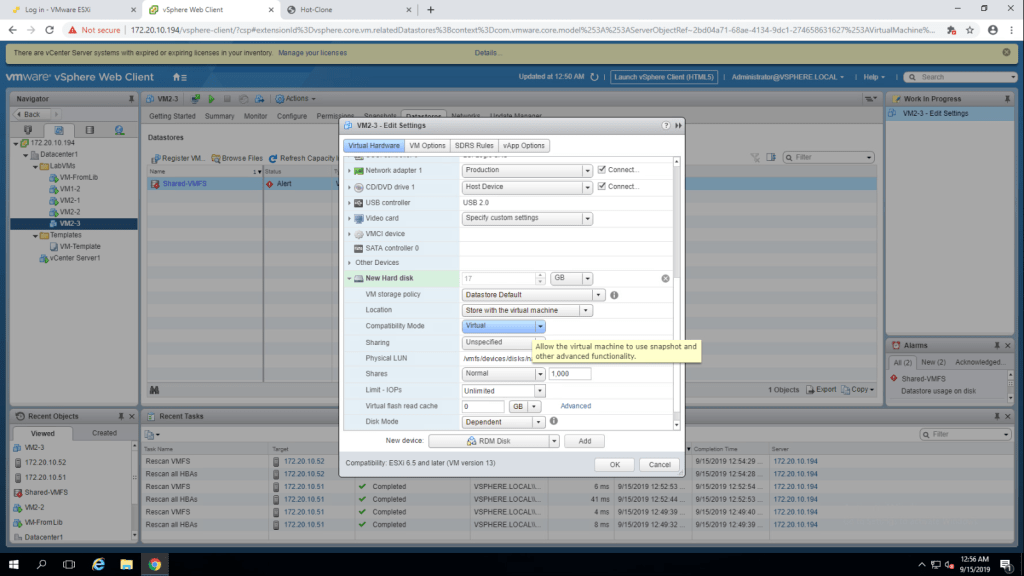
TASK-4 Add or Remove a Raw LUN on a virtual machine.
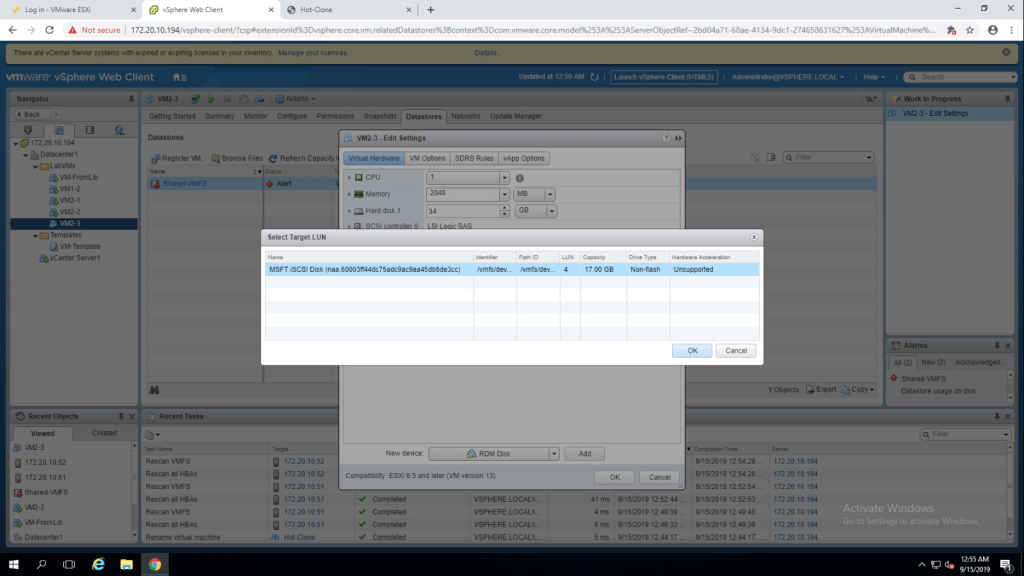
- Right click on VM2-3 and click on edit settings. Select RDM disk from the new device drop down menu and click add.
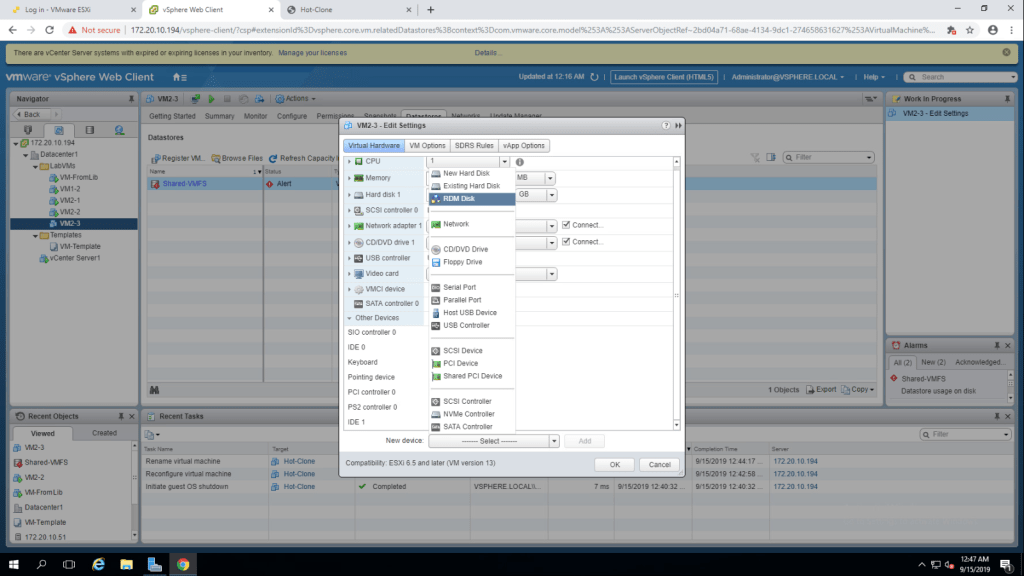
2. select a LUN target and click ok.
3. Expand the new hard disk and select ‘share with the virtual machine’ in location, in compatibility mode select Virtual and click ok.
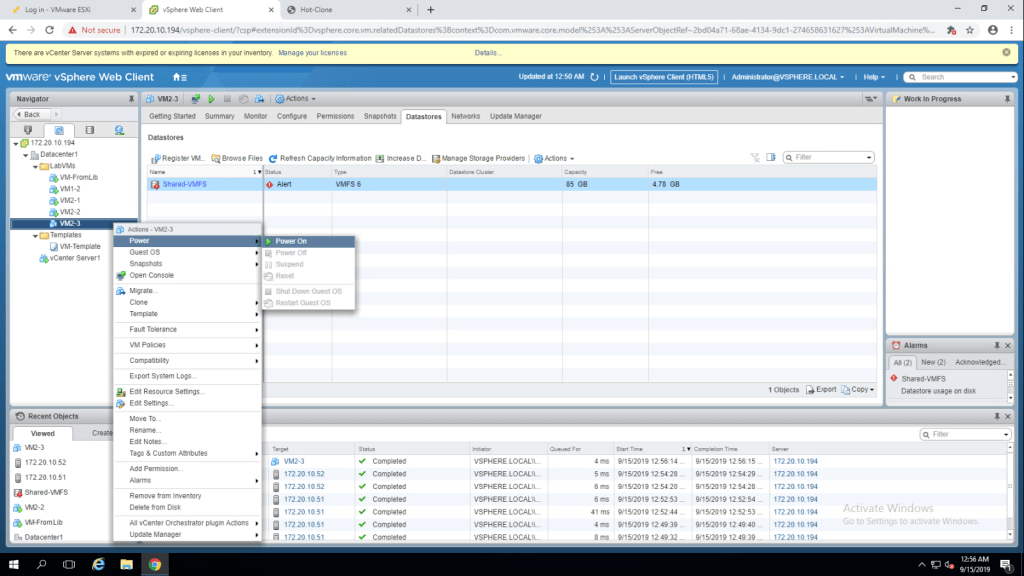
4. Power on the virtual machine VM2-3 and open in console.
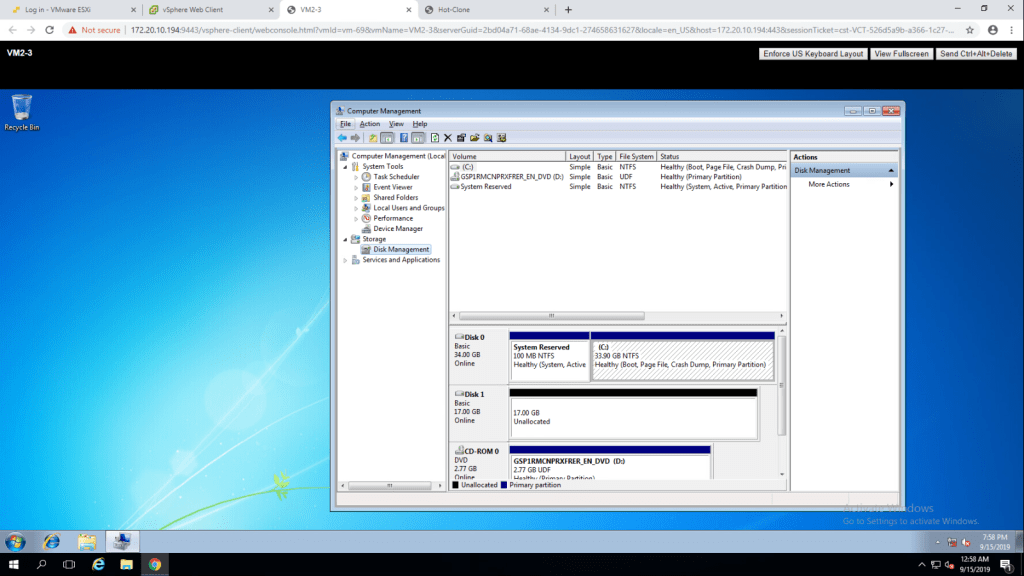
5. Follow the path : Start -> Right click on computer -> Manage.
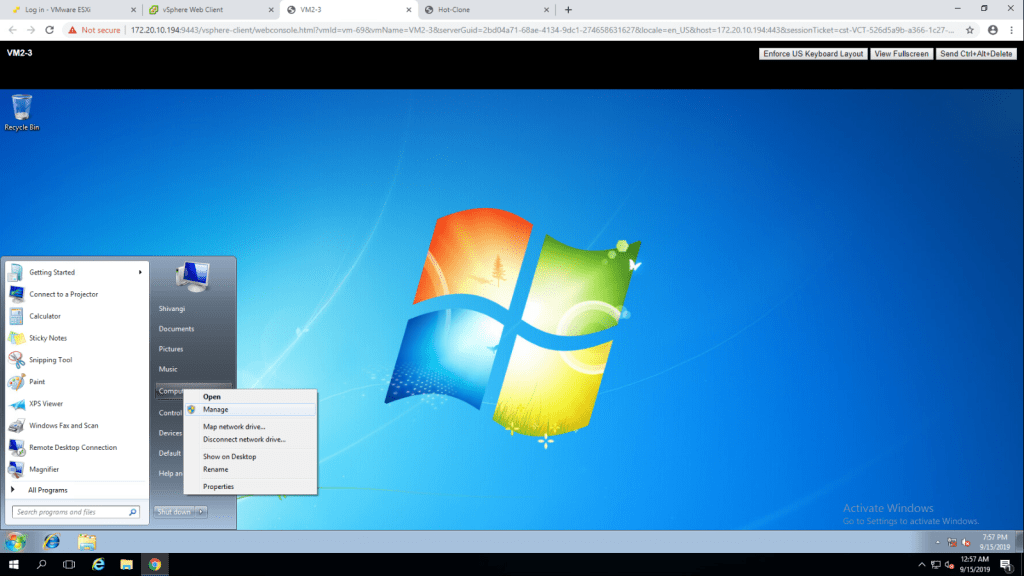
6. Select Disk Management from the left hand side panel. Disk 1 is listed there.
7. Close the web console and shut down the virtual machine
8. Then right click on VM2-3 and go to edit settings.
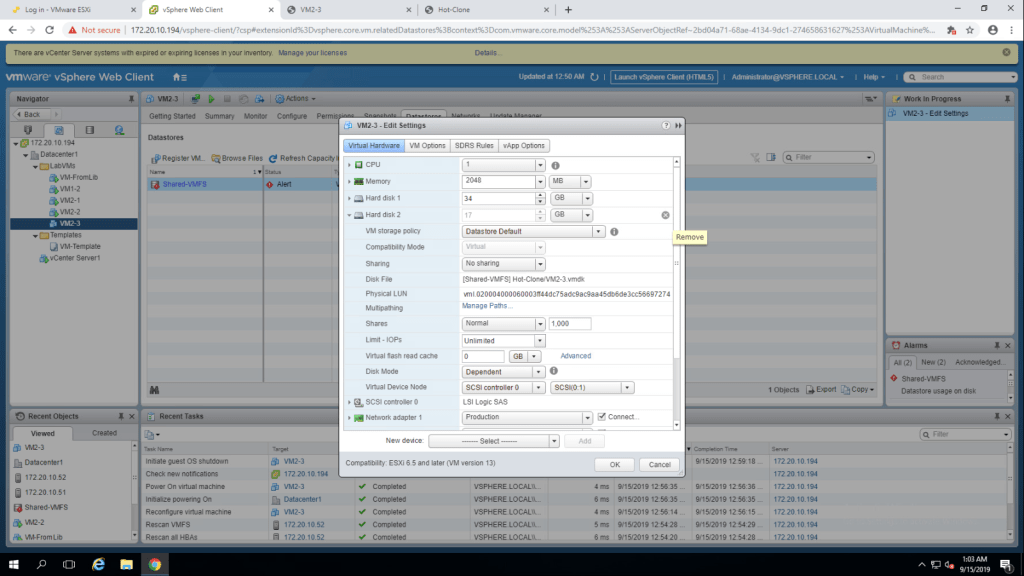
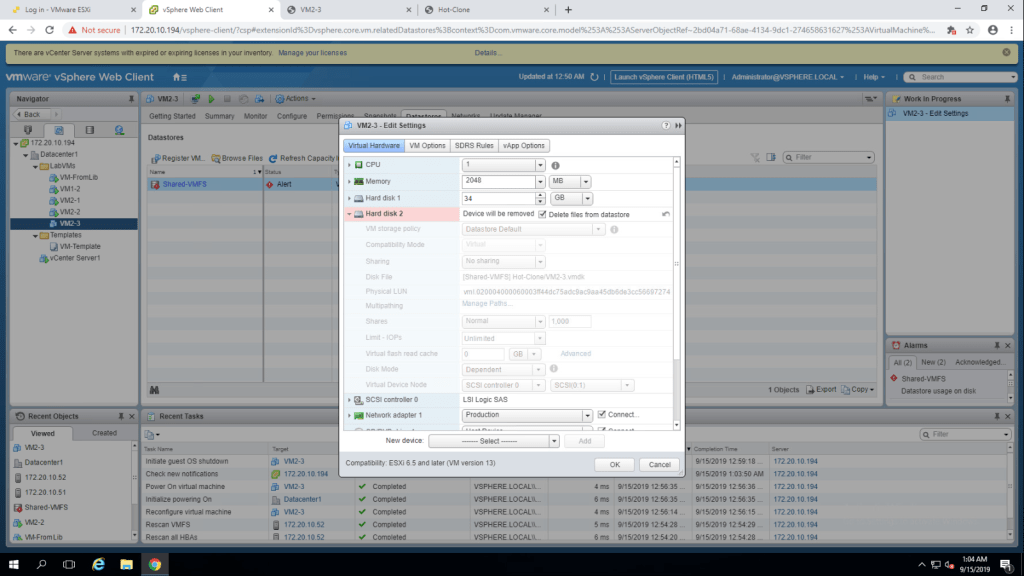
9. Delete the hard disk 2 by clicking on the cross beside hard disk2. then click ok.
Lab-11 Using Templates and Clones
TASK-1 Create a Virtual Machine Template.
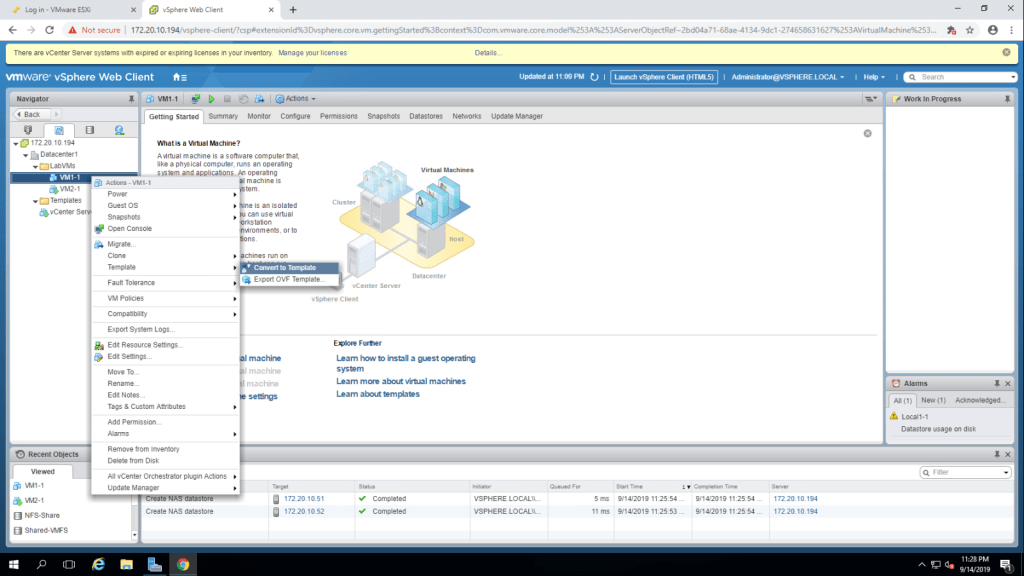
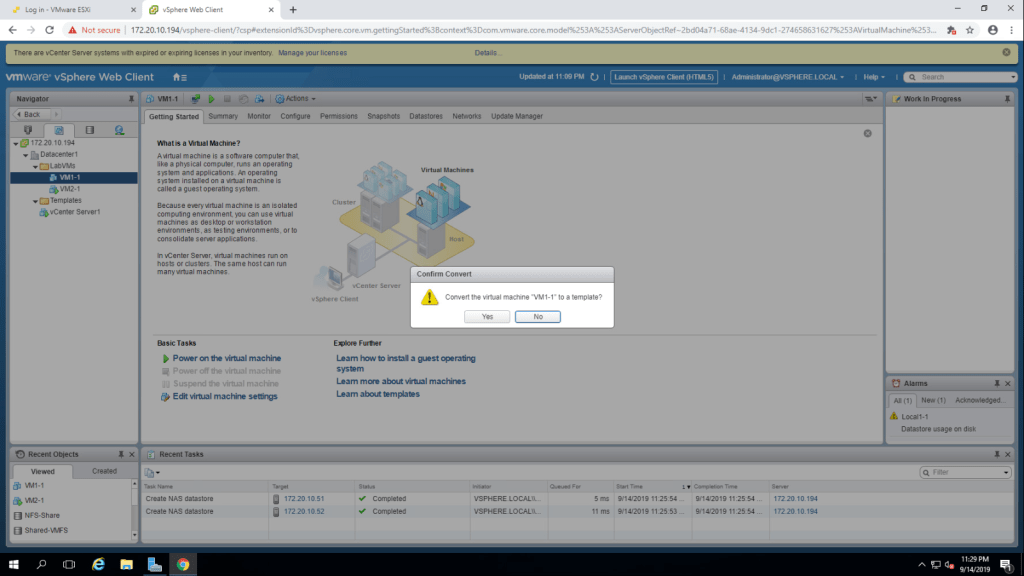
- Make sure that VM1-1 virtual machine is powered off and then right click on VM1-1 then go to template and select Convert to Template.
2. Click on yes to confirm the convert to template.
3. Again right click on VM1-1 and select move to.
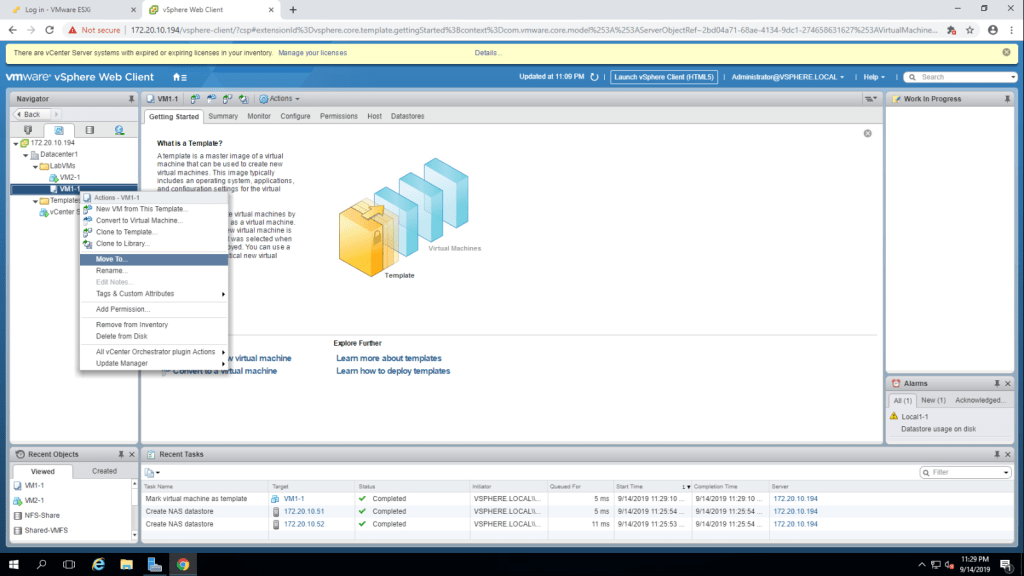
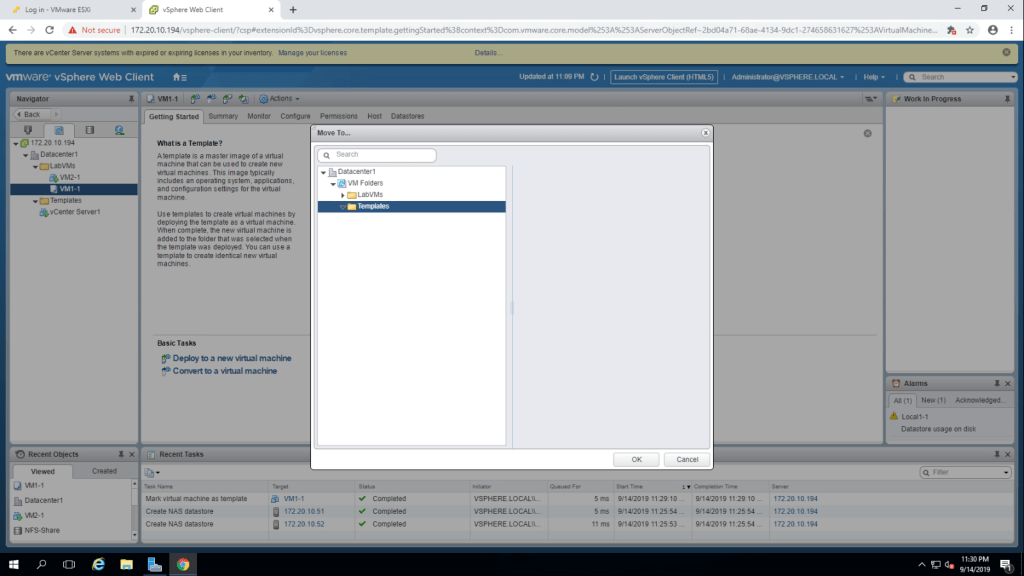
4. Expand VM Folders and select Templates and click on ok.
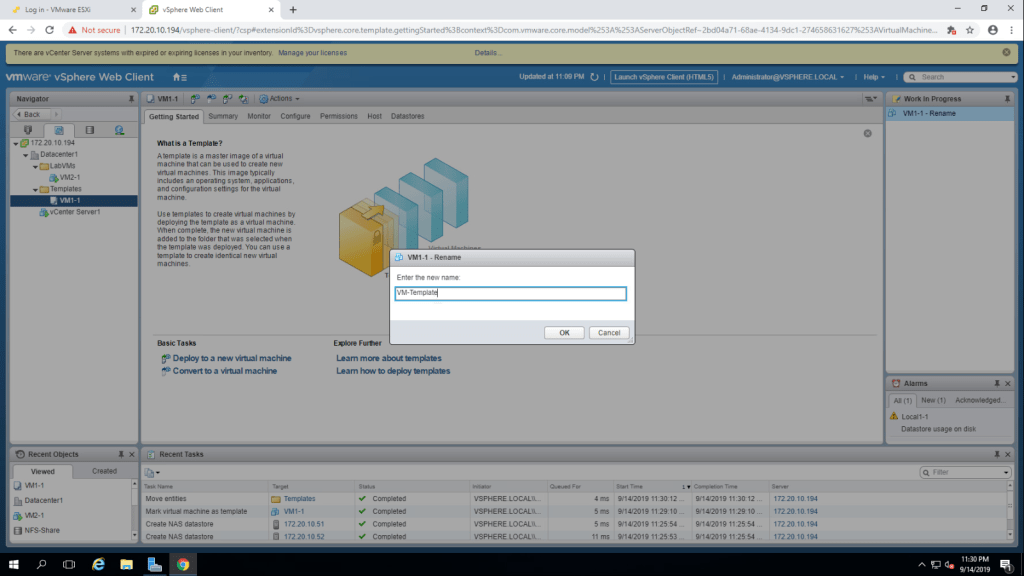
5. Now expand template folder and right click on virtual machine VM1-1, then select rename. Enter the name VM-Template and click ok.
TASK-2 Create Customization Specification.
- Go to policies and profiles from the nevigator pane.
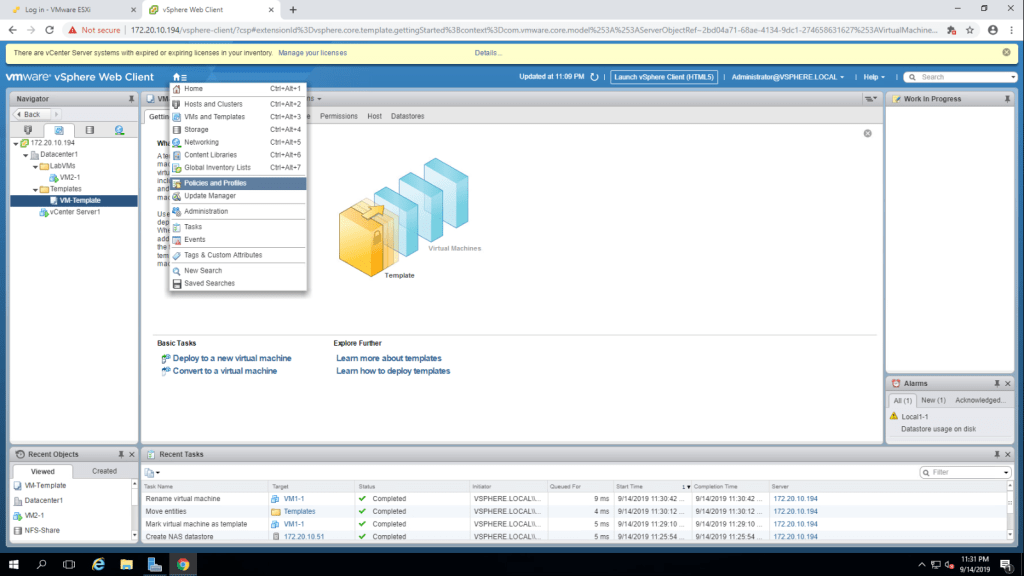
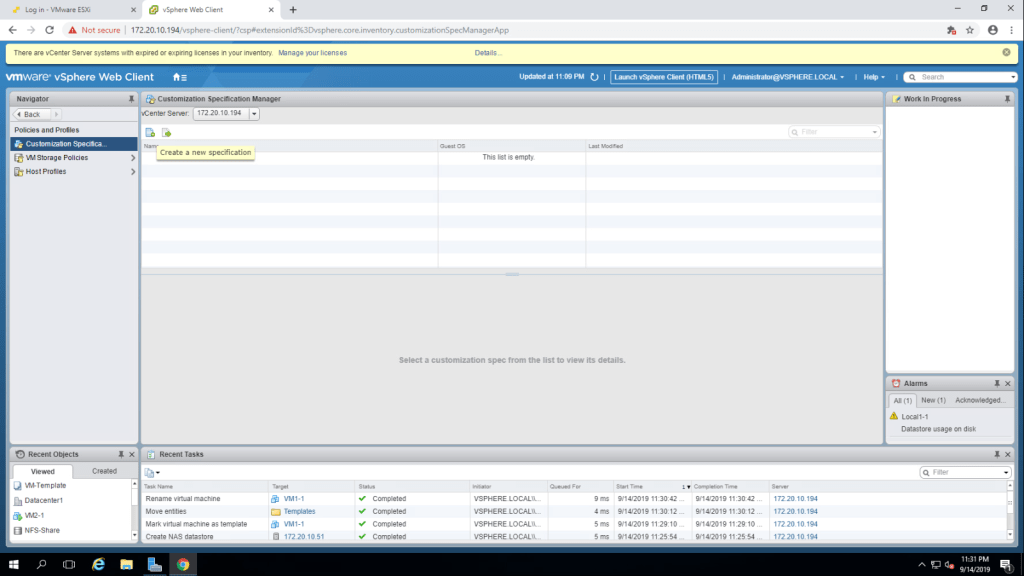
2. Click Customization Specification Manager and Create a new Specification.
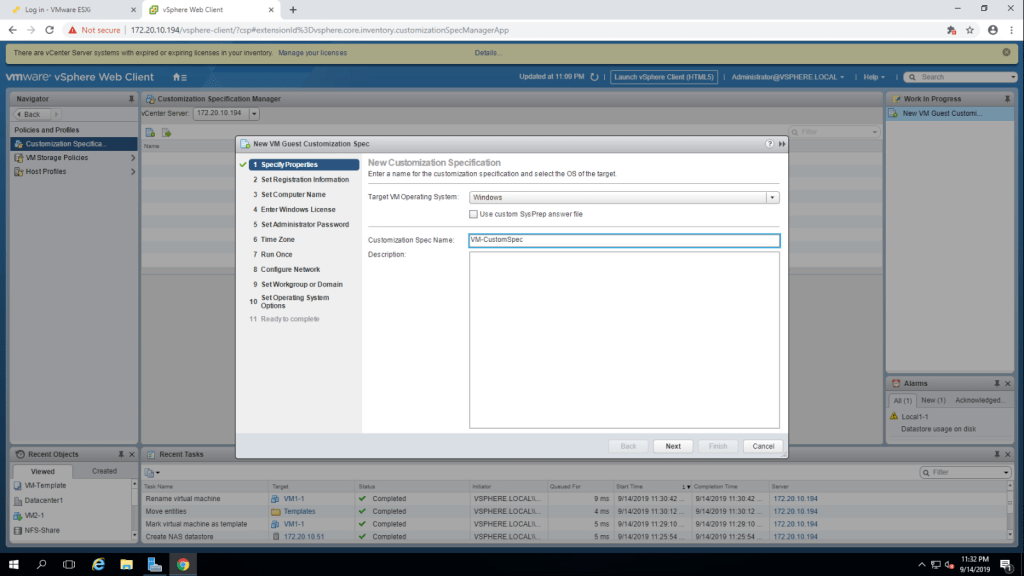
3. select windows from target vm operating system and give a name ‘VM-Customspec’ in customization spec name and click next.
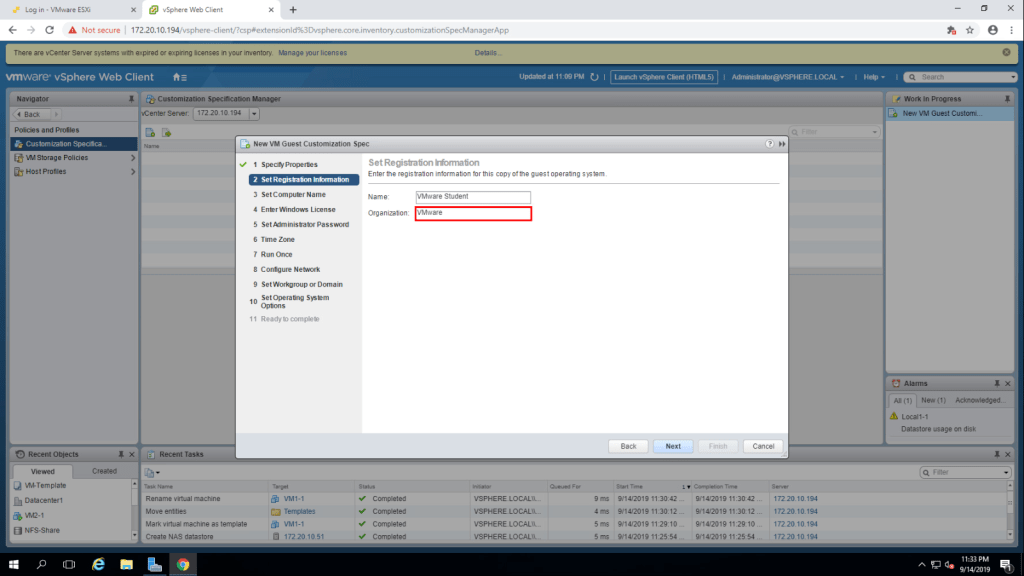
4. Set he registration information(Name : VMware Student , Organization : VMware). click next.
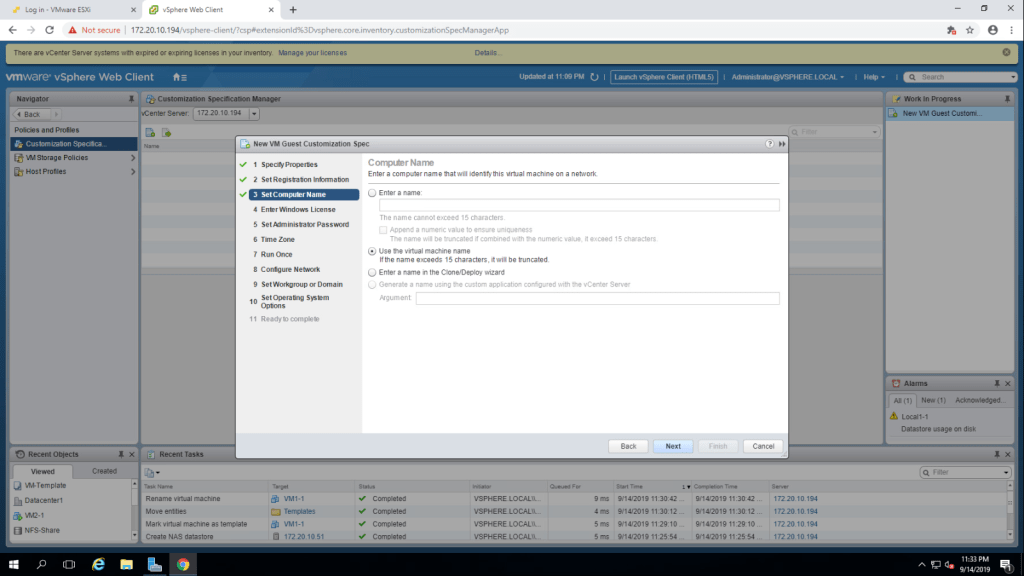
5. Select ‘use virtual machine name’ and click next.
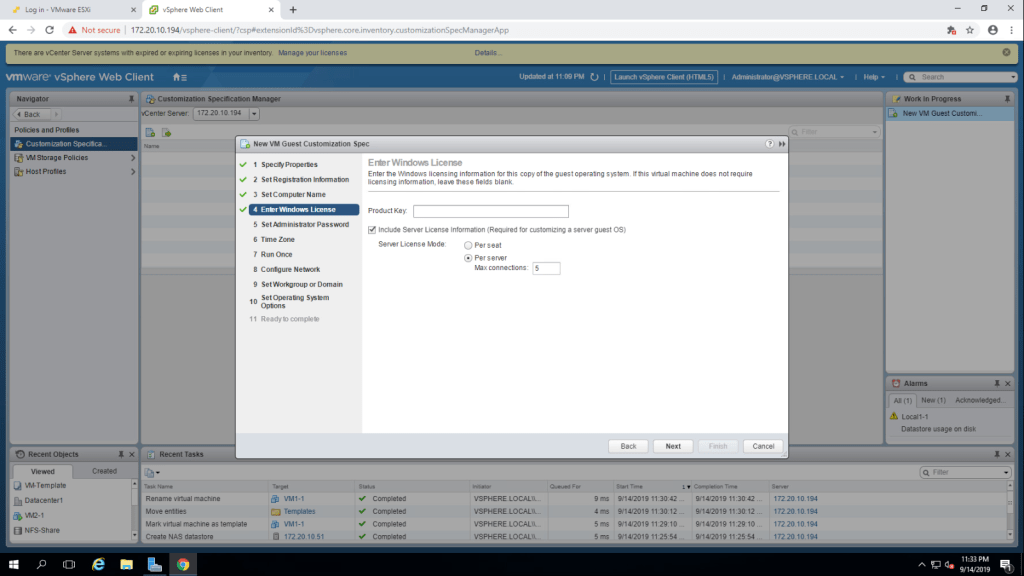
6. Leave this page to default settings and click next.
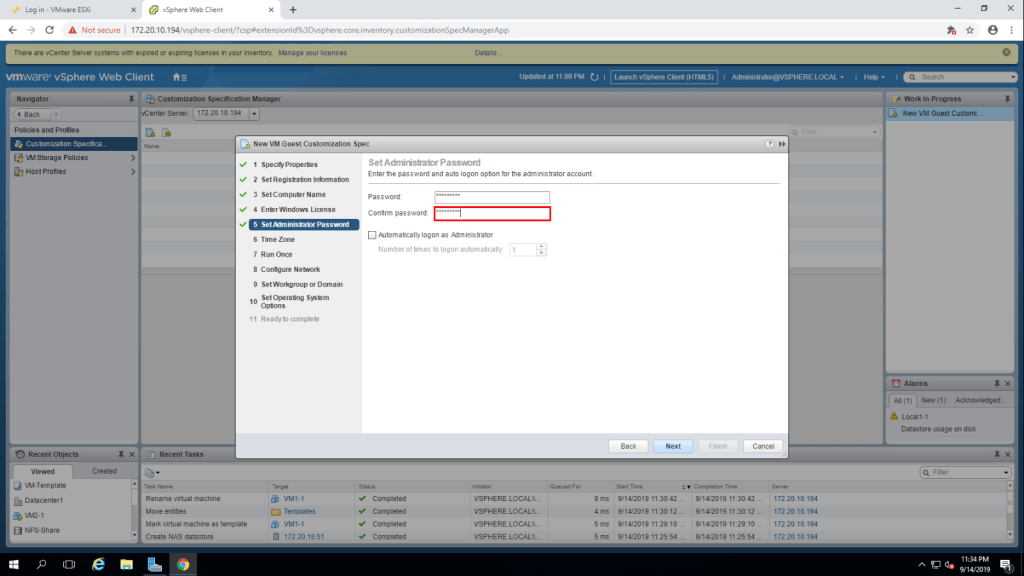
7. Set administrator password and click next.
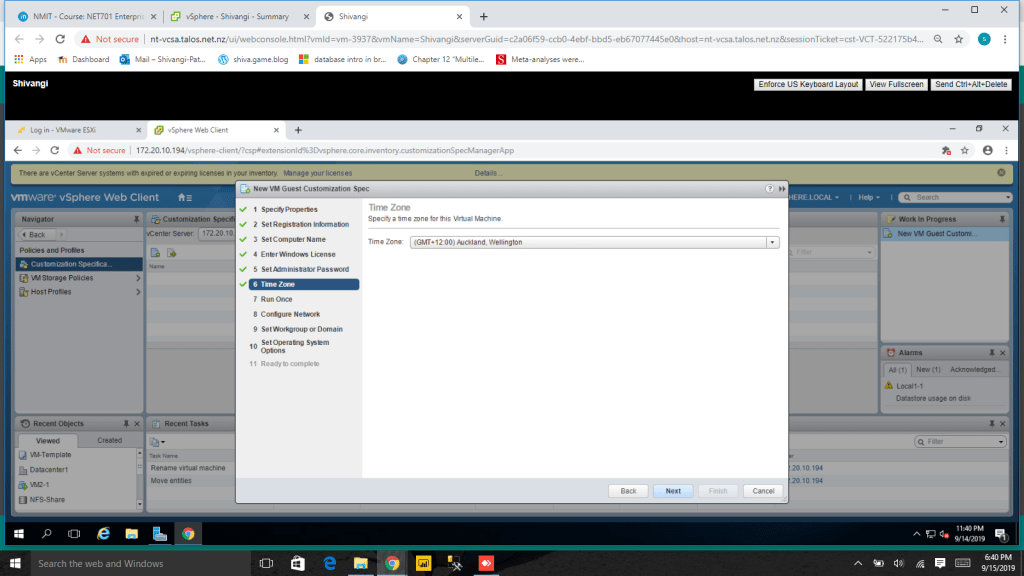
8. Choose time-zone from the drop down and click next.
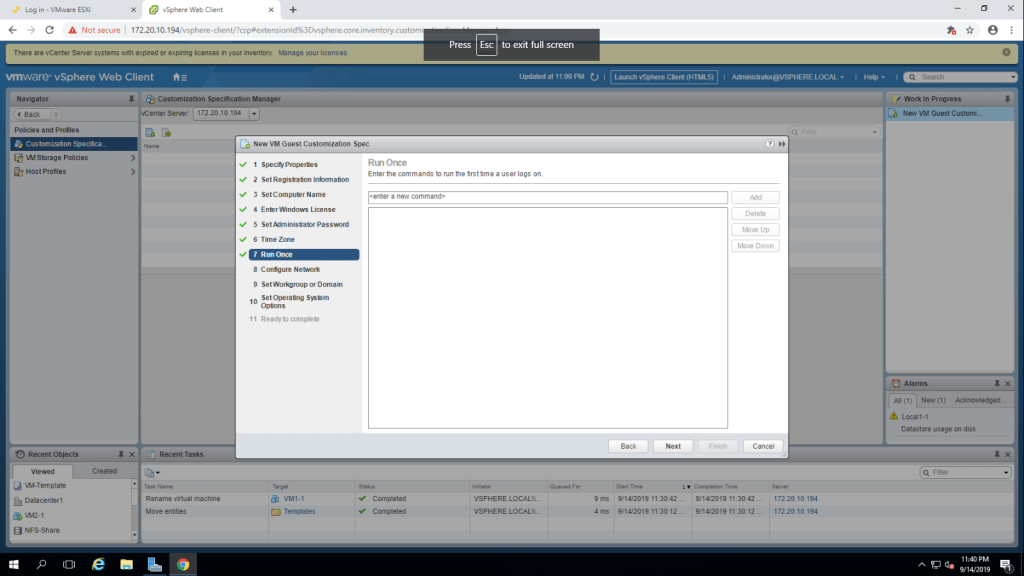
9. click next.
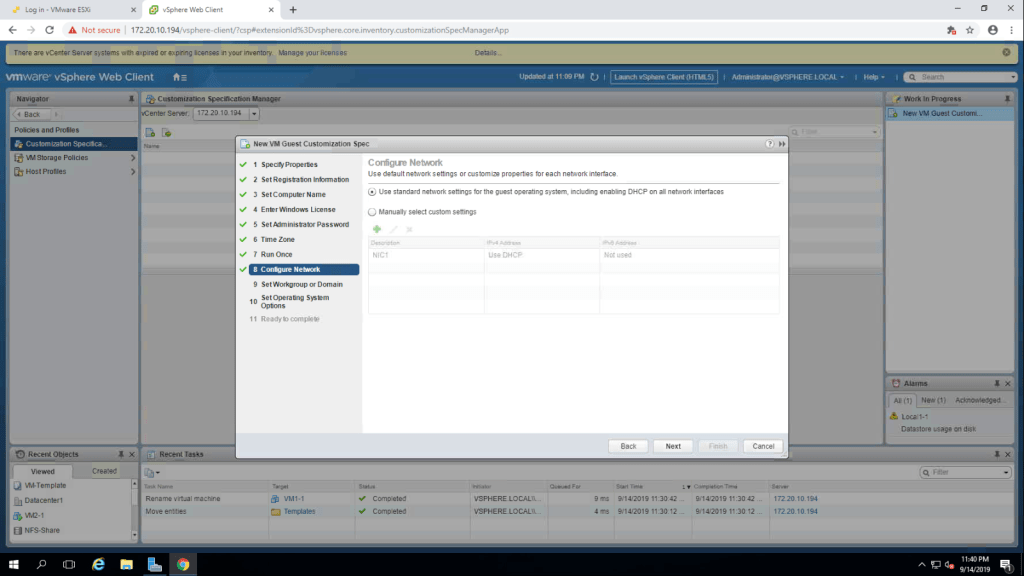
10. select ‘choose standard network settings for the guest OS, including enabling DHCP on all network interfaces’ and then next.
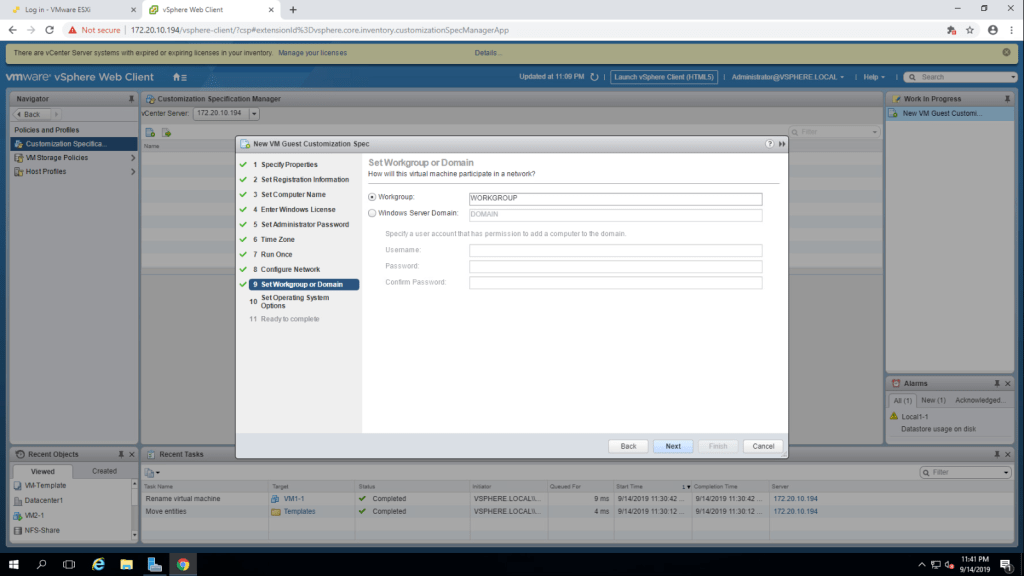
11. Verify that the textbox shows WORKGROUP and click next.
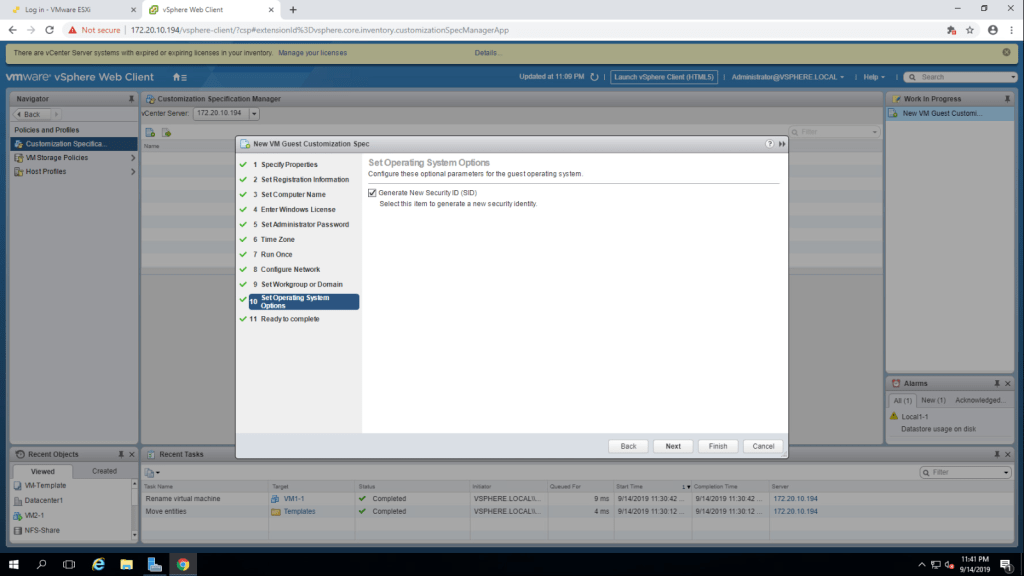
12. click on the checkbox near to ‘Generate new SID’ and click next.
13. Review the information and click finish.
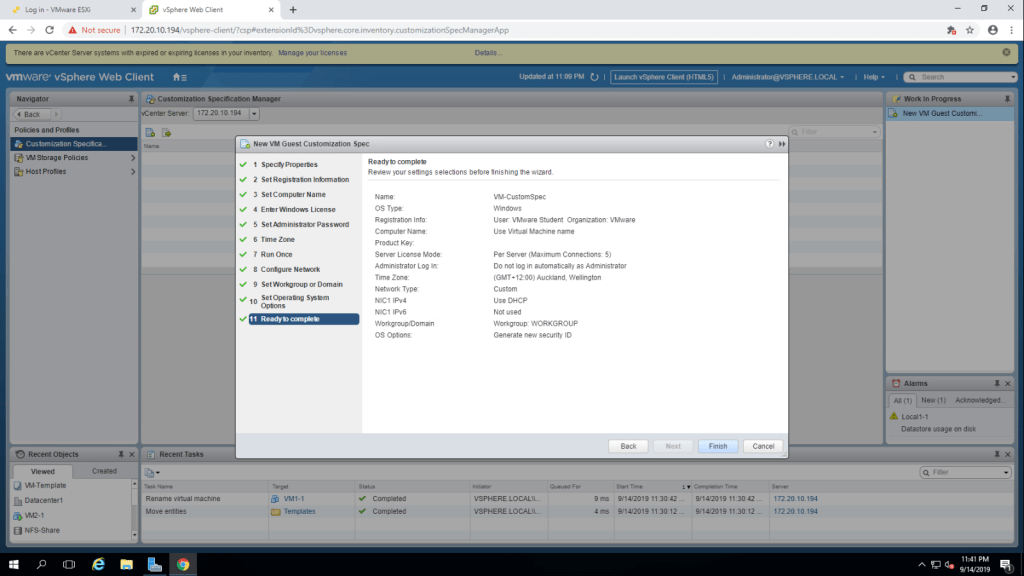
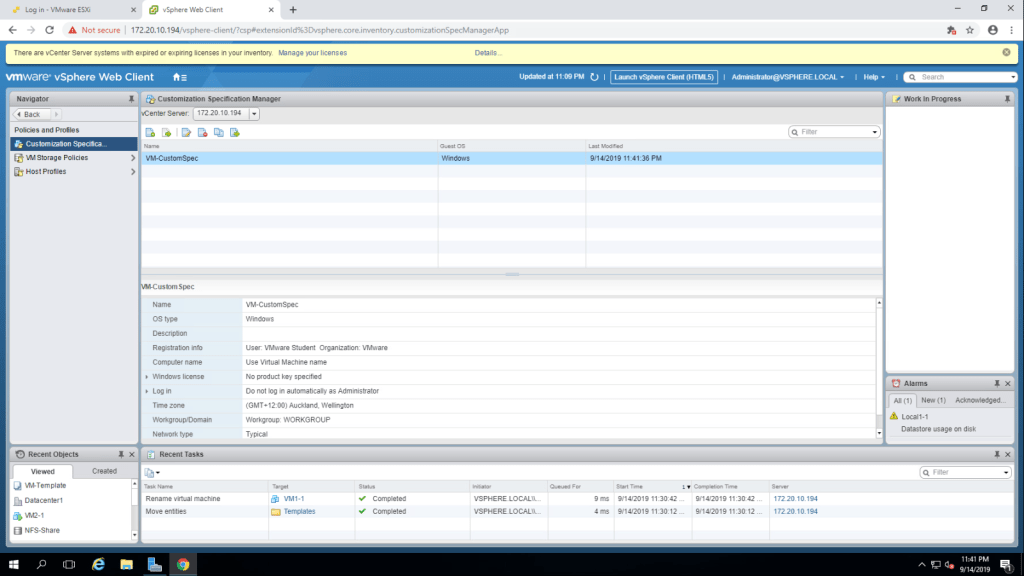
14. You can see that the VM-CustomSpec is listed in Customization Specification Manager panel.
TASK-3 Deploy a Virtual Machine from a Template.
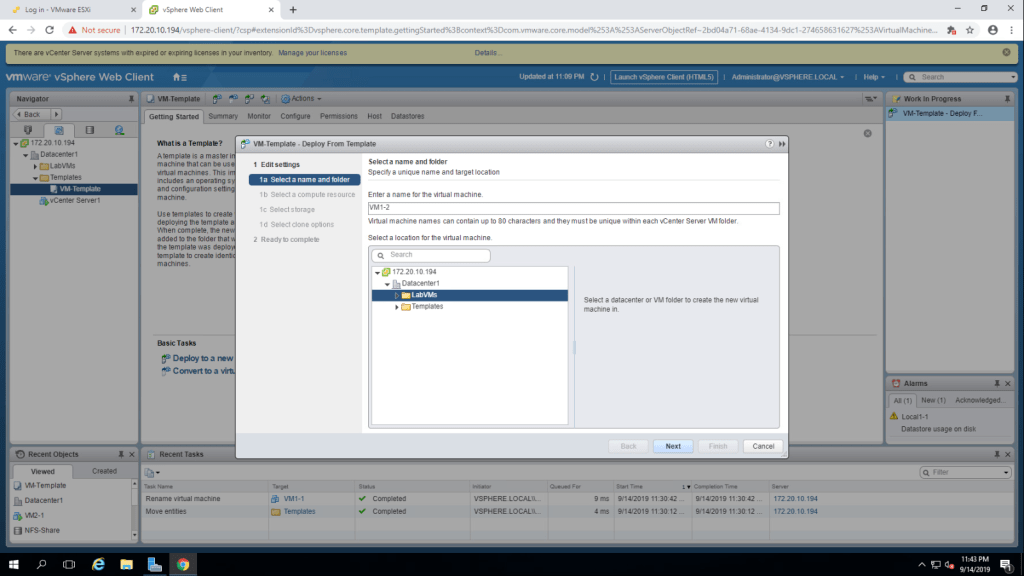
- Select ‘New VM from this Template’ by right clicking on the VM-Template.

2. Give the name VM1-2, select LabVMs folder and click next.
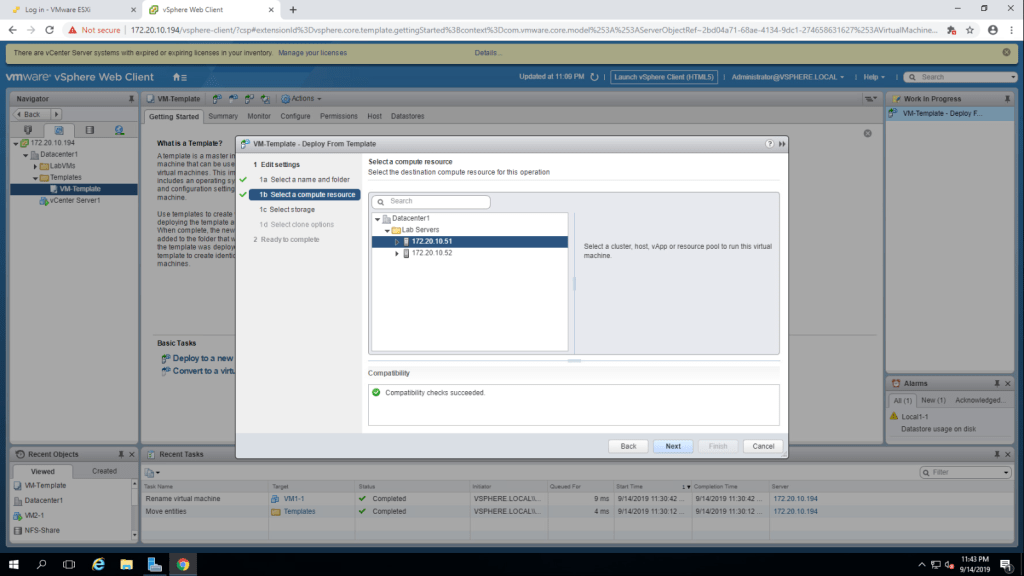
3. Select esxi-01 (172.20.10.51) as computer resource.
4. Select the ‘Shared-iSCSI-Datastore’ and click next.
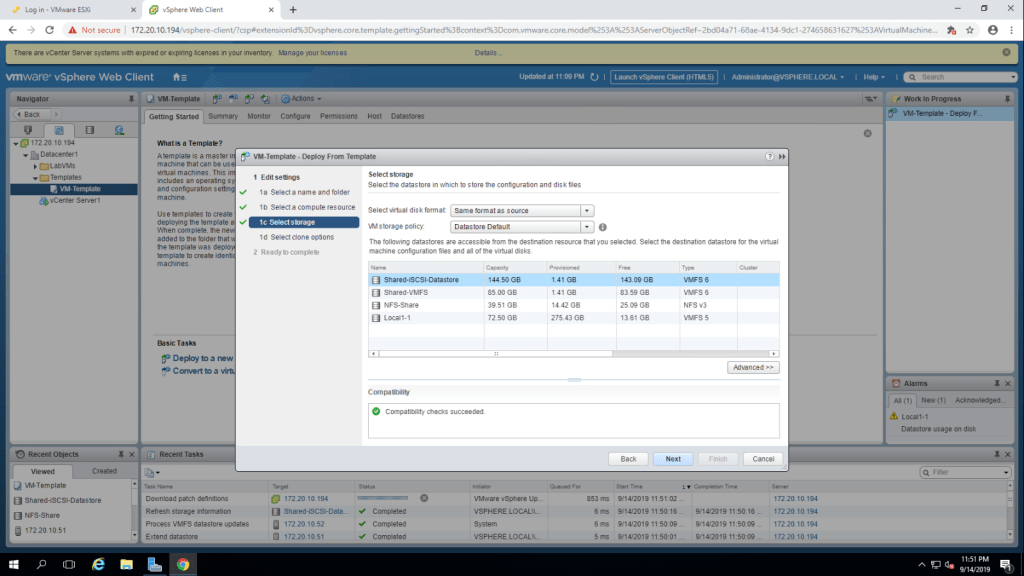
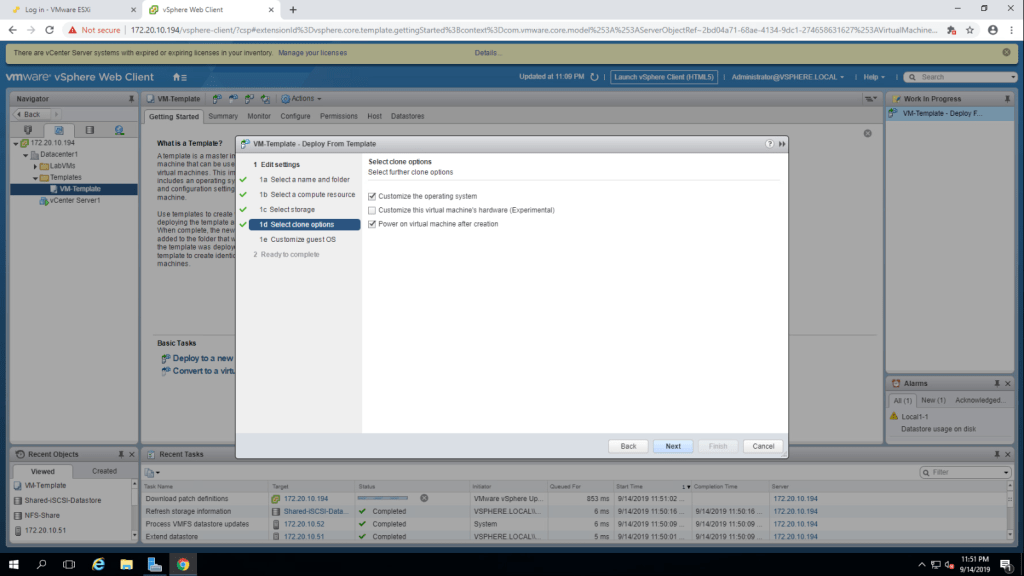
5. Check on ‘Customize the operating system’ and ‘Power on Virtual Machine after creation’ and click next.
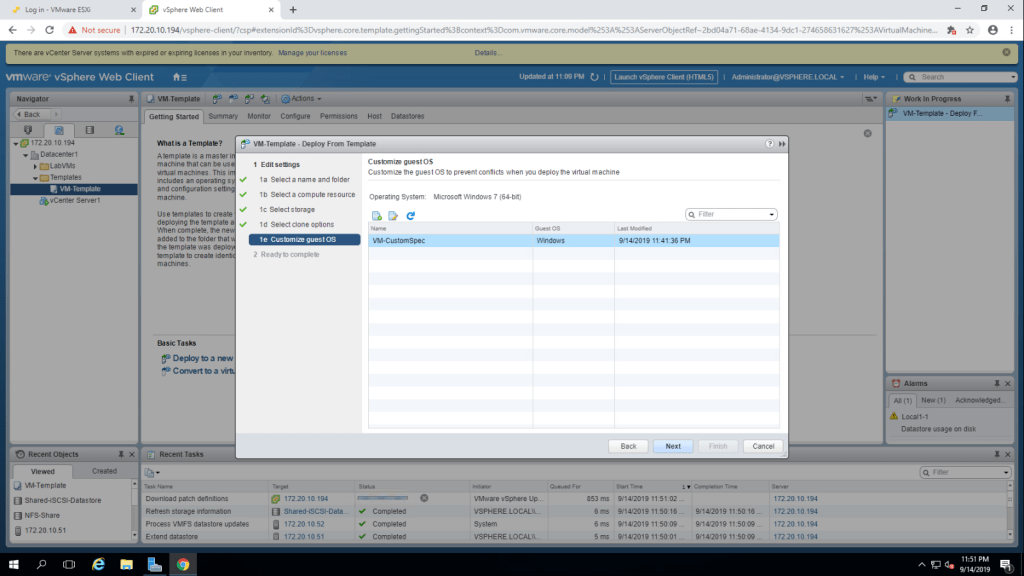
6. Select ‘VM-CustomSpec’ in customize guest OS page.
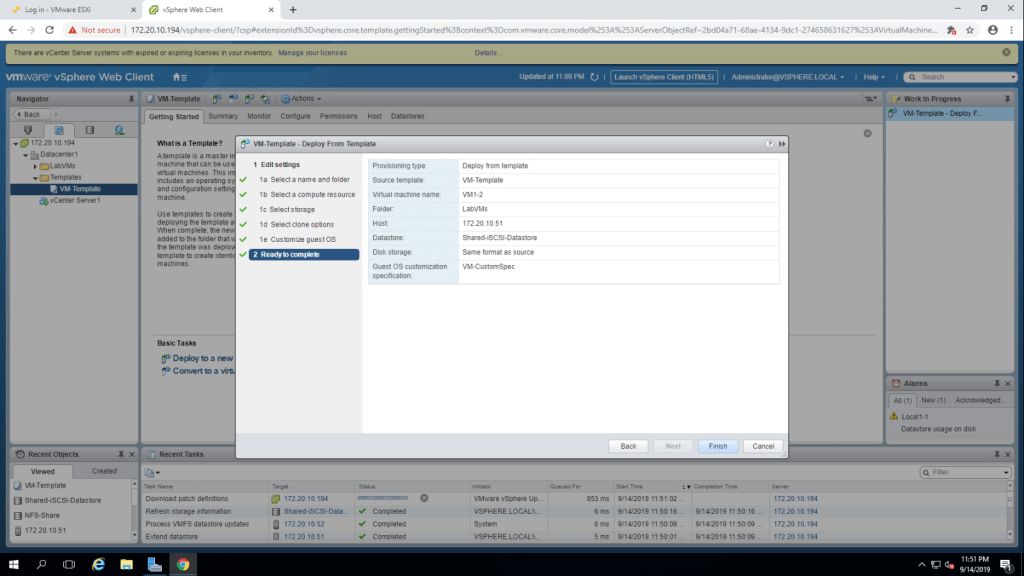
7. Summarize the information and click finish.
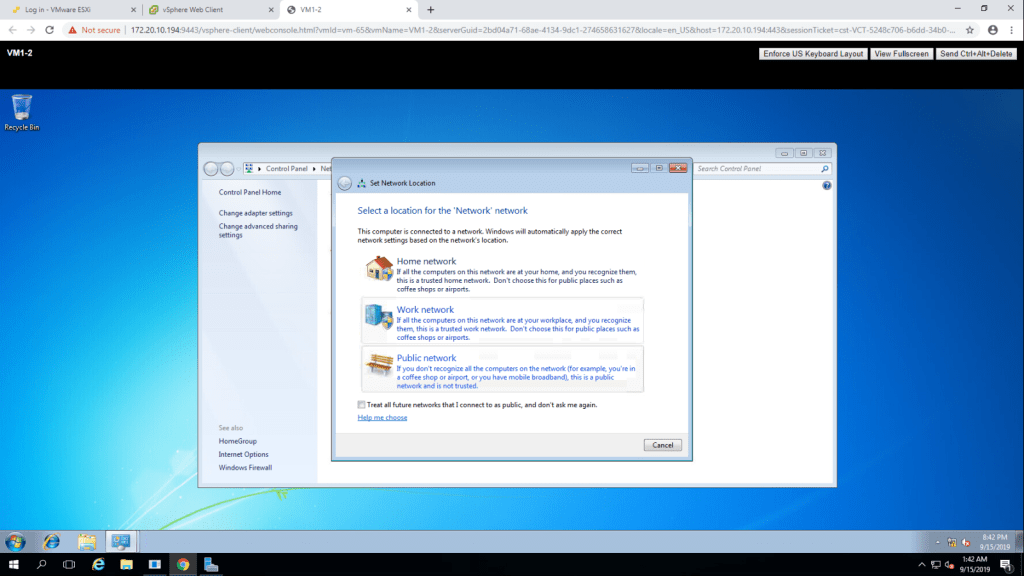
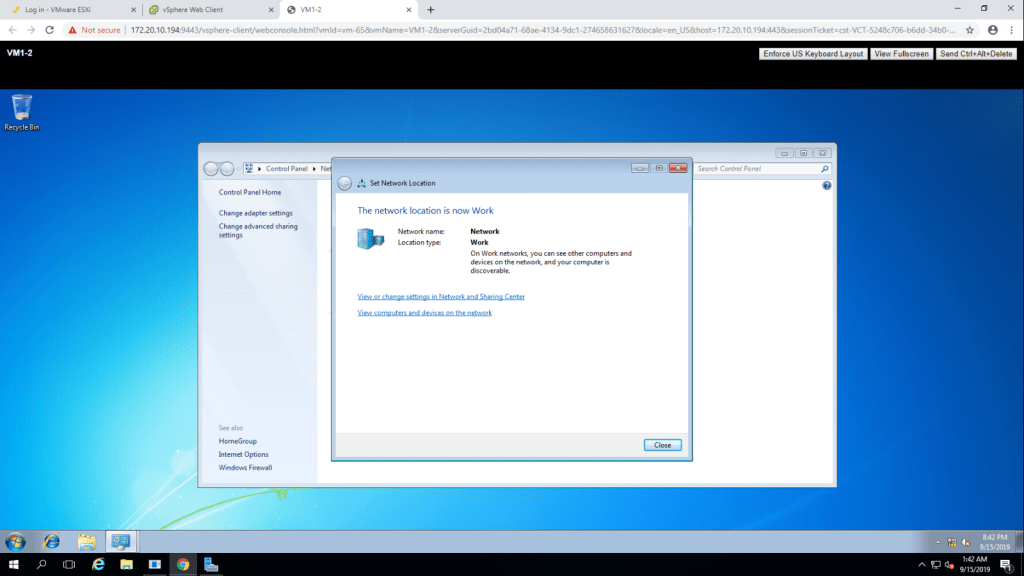
NOTE : Repeat the same steps to create another virtual machine on the second esxi host(172.20.10.52) and then launch console for both the virtual machine and set the network group/location and install VMware tools.
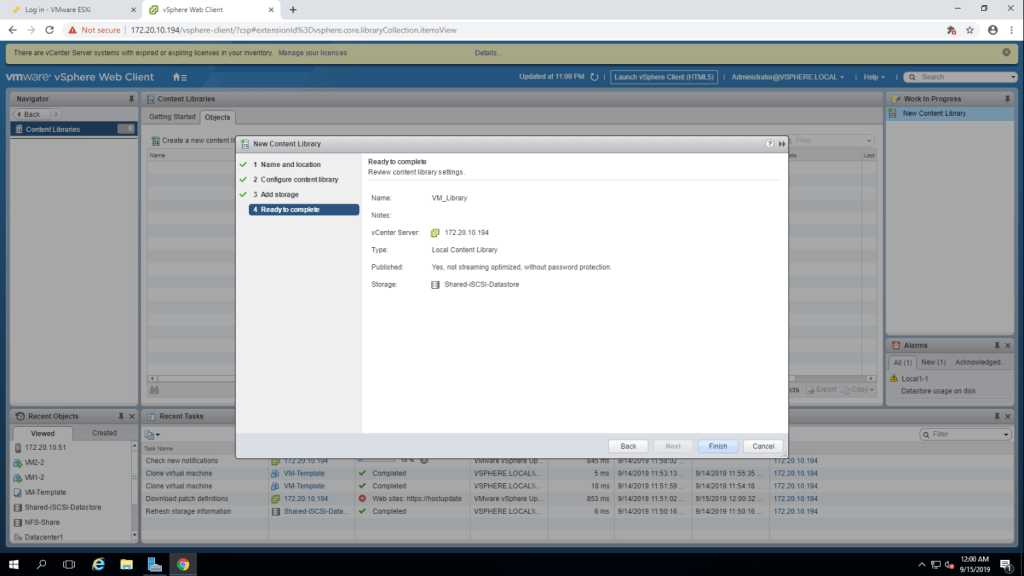
TASK-4 Create a Content Library
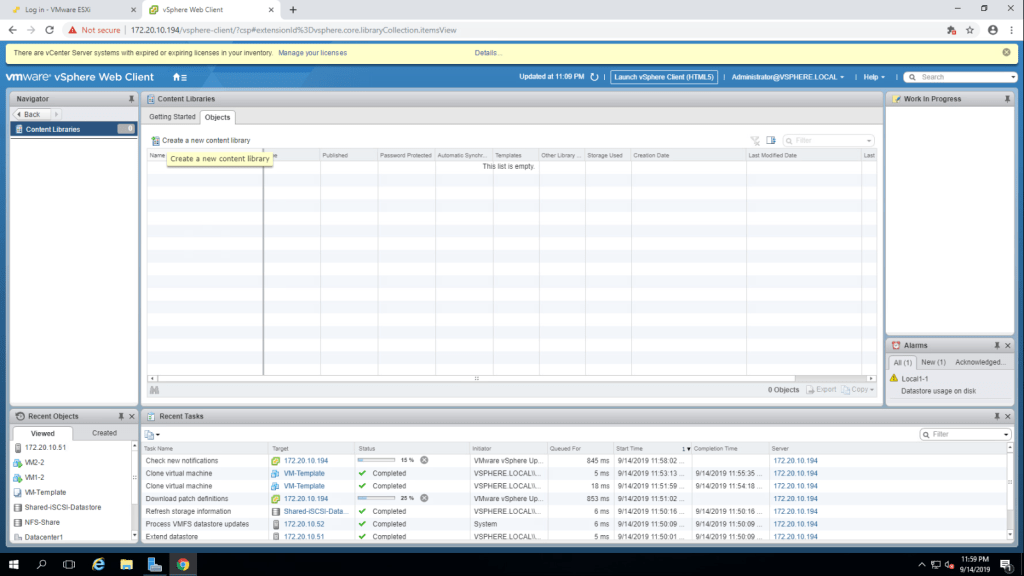
- click on Home button and go to content libraries.
2. Click on create a new content library.
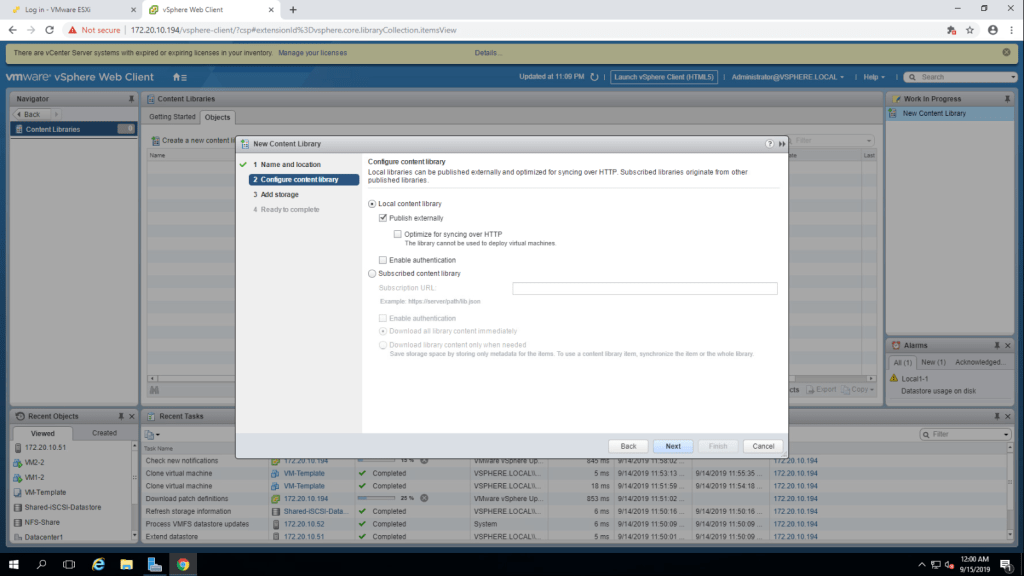
3. Give the name VM_Library for the content library.

5. Select Local content library and check on publish externally then click next.
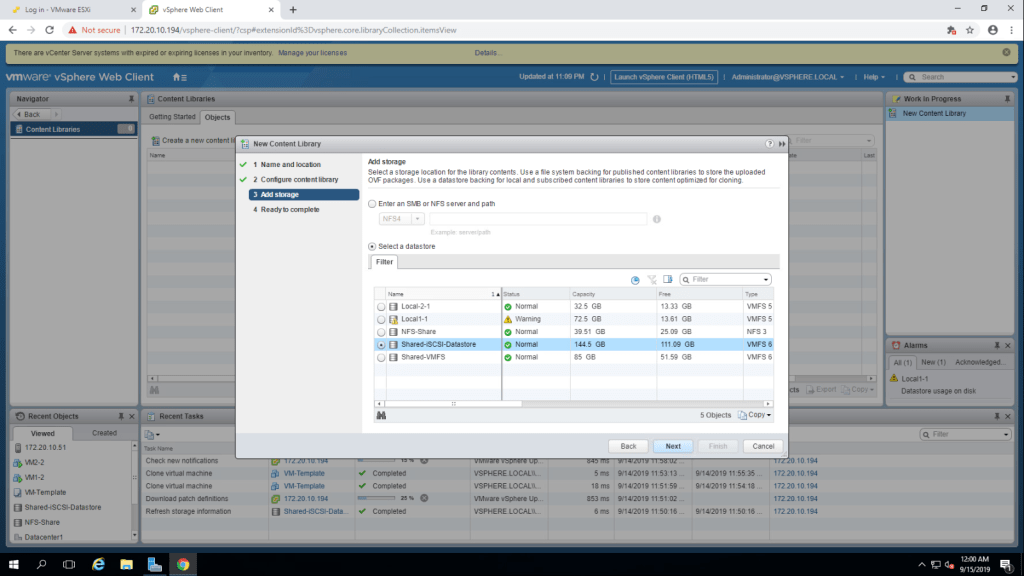
6. Select the iSCSI datastore and click next.
7. Summarize the information and click finish.
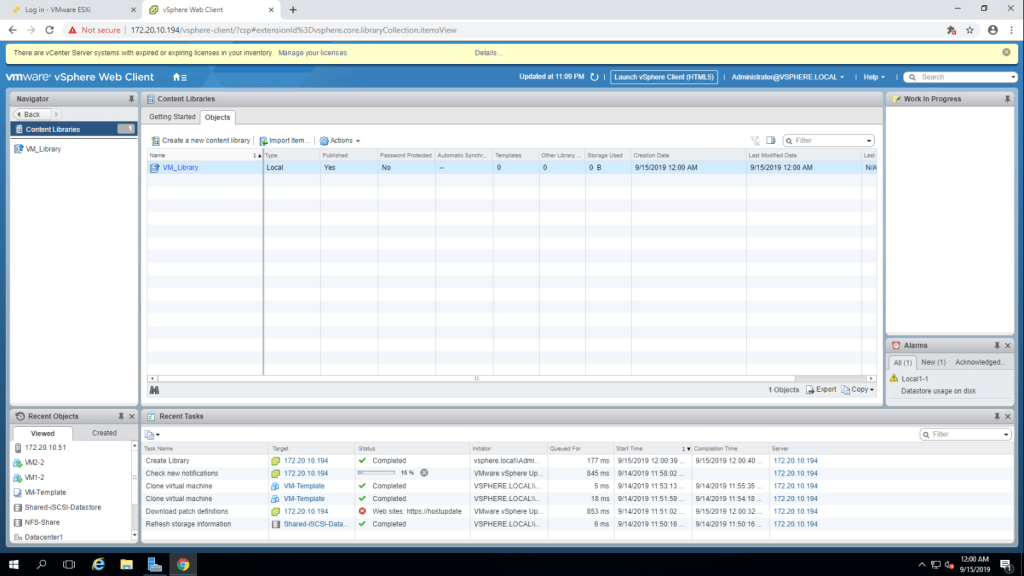
8. The new content library(VM_Library) is visible in content library pane.
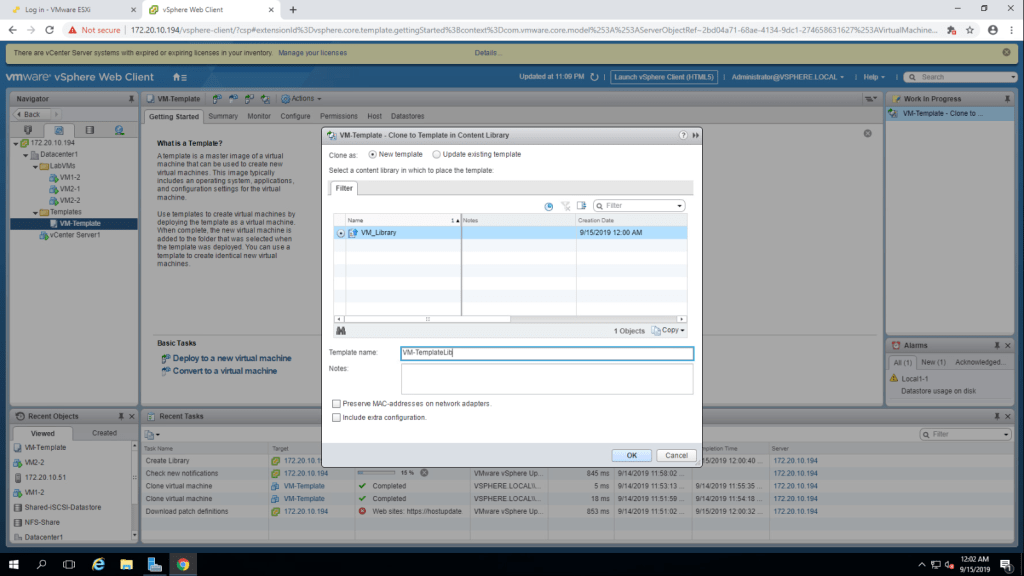
TASK-5 Clone a VM Template to a Template in a Content Library.
- Right click on VM-Template and select Clone to Library.

2.By default new template is selected, in the filter tab select VM_Library and then give a template name as VM-TemplateLib. Then click OK.
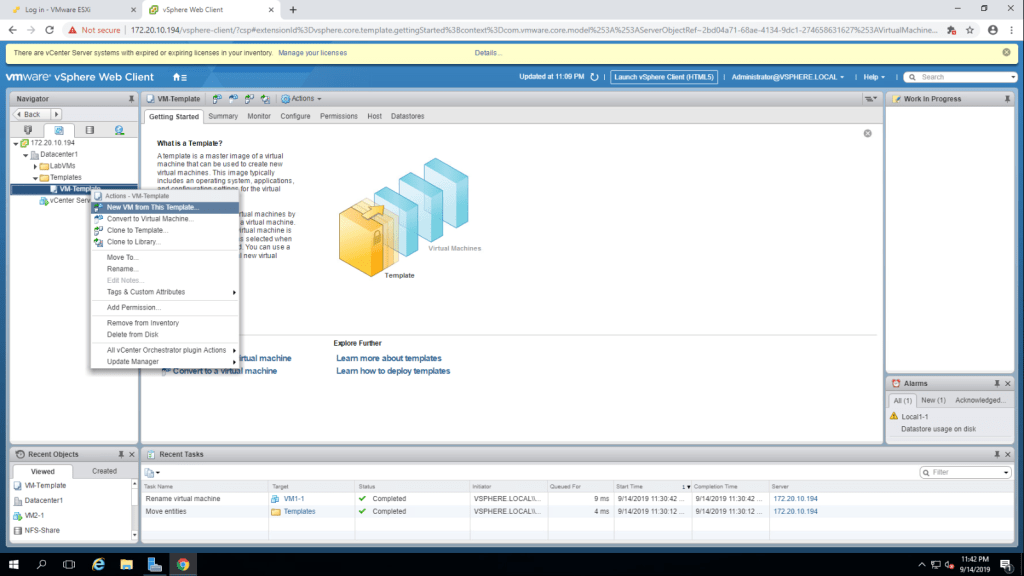
TASK-6 Deploy a virtual machine from a VM Template in the Content Library.
- Right click on VM_TemplateLib and select New VM from this Template.
2. Select the folder LabVMs and click next.
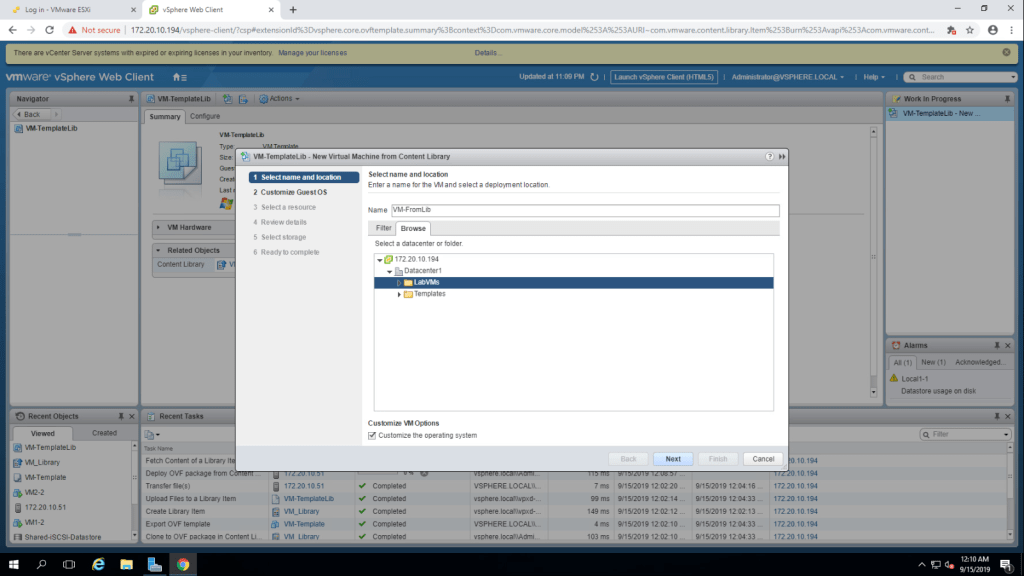
3. In the Customize the guest os page, select VM-CustomSpec and click next.

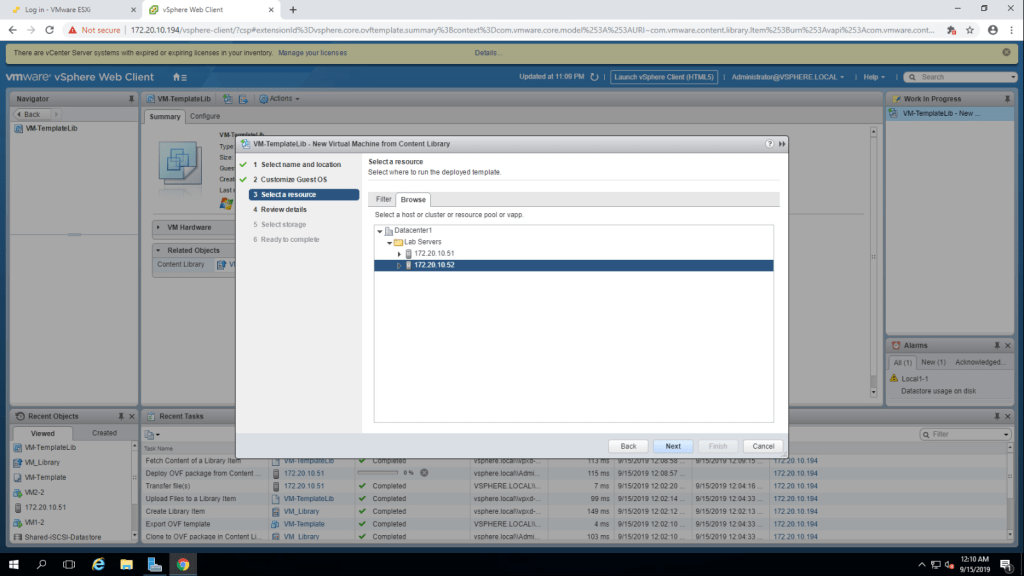
4. select esxi-2 host(172.20.10.52) from expanded Lab Server folder.
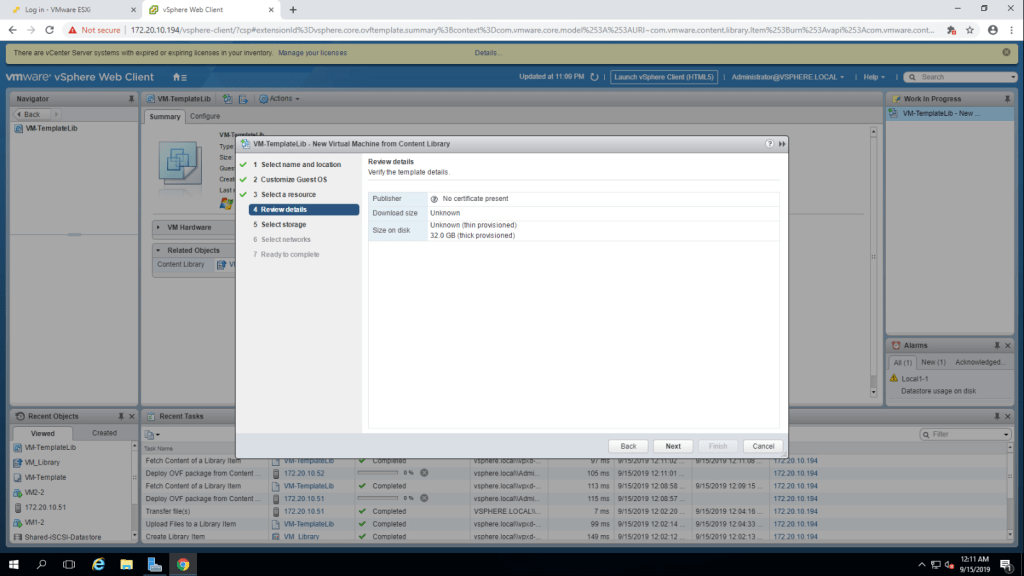
5. Review the summary and click next.
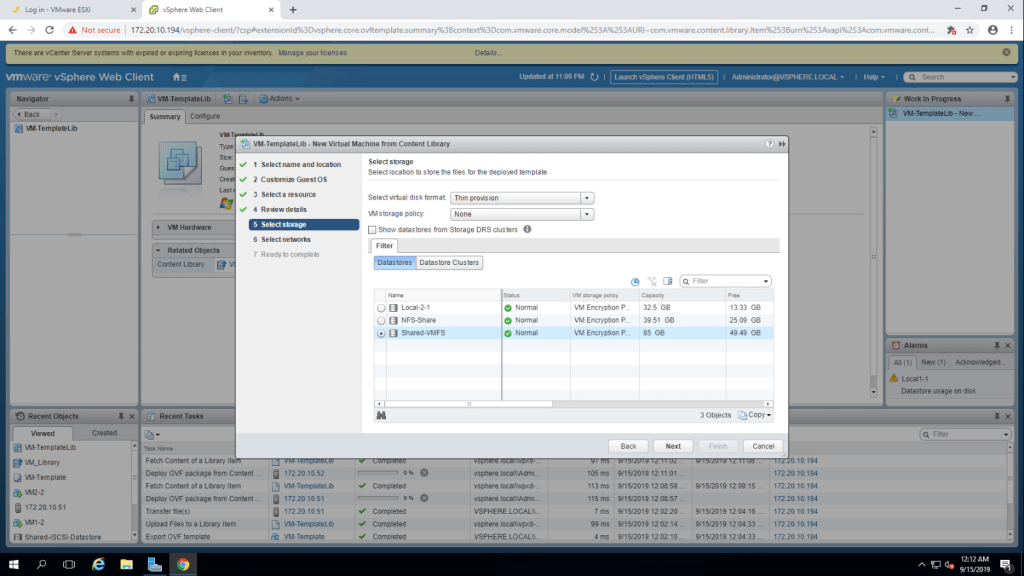
6. Select virtual disk format as ‘Thin Provision” from the drop down menu and in the datastore tab, select datastore and click next.(here I’ve selected Shared-VMFS datastore instead of Local datastore).
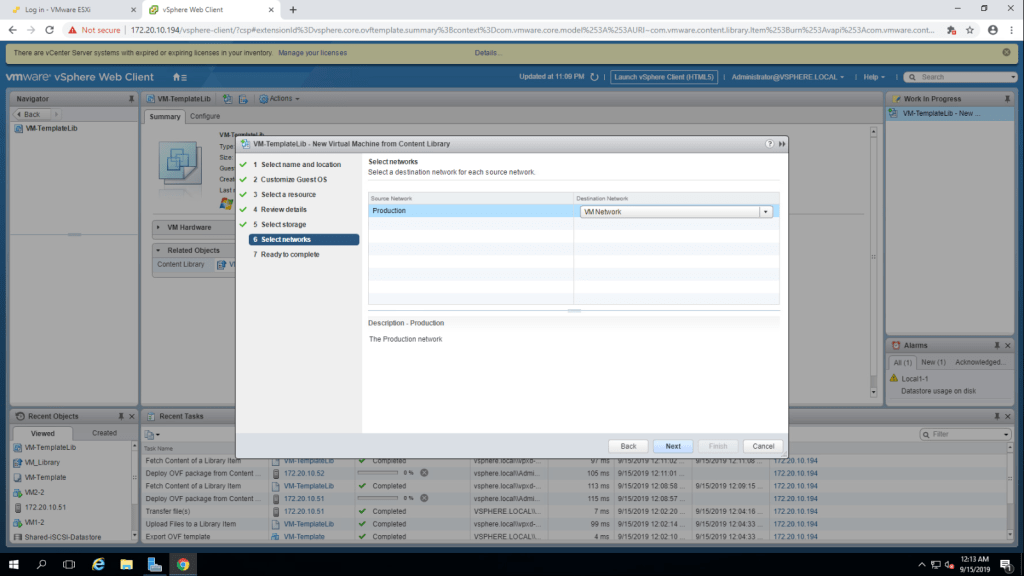
7. Select VM Network in the production and click on next.
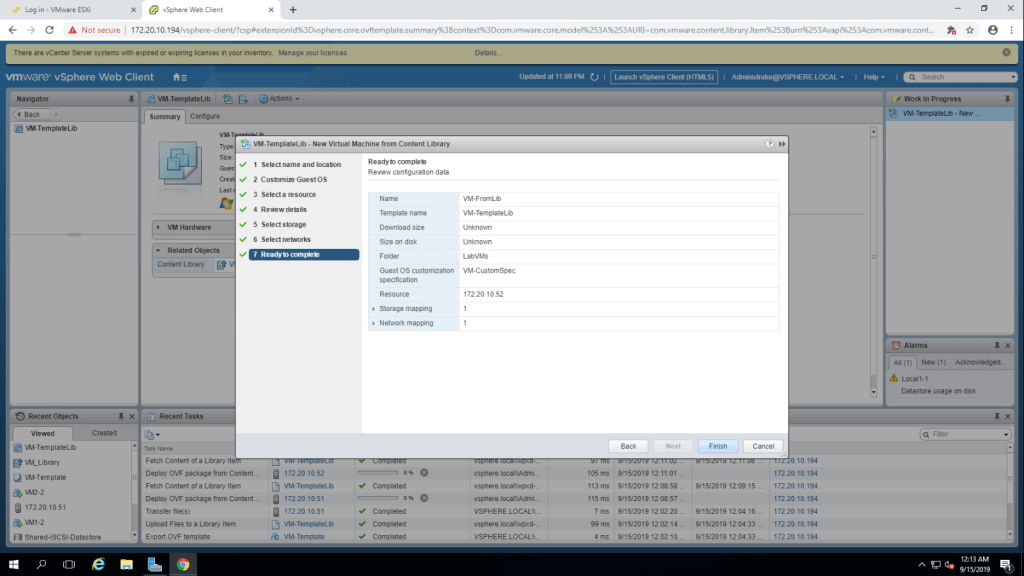
8. Summarize the information and click finish.
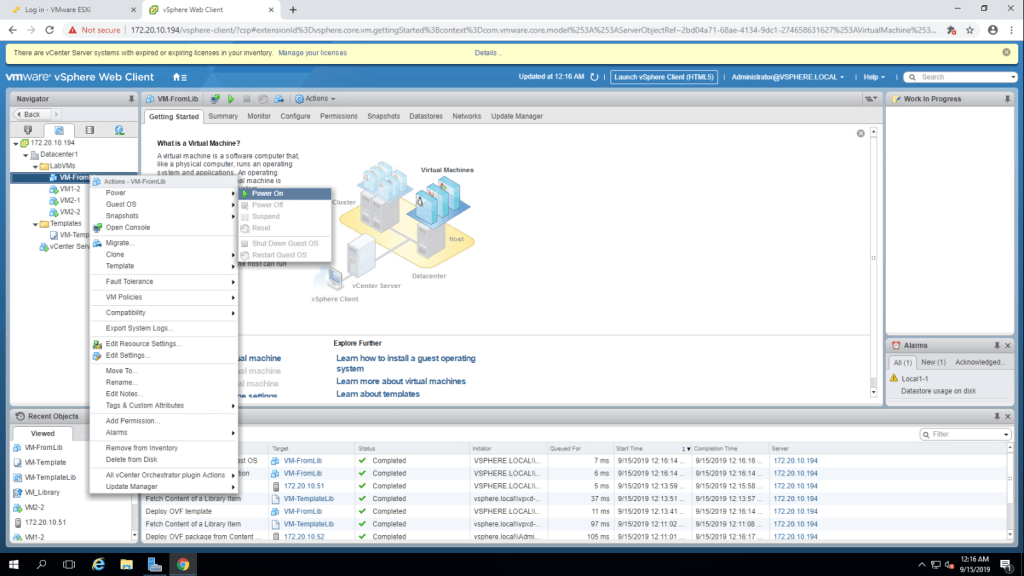
9. Now go to VM and Templates and Power on the virtual machine VM-FromLib.
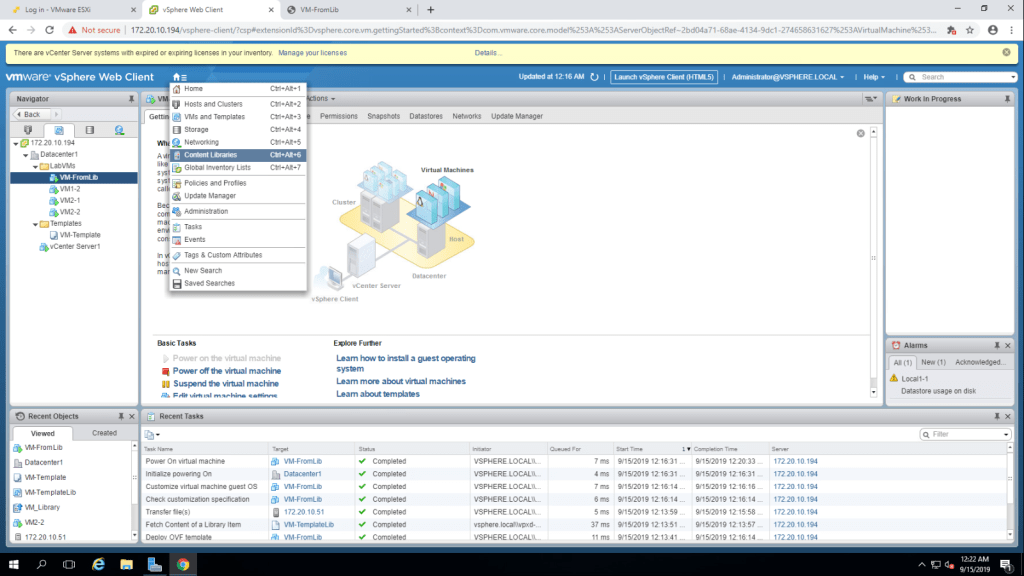
10. Now go to Content Libraries
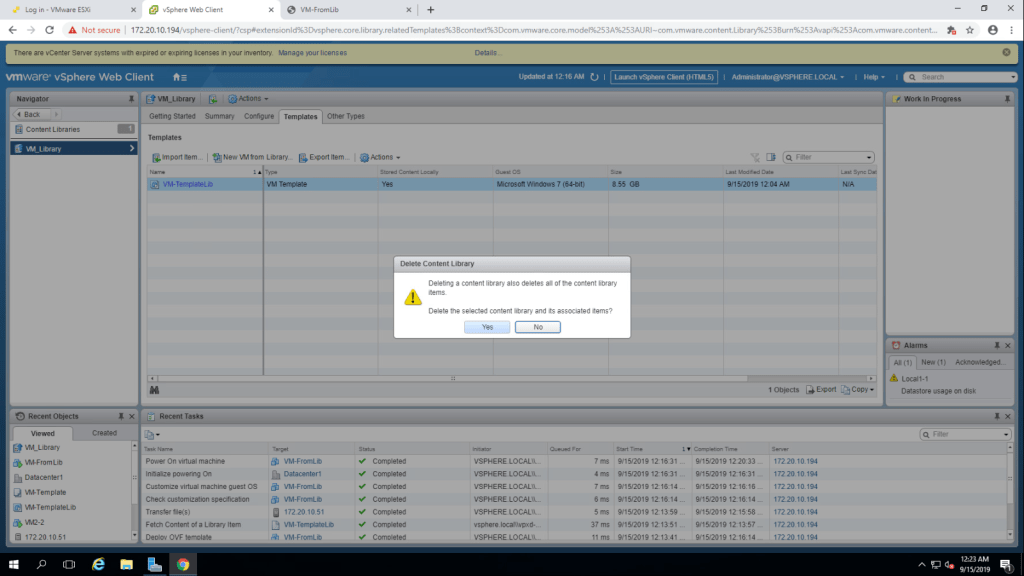
11. Right click on VM_Library and select delete.
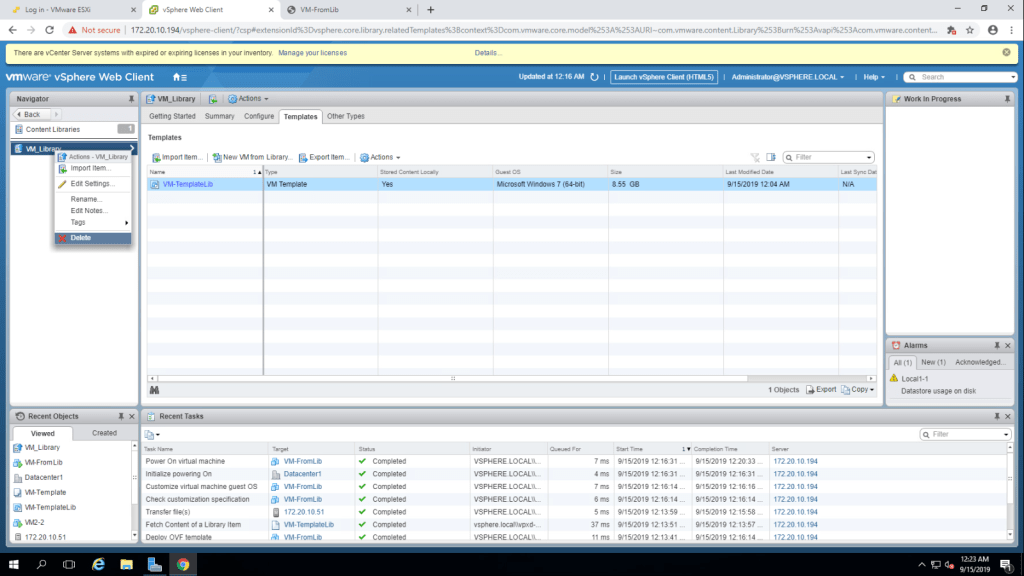
12. Confirm the deletion by clicking yes.
TASK-7 Clone a Powered on Virtual Machine.
- Right click on VM2-1 virtual machine and select clone and then select clone to virtual machine.
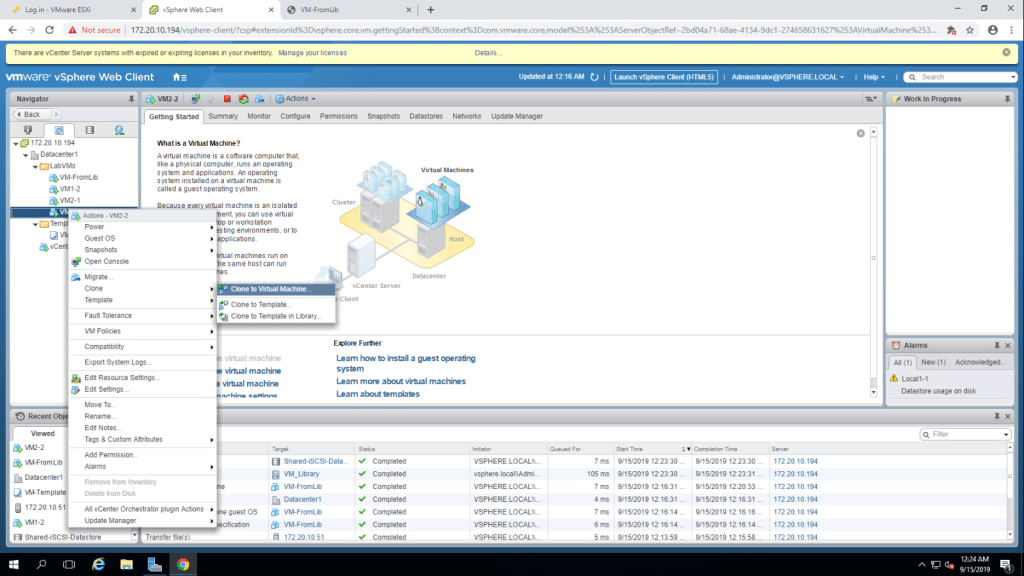
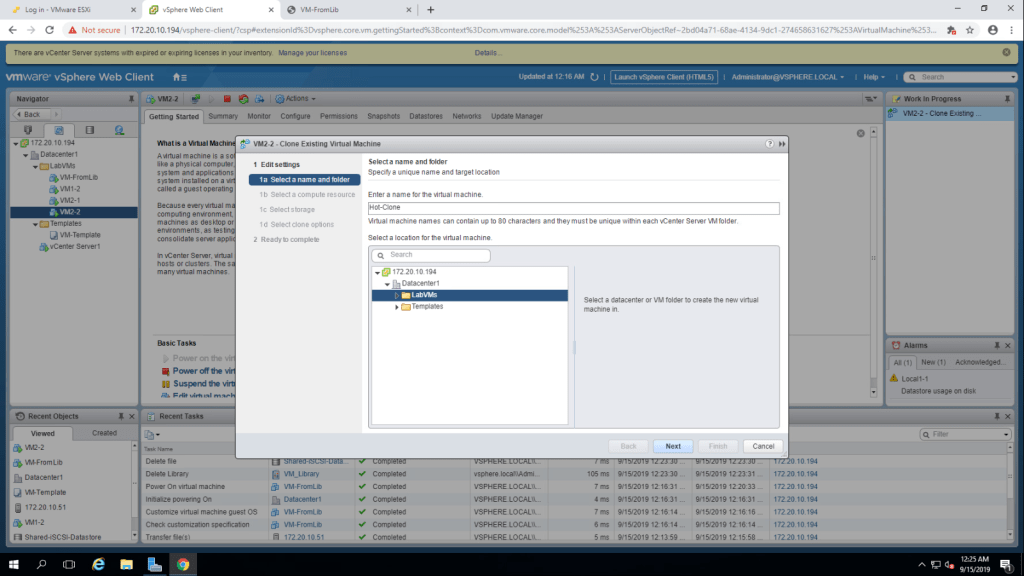
2. Type a name ‘Hot-Clone’ in the rnter name for the virtual machine text-box and select LabVMs as the location and click next.
3. Select 172.20.10.52(second esxi host) in the select computer resource page and click next.
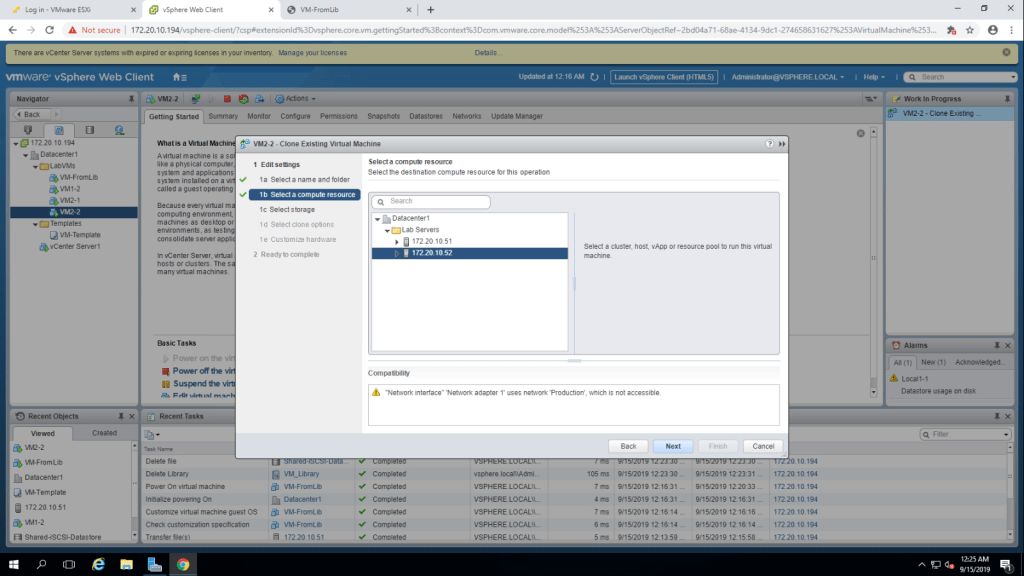
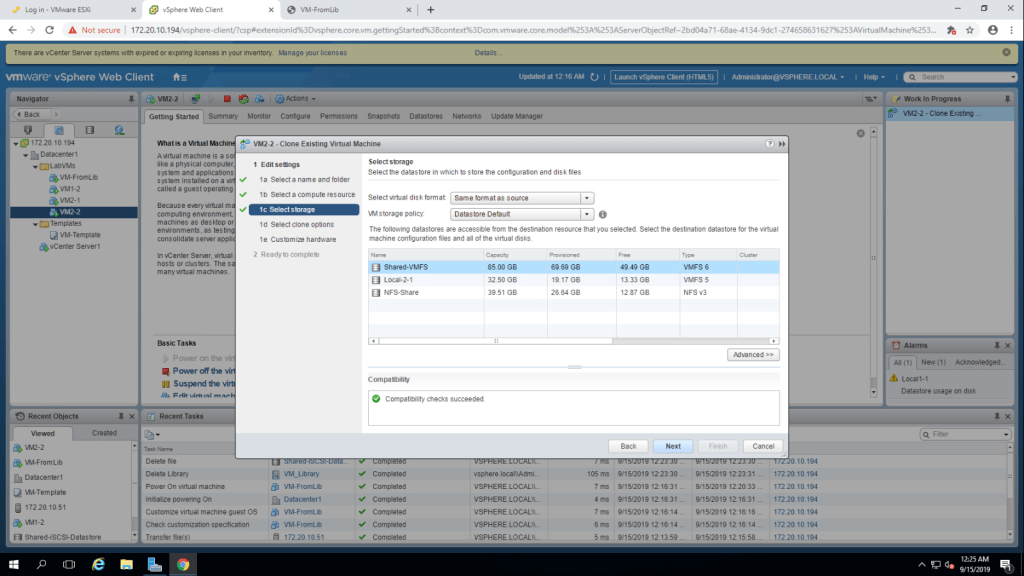
4. Select the storage for clone. here, i am selecting Shared-VMFS datastore.
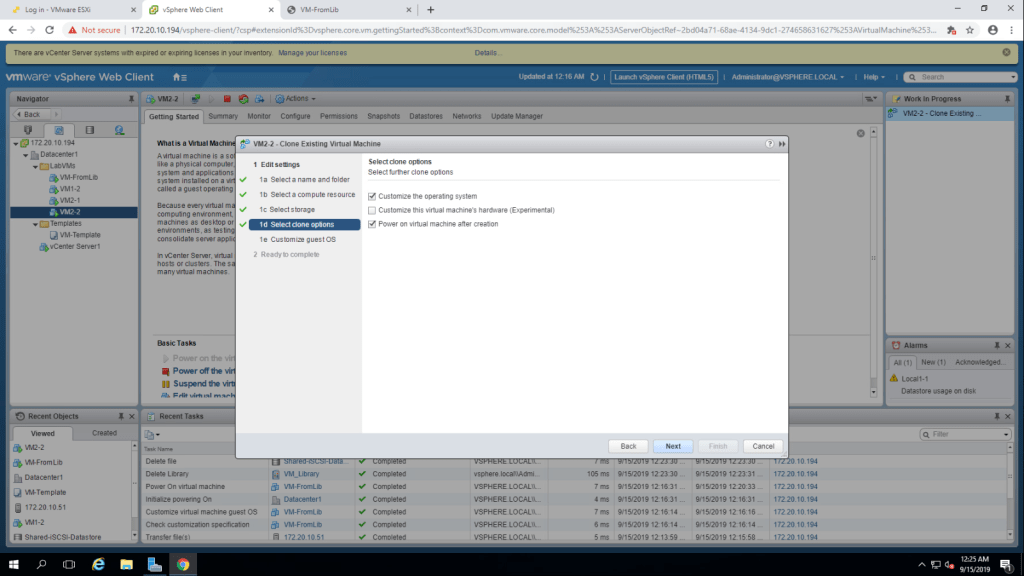
5. Check on the ‘Customize the Operating System’ and ‘Power on Virtual Machine after creation’ checkbox and click next.
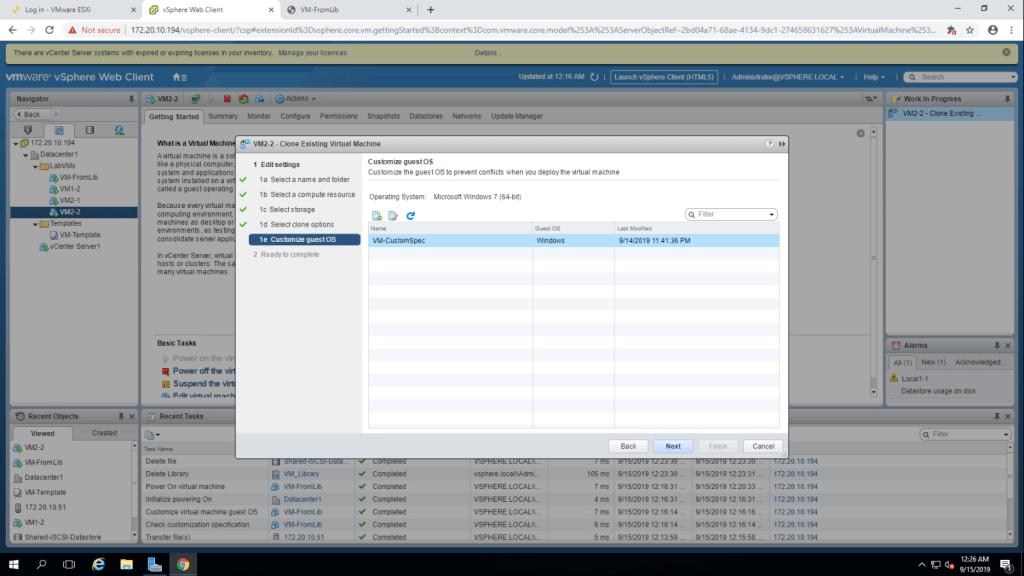
6. Choose VM-CustomSpec and click on next.
7. Summarize the information and click finish.
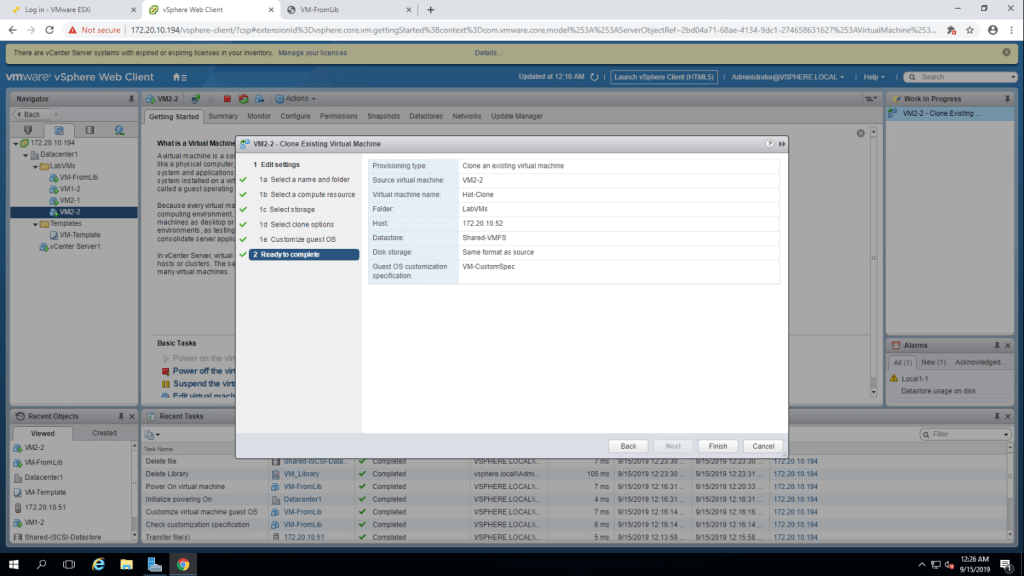
After finishing the clone set-up, launch web console for Hot-Clone Virtual machine and set-up the network location as work network and install VMware tools.
Lab-10 Accessing NFS Storage
TASK-1 Configure Access to NFS Datastore.
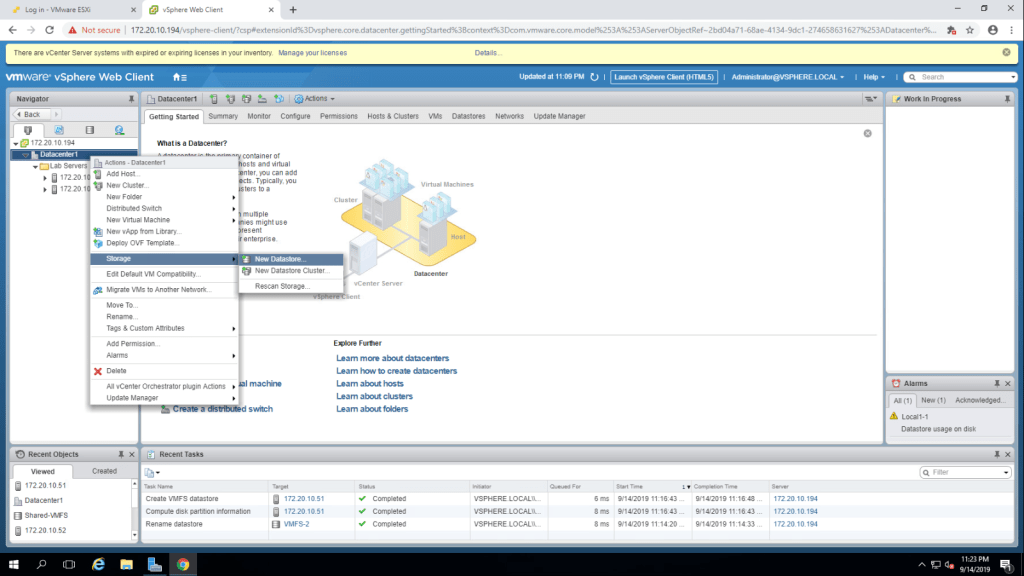
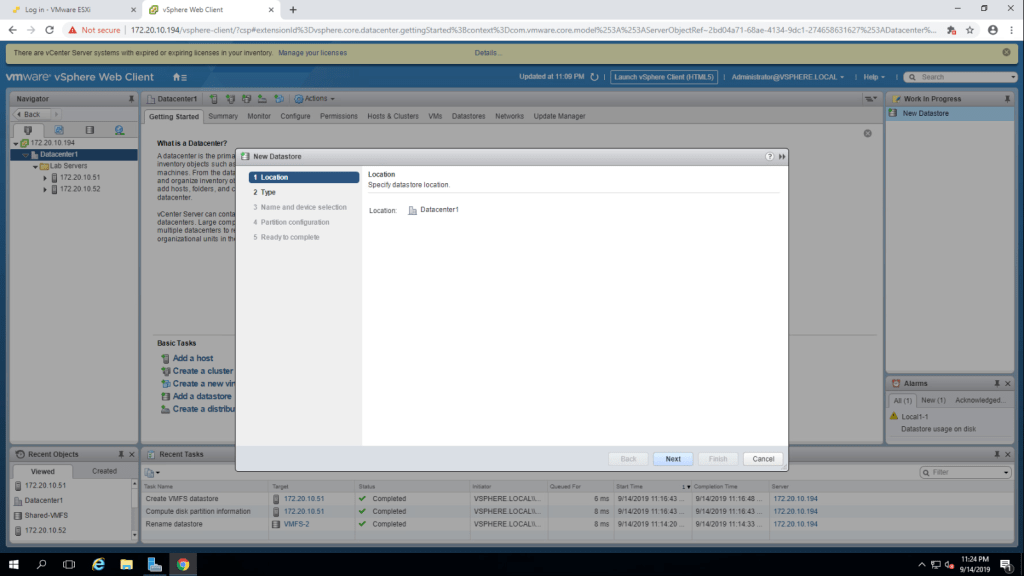
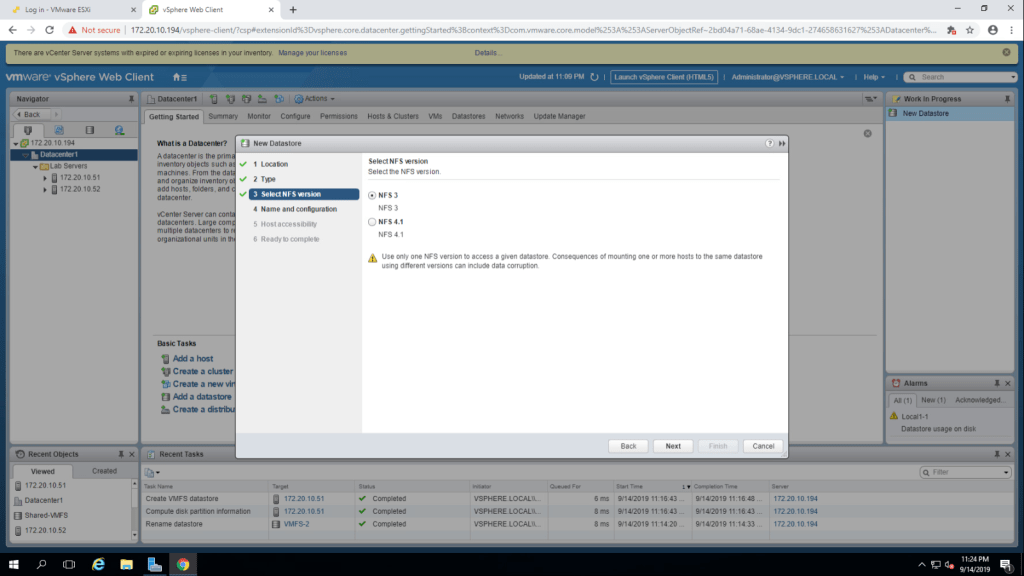
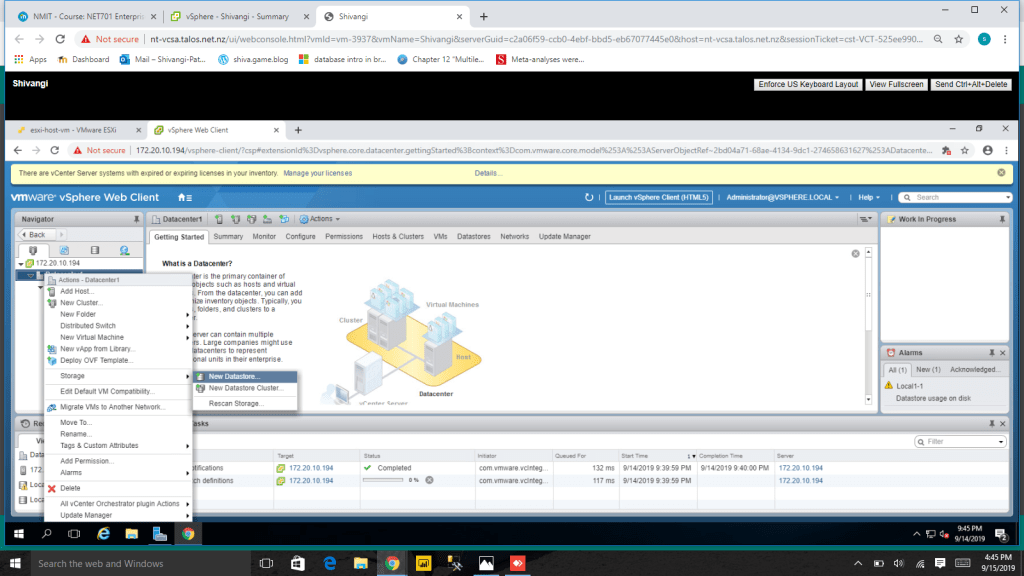
- Right click the Datacenter1 and select storage, then new datastore.
2. Nothing to change in this step,click next.
3. Select NFS datastore
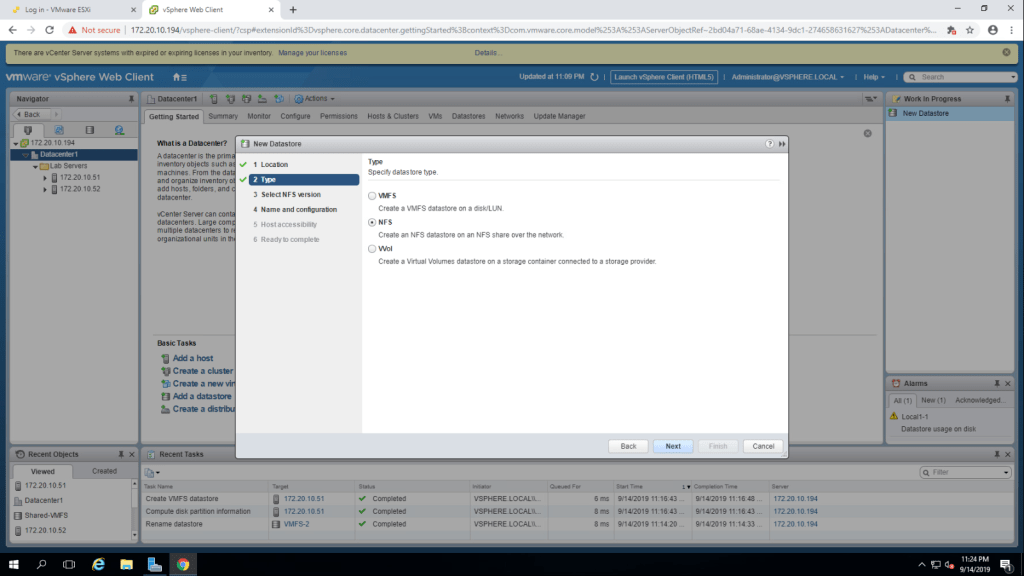
4. It will ask for the version of NFS datastore, select NFS 3 and click on next.
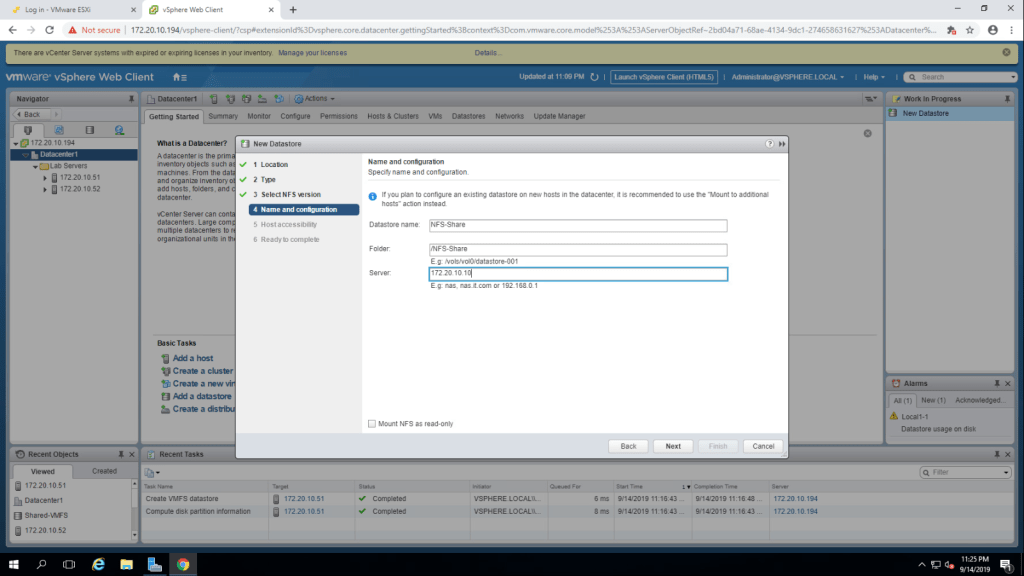
5. Give datastore name. for me, the Datastore Name = NFS-Share, Folder= /NFS-Share and server = 172.20.10.10, click next.
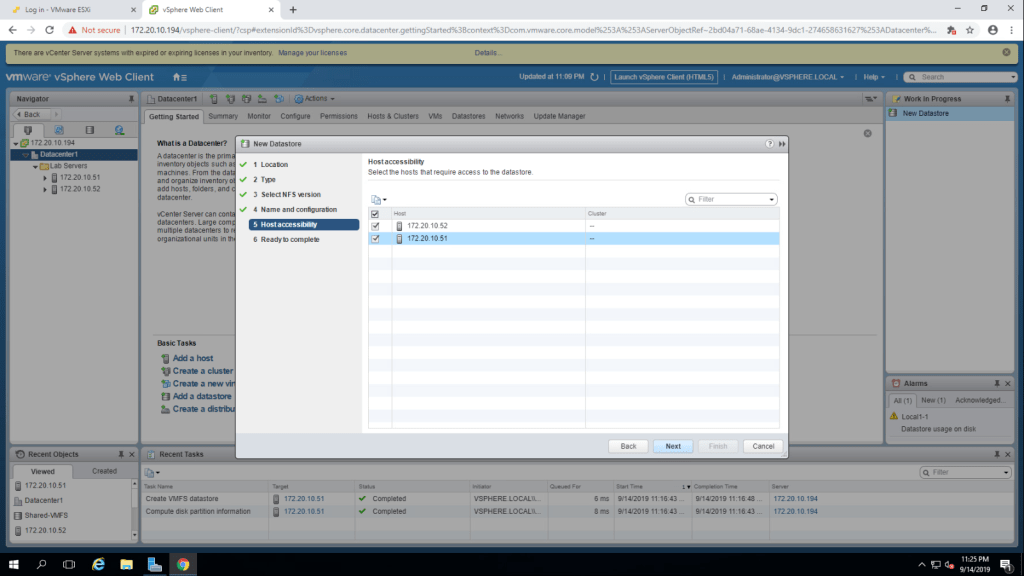
6. Select both esxi host(172.20.10.51 & 172.20.10.52), click next.
7. click on finish.
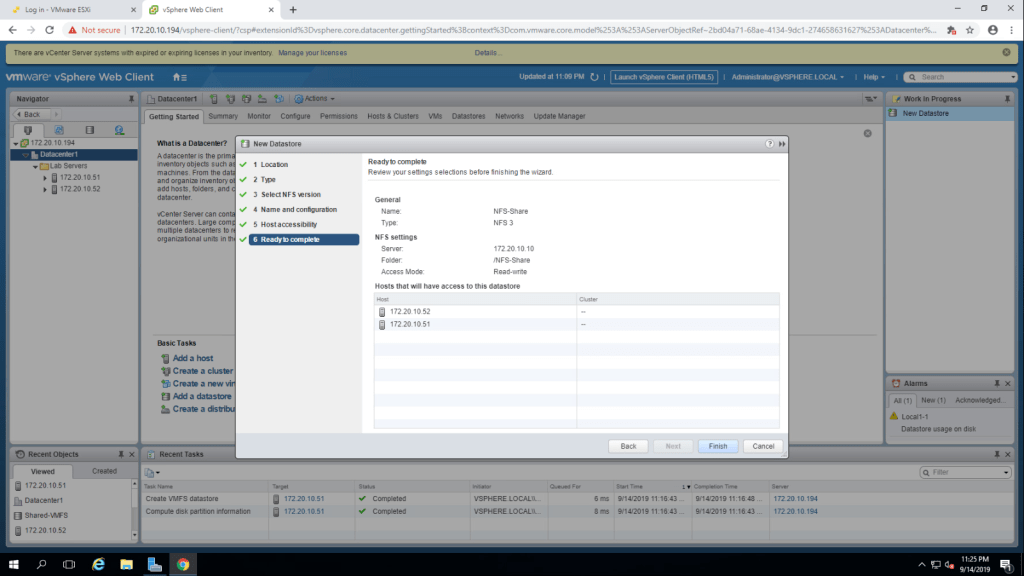
8. You can see the NFS datastore in the inventory.

TASK-2 View NFS STorage Information.
- Go to the summary tab of NFS-Datadtore.
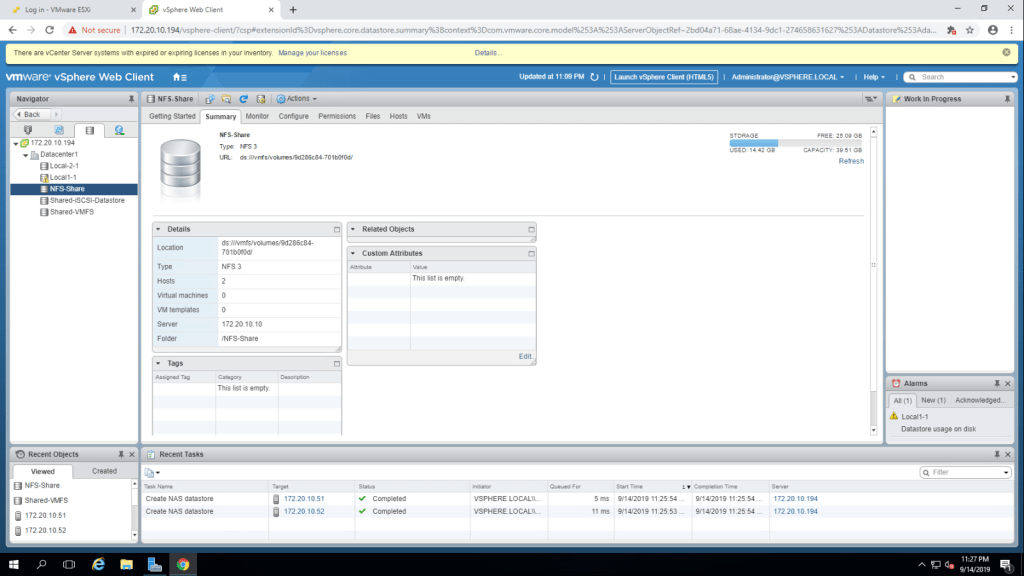
The Datastore Type : NFS 3
The Capacity of the Datastore : 39.51 GB
The free Space of Datastore : 25.09 GB
The used space of Datstore : 14.42 GB
(All this information can be seen in the above screenshot)
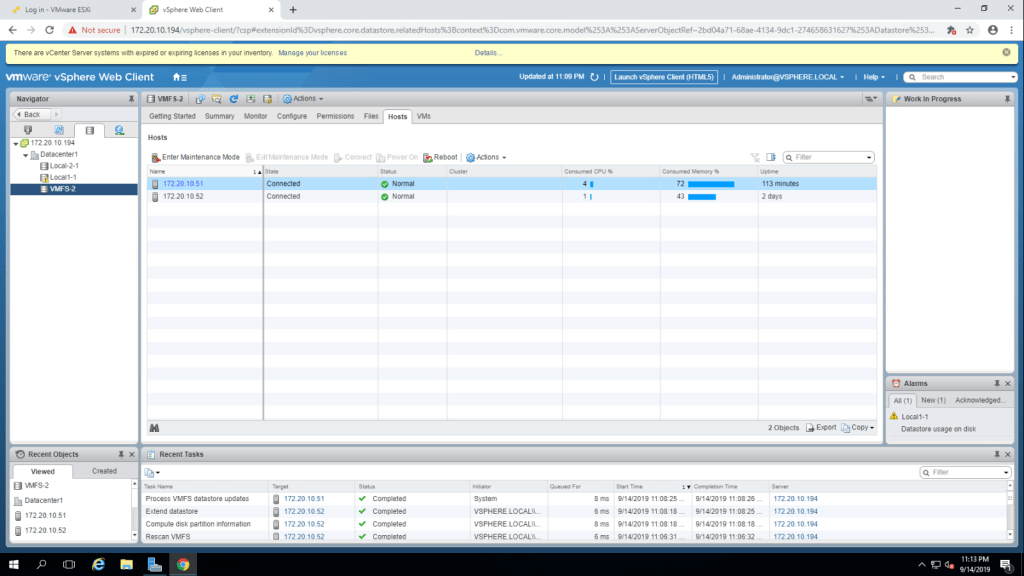
Lab-9 Managing VMFS Datastore
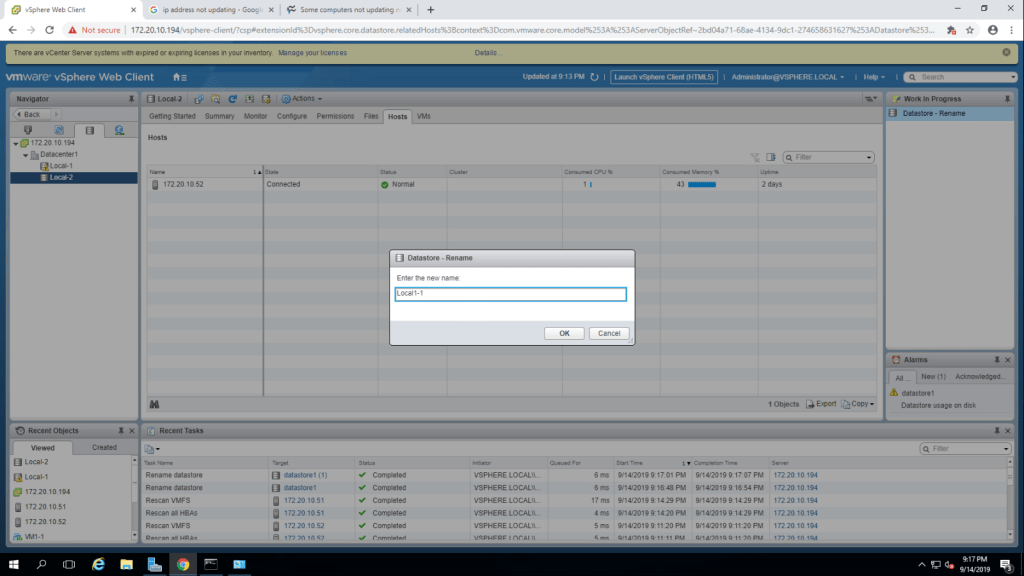
TASK-1 Rename a VMFS Datastore
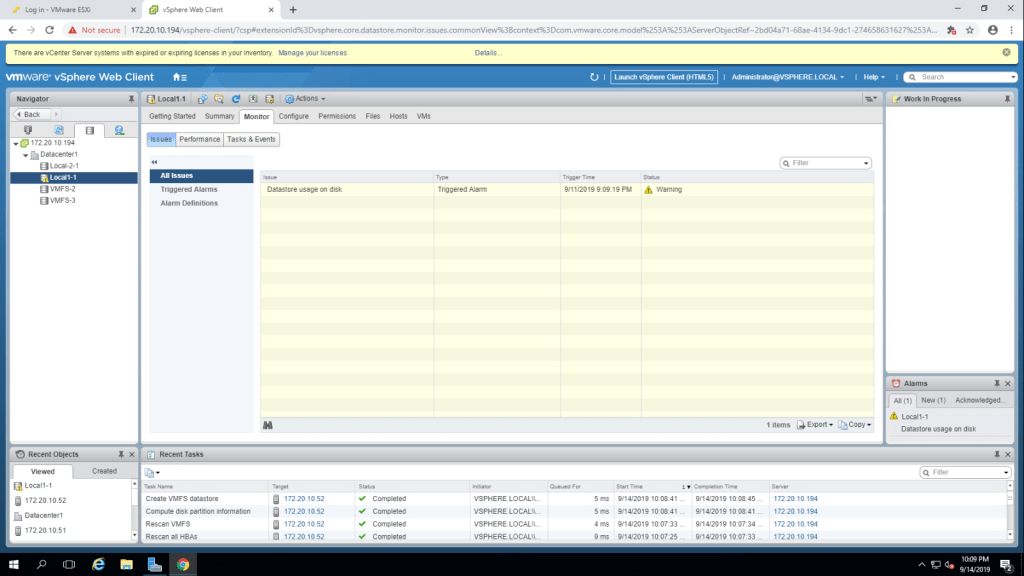
- Right click on the datastore 1(datstore for 172.20.10.51) and select rename option, give the name Local1-1 and click ok.
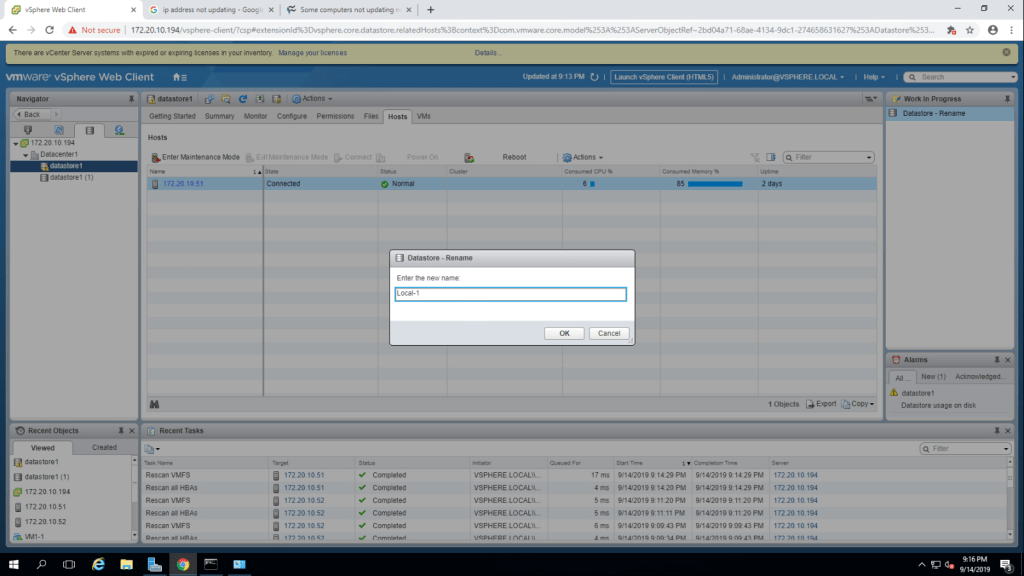
2. Repeat it for the 172.20.10.52 datastore and give the name Local02-1.
TASK-2 Create VMFS datastores for the ESXi Host.
- Right click on datacenter -> storage -> New Datastore.
2. Select VMFS datastore and click next.
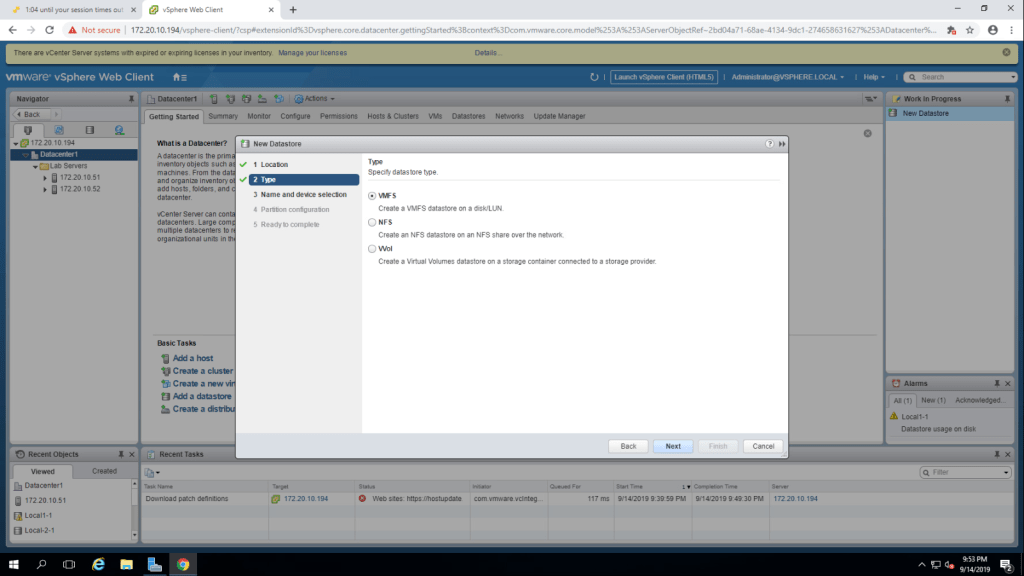
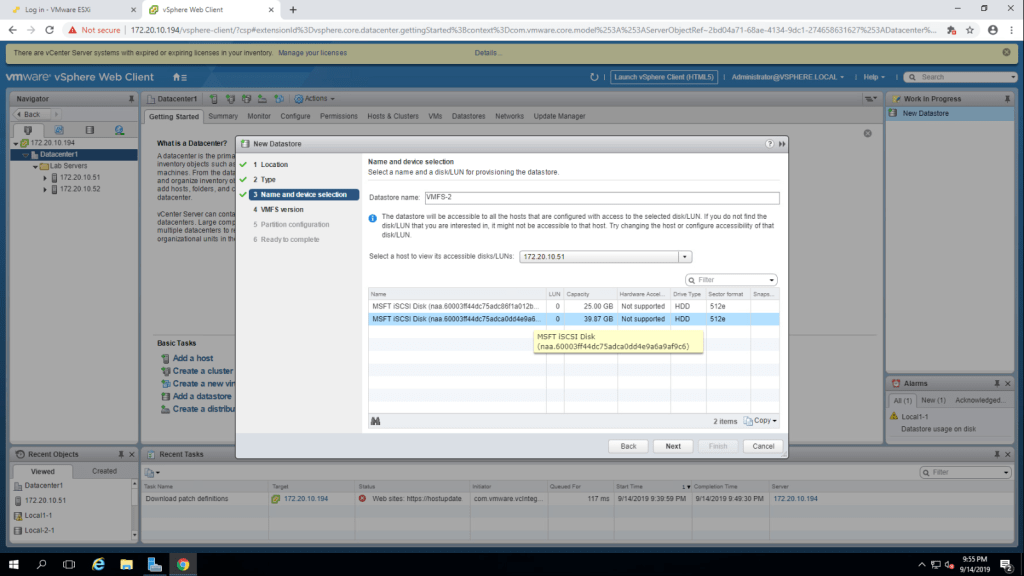
3. In the datastore name field, type VMFS-2, select 172.20.10.51(first esxi host) from the drop down menu of LUNs, after that select second LUN from the list and click next.
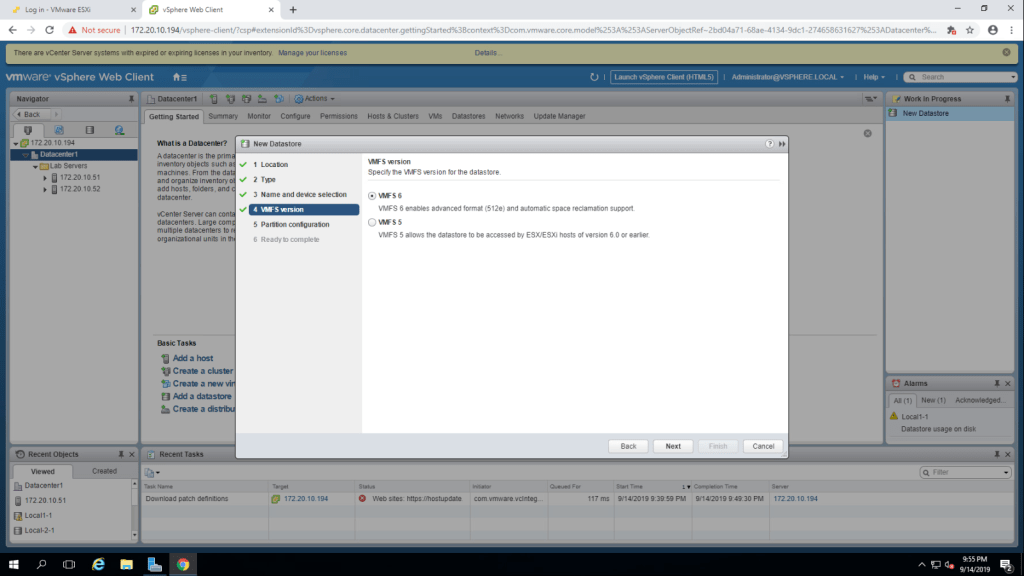
4. select VMFS 6 version and click next.
5. In this step, play with the Datastore size and then click next.
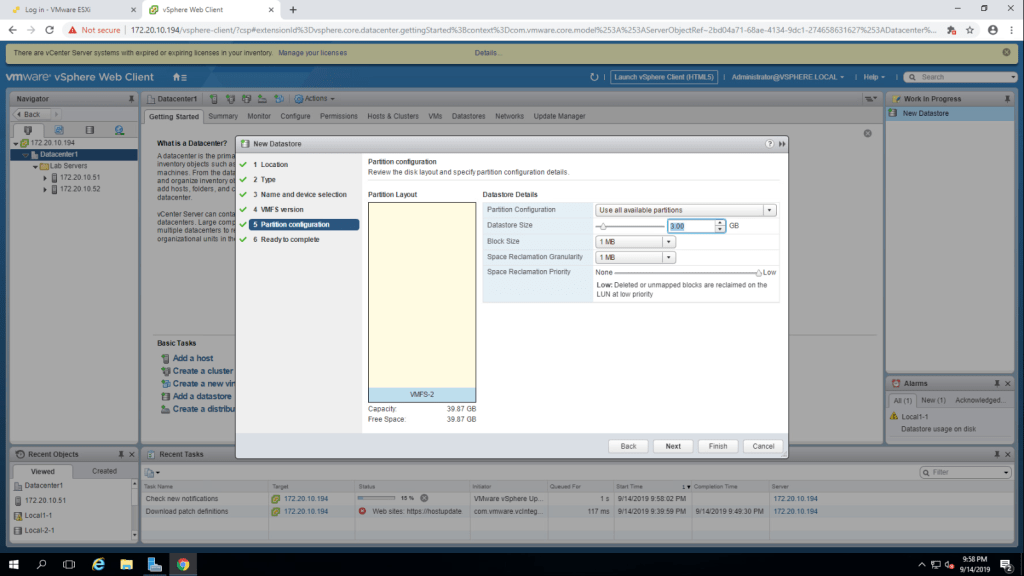
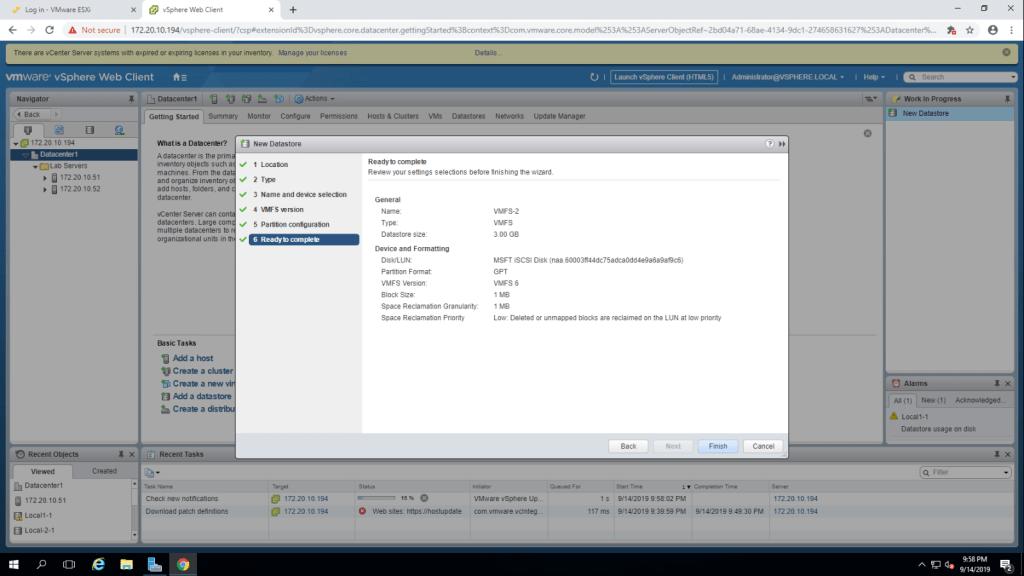
6. Review the information and click on finish.
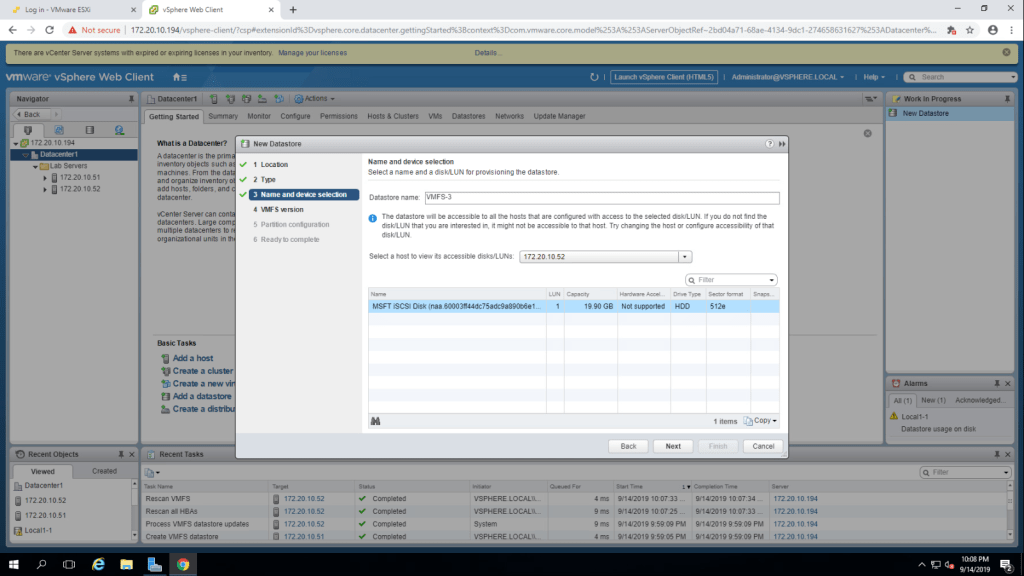
7. Same way, Create VMFS-3 for 172.20.10.52(second esxi host) and click next.
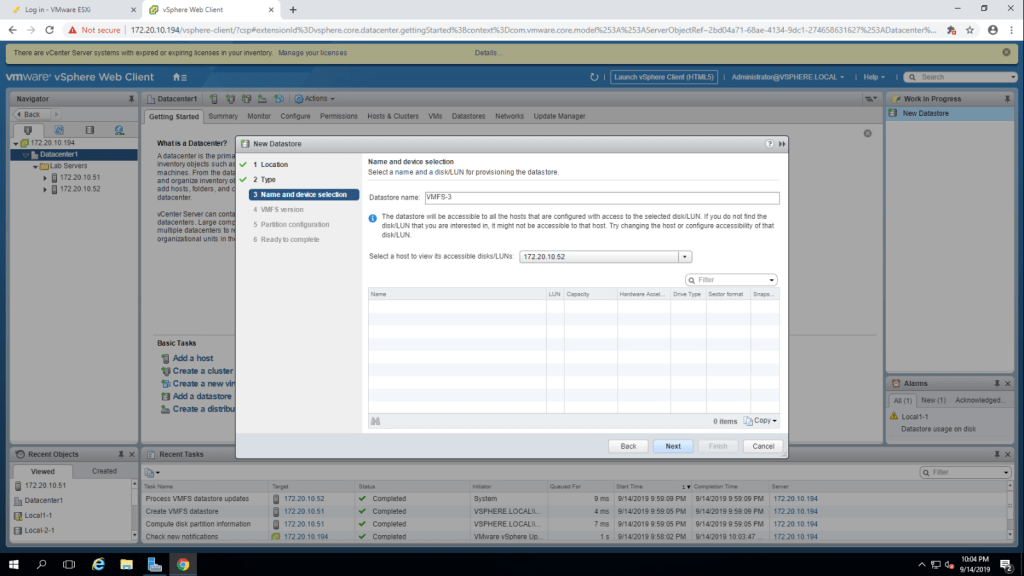
8. Select LUN according to the esxi host and click next and follow the steps same as the above VMFS datastore creation.
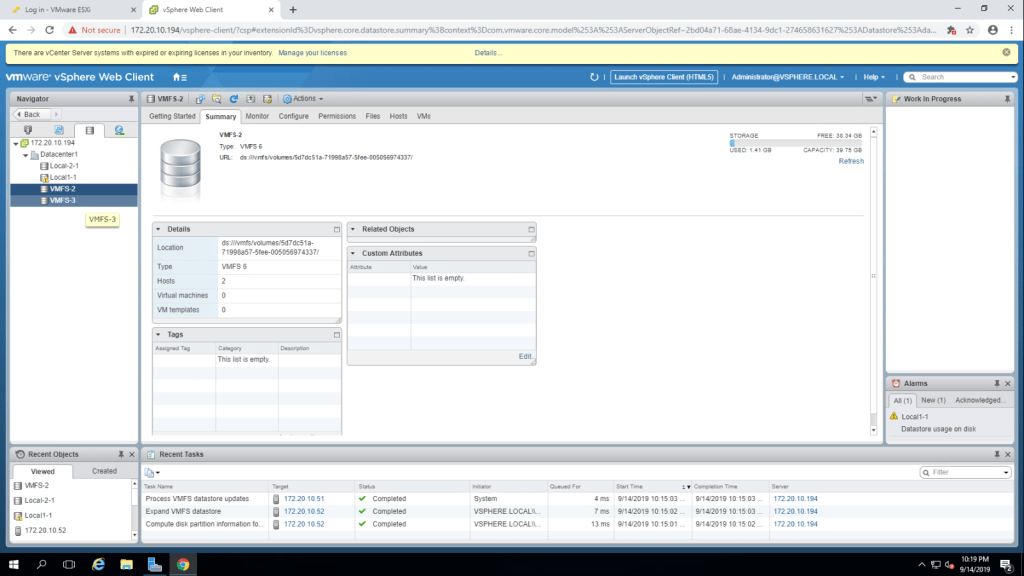
9. The datastores , VMFS-2 and VMFS-3 is listed in the inventory.
10. Summarize the information of VMFS – 2 from summary tab.
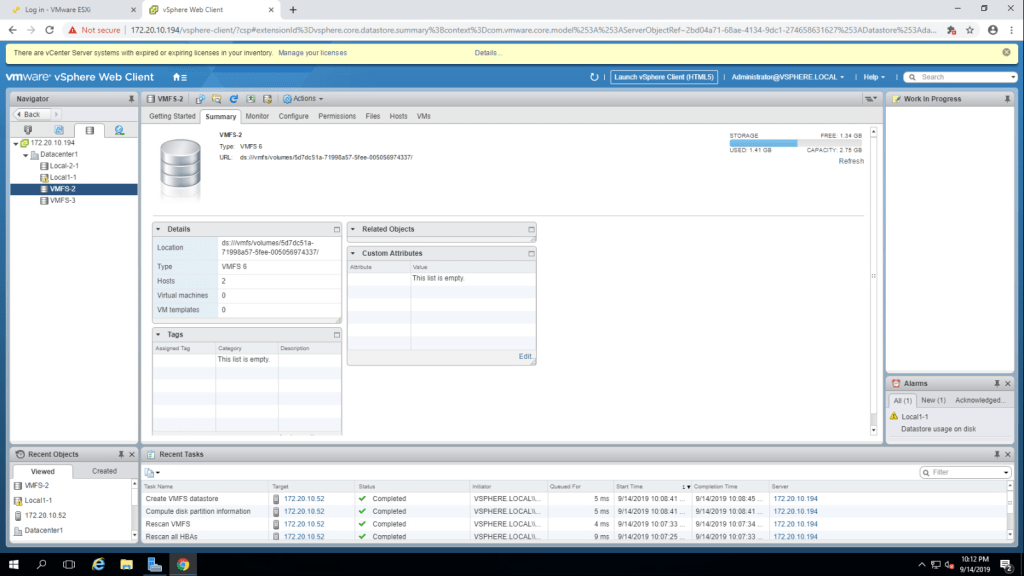
The Storage Capacity of VMFS-2 is 2.75 GB.
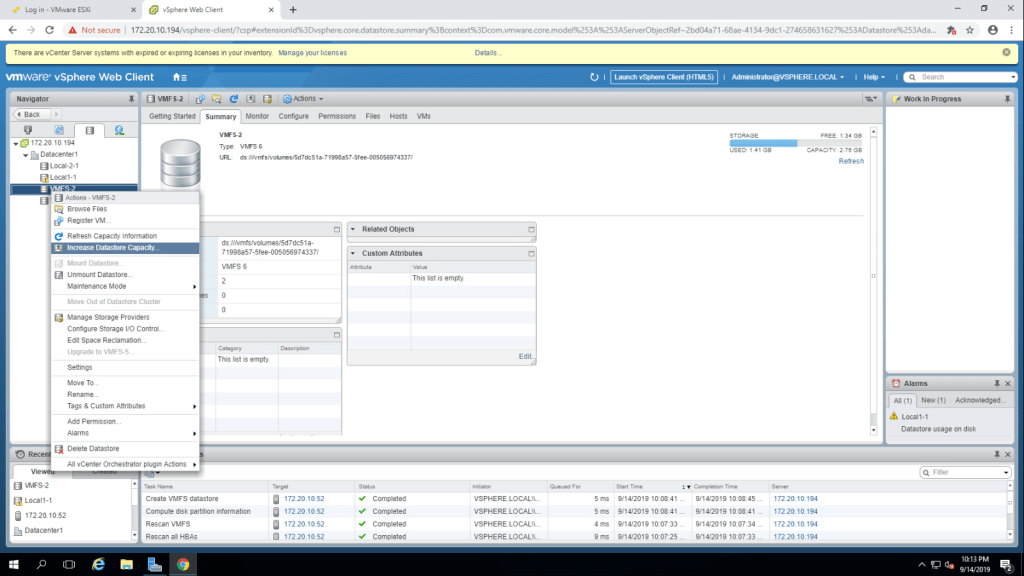
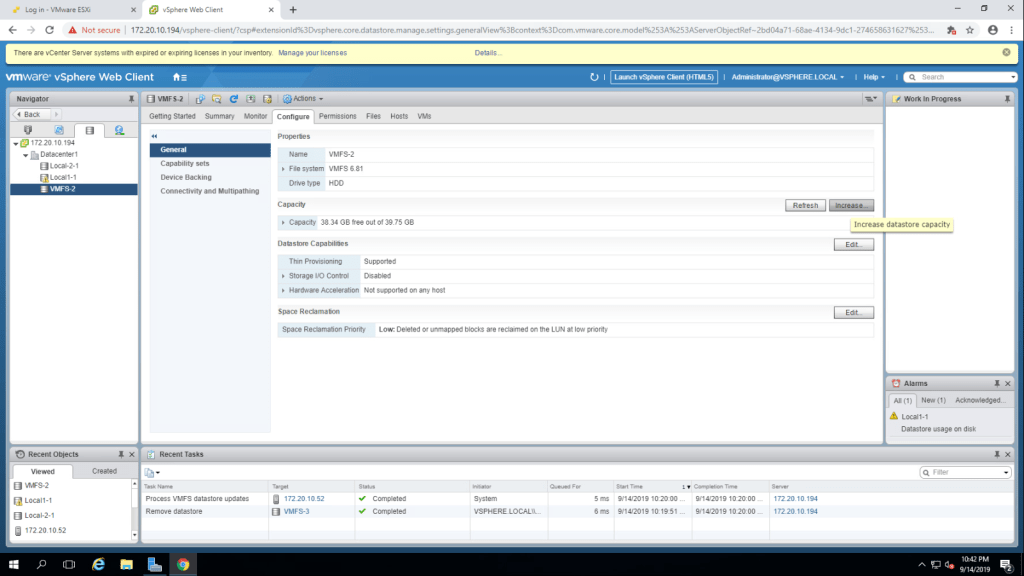
TASK-3 Expand a VMFS Datstore to Consume Unused space on a LUN.
- Right click on VMFS-2 datstore and select Increase Datastore Capacity.
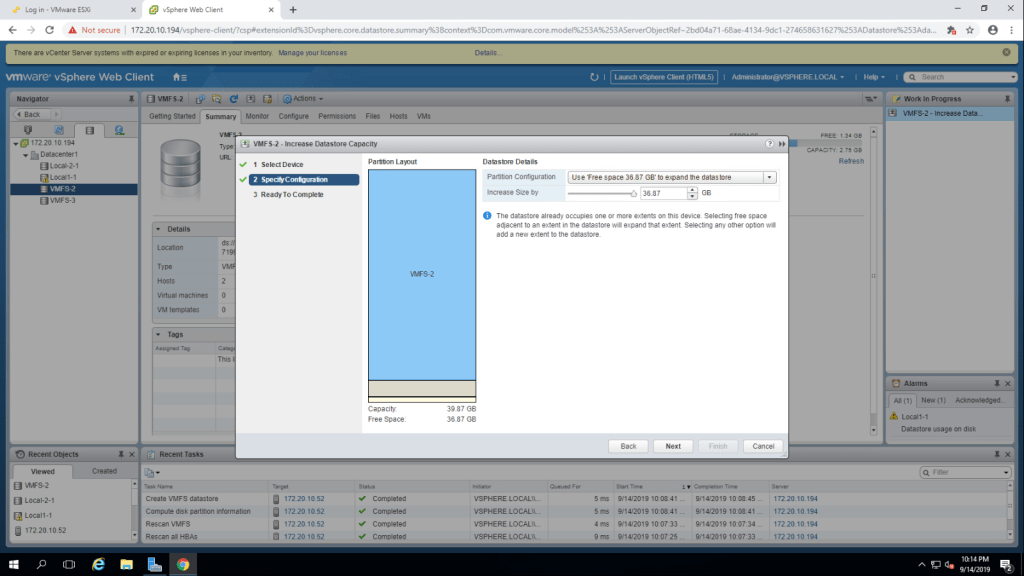
2. Select a LUN and click next.

3. In Partition Configuration, select Use Free Space 36.87 GB to expand the datastore from drop down menu and click next.
4. Summarize the information and click on finish.
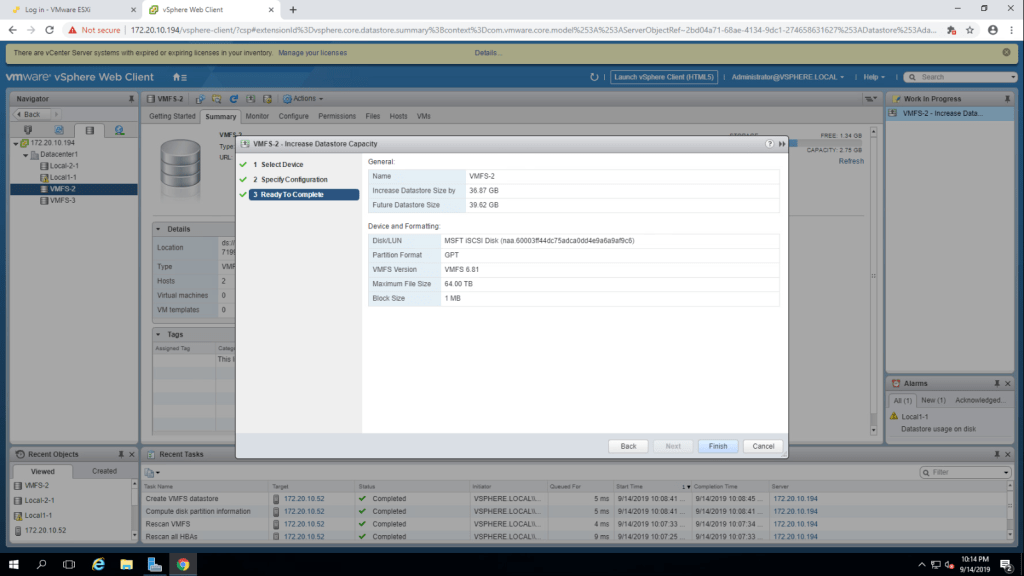
5. Go to the Summary tab, and review the information about VMFS-2.
The Original Capacity was 2.75 GB and after the increase of capacity it is 39.75 GB in my case.
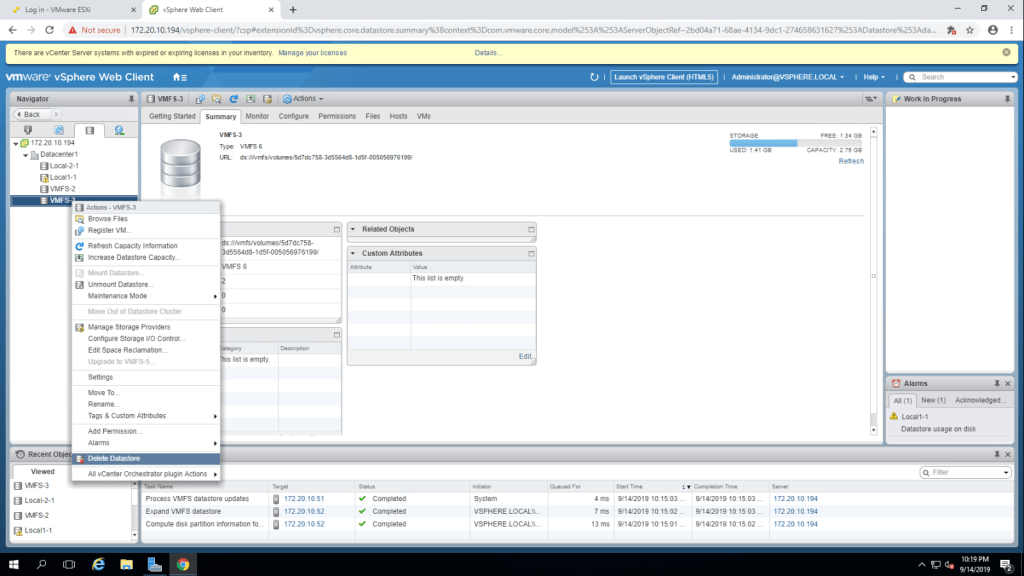
TASK-4 Remove a VMFS datastore.
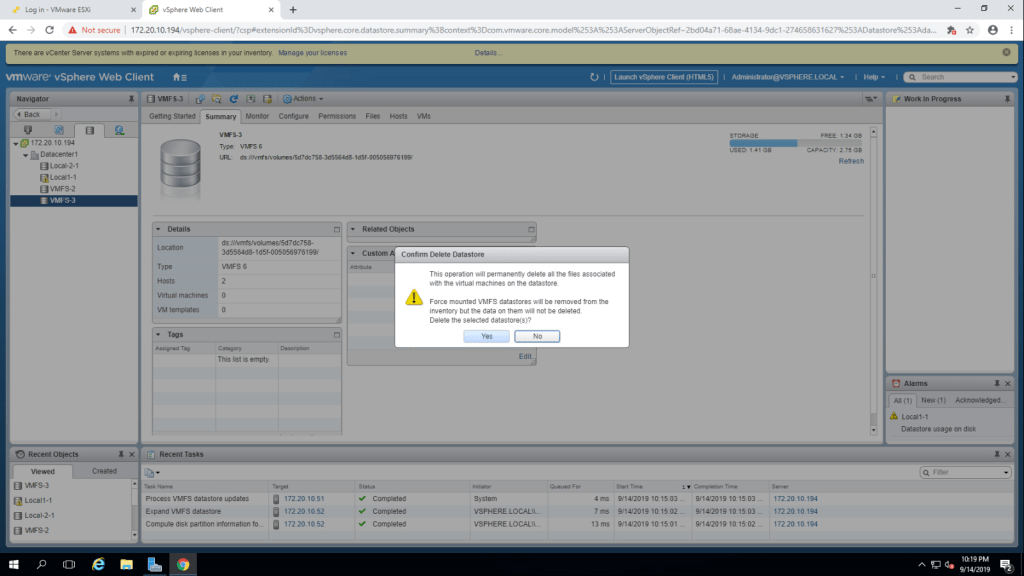
- In the datstore pane, right click on VMFS-3 datstore and click on delete datastore.
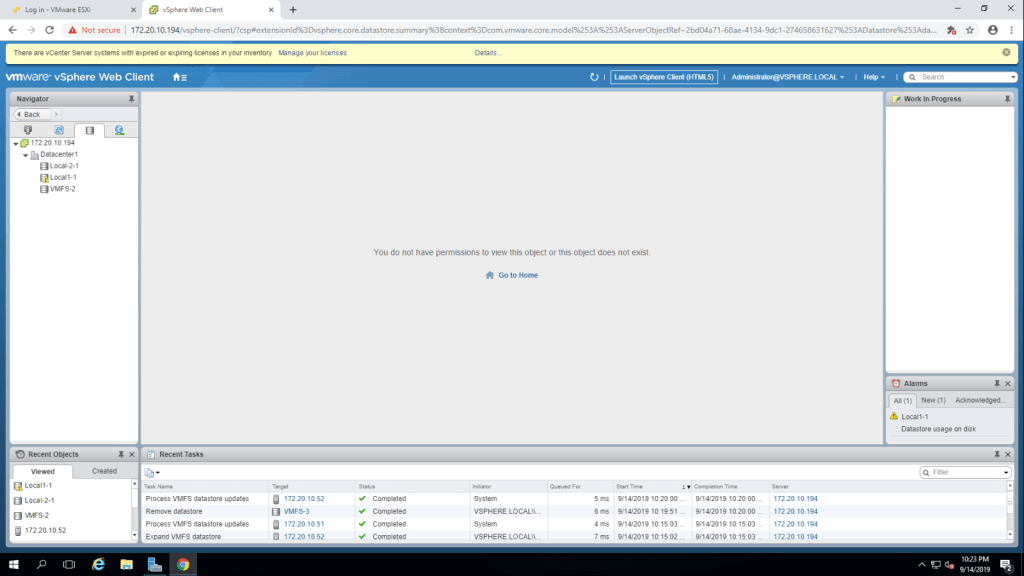
2. Confirm the deletion by clicking on yes.
3. Now, you can see that the datastore is removed from the inventory.
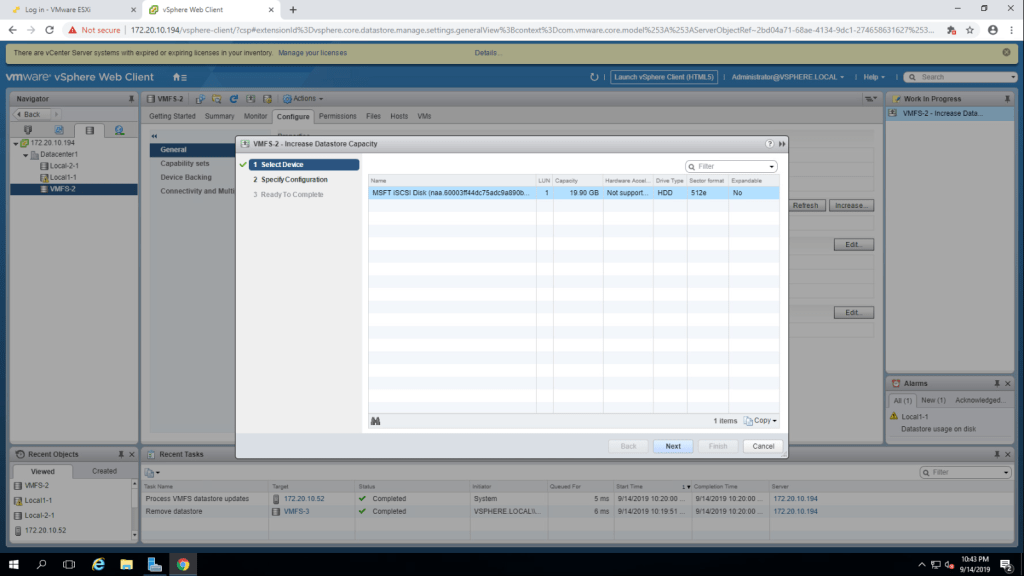
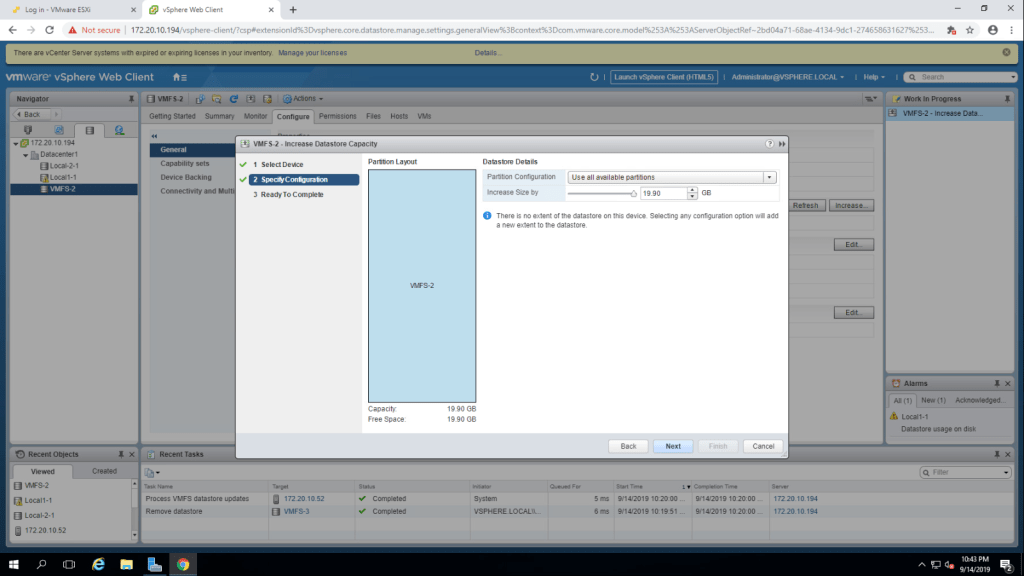
TASK-5 Extend a VMFS Datastore.
- Go to the configure tab of VMFS-2 -> General -> Increase.
2. Select a LUN and click next.
3. select use free space and click next.
4. In the device backing screen, the LUNs are listed. and click on summary and the value for total capacity is 39.87 GB.
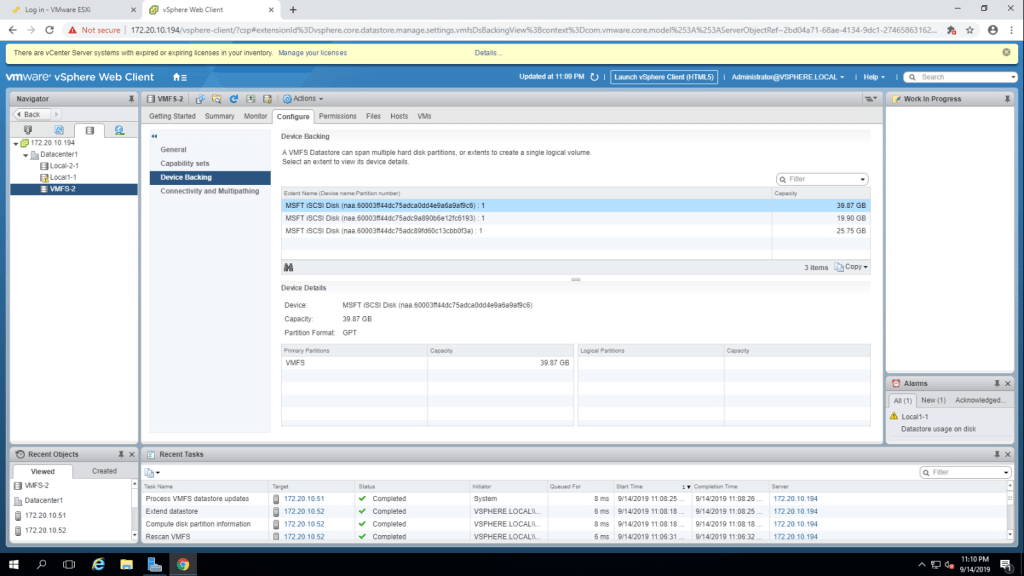
5. Go to storage tab and click on hosts tab in the middle pen and check that both the esxi are connected.
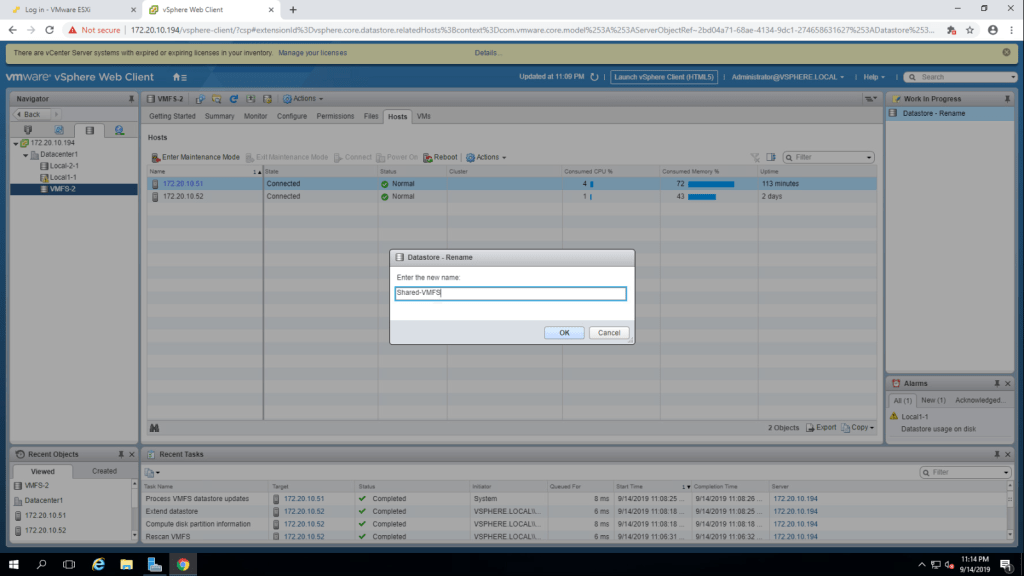
6. Now, change the name of VMFS-2 to Shared-VMFS by right clicking on VMFS-2.
TASK-6 Create a second VMFS Datastore using iSCSI.
- Right click on Datacenter1 -> Storage -> New Database.
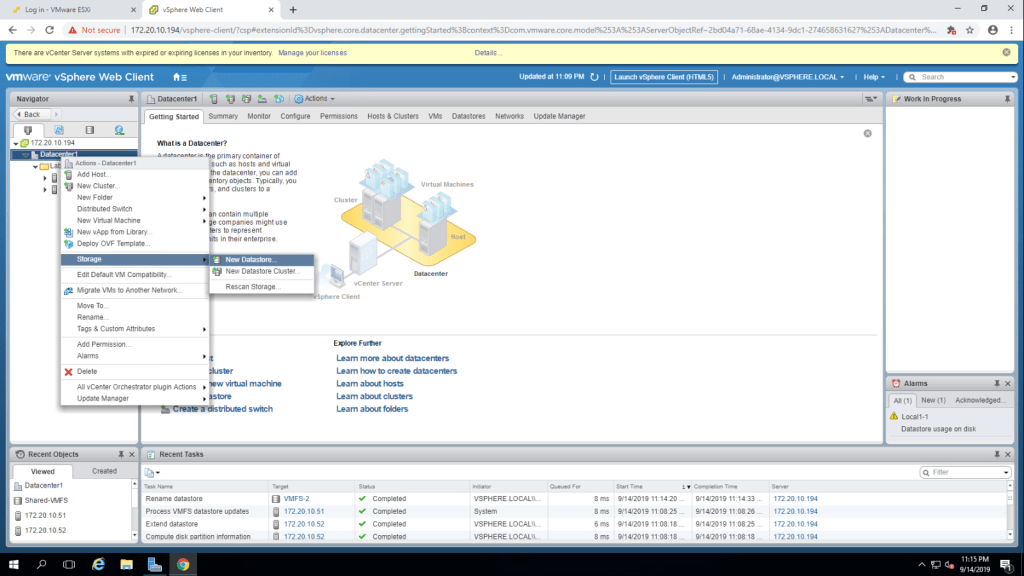
2. Select VMFS datastore type and click on next.
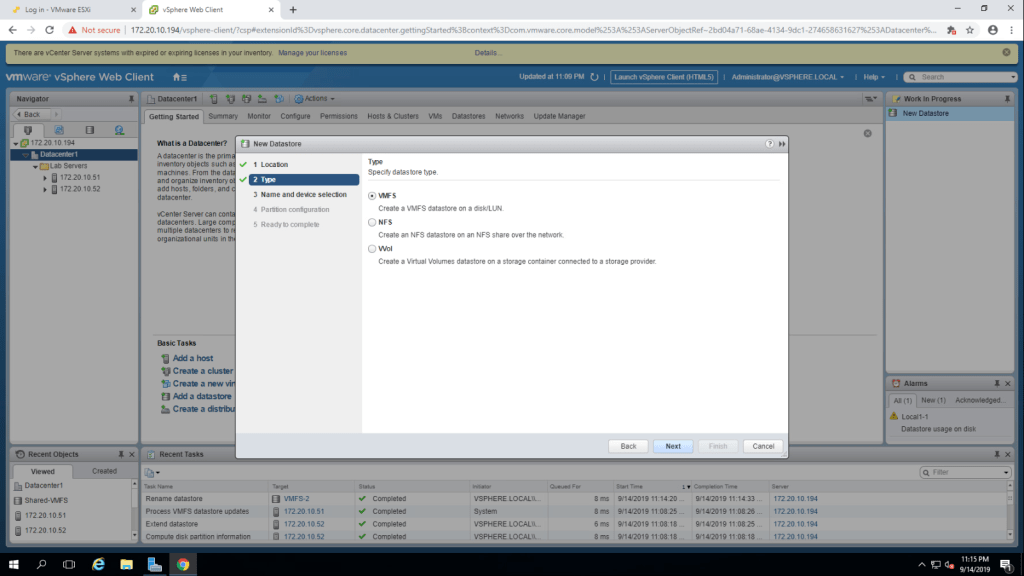
3. Give it a name ‘Shared-iSCSI-Datatstore’, select 172.20.10.51(first esxi host) , then select a LUN from the list and click next.

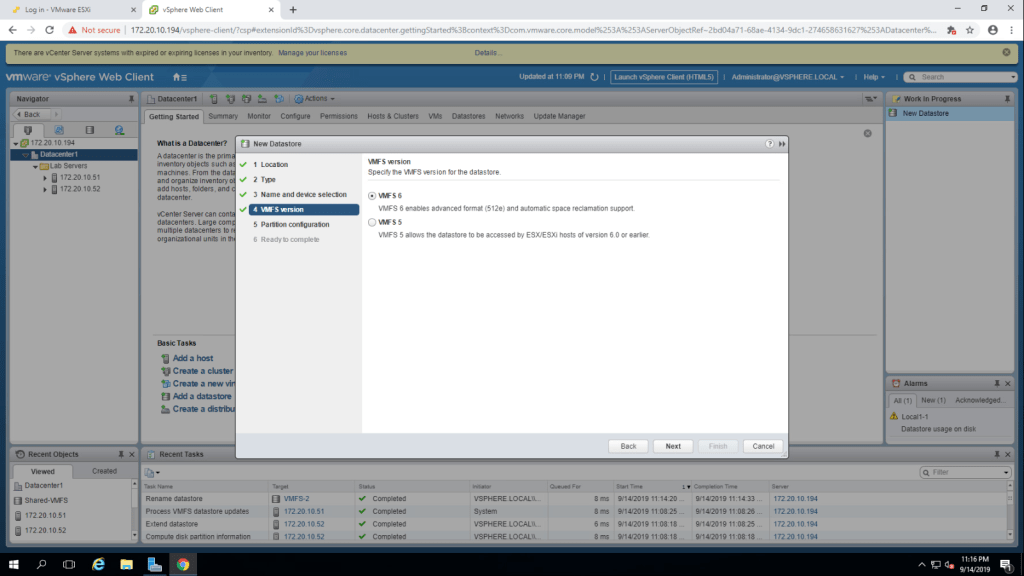
4. Select a version 6 and click next.
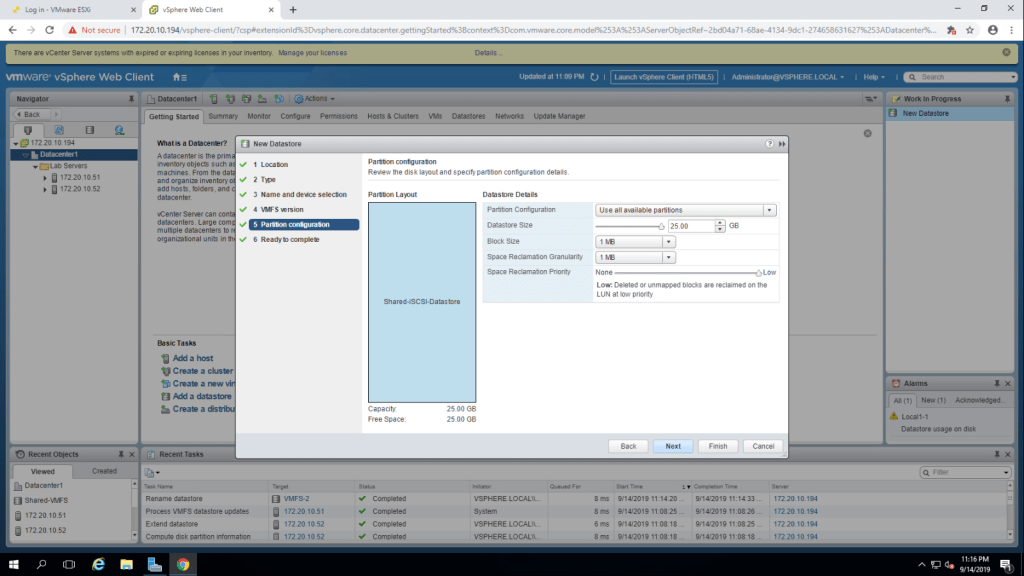
6. Select ‘use all available space partition’ from drop down menu and click next. In the next step just summarize the information and click finish.
Lab-8 Accessing iSCSI Storage
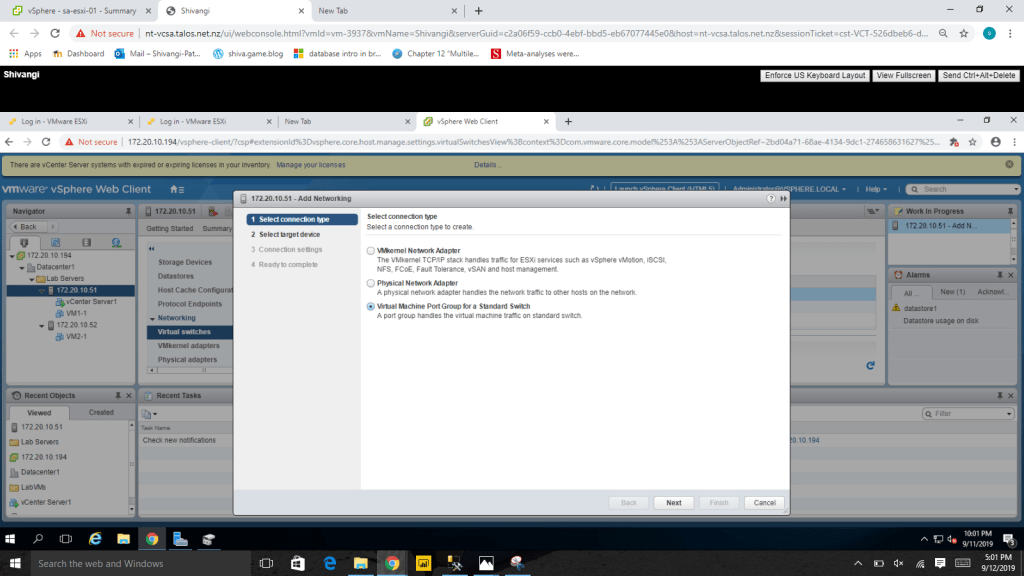
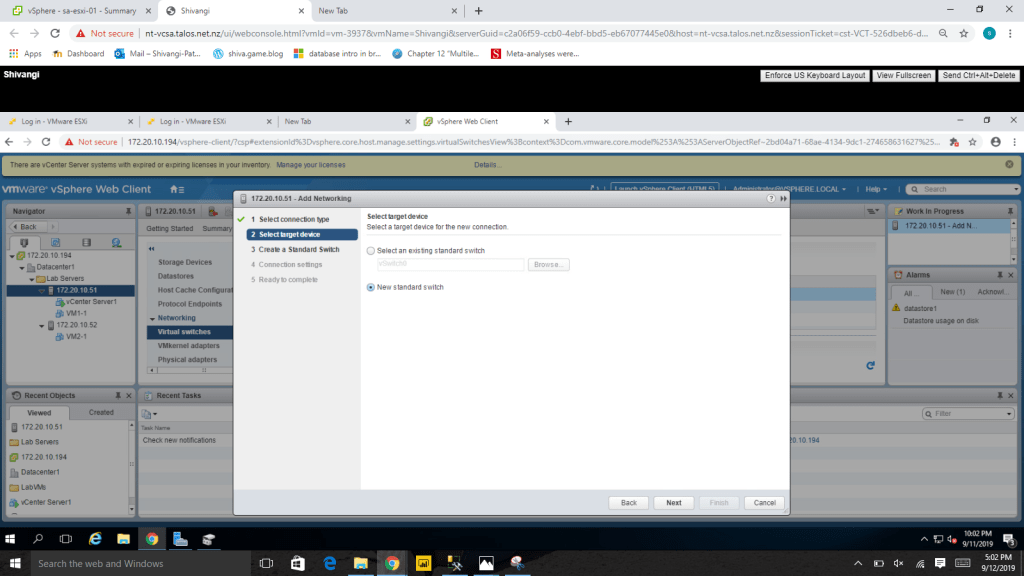
TASK-1 Add a VMKernel Port Group to a Standard Switch.
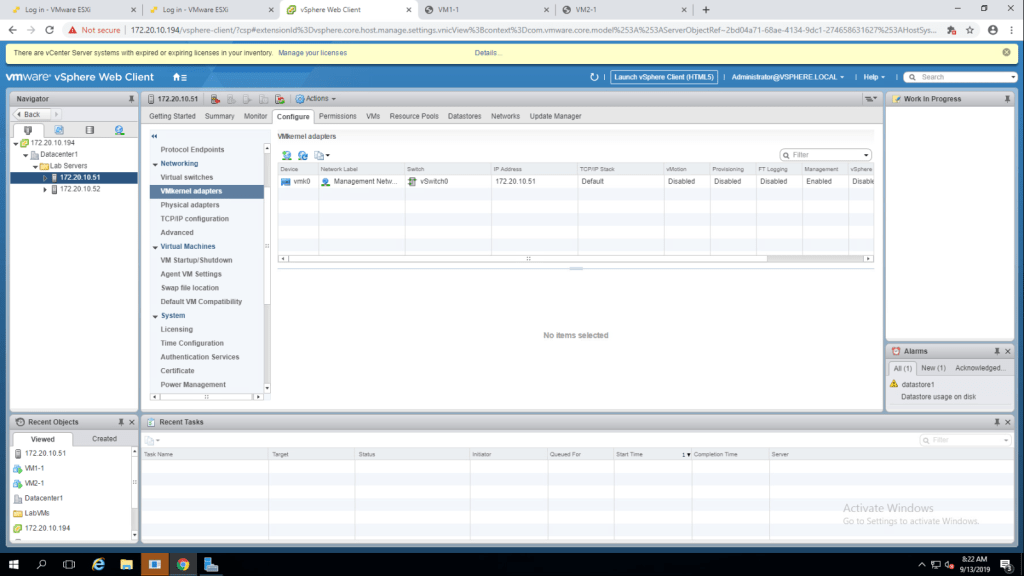
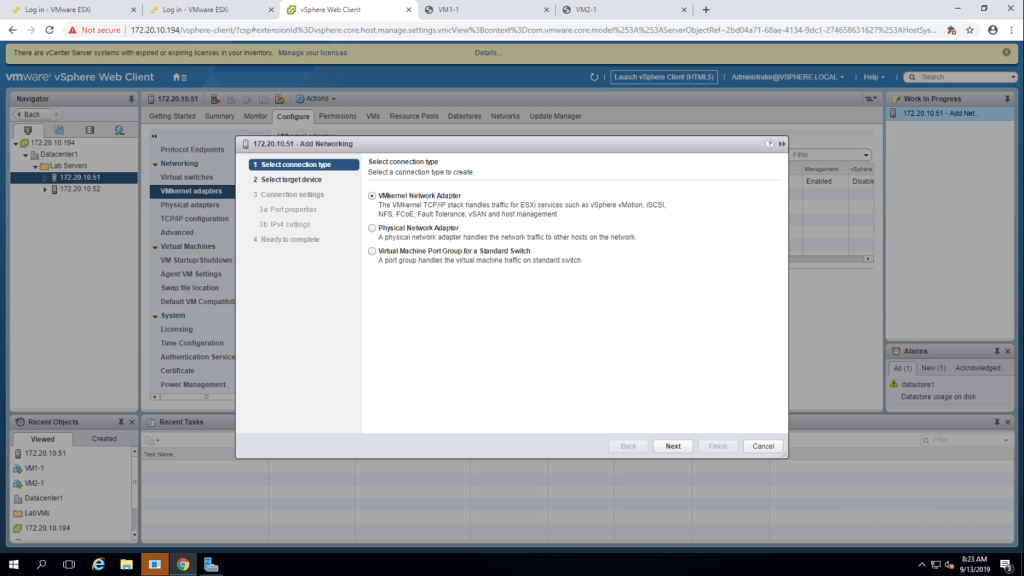
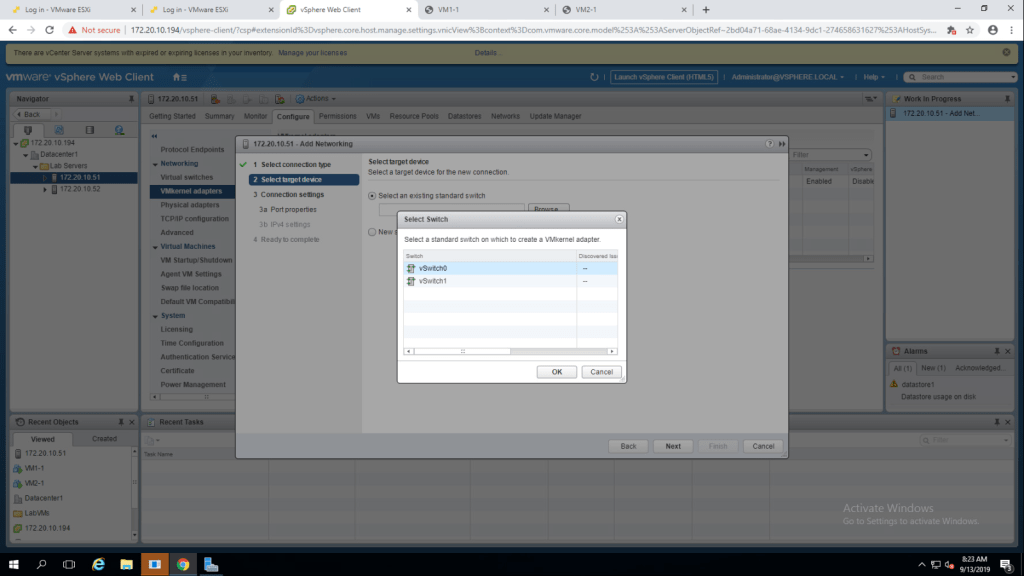
- select 172.20.10.51 -> Configure tab -> Networking -> VMKernel Adapters -> Add Host Networking.
2. Select the option VMKernel Network Adapter and click next.
3. Choose vSwitch0 by browsing an existing standard switch and click on ok.
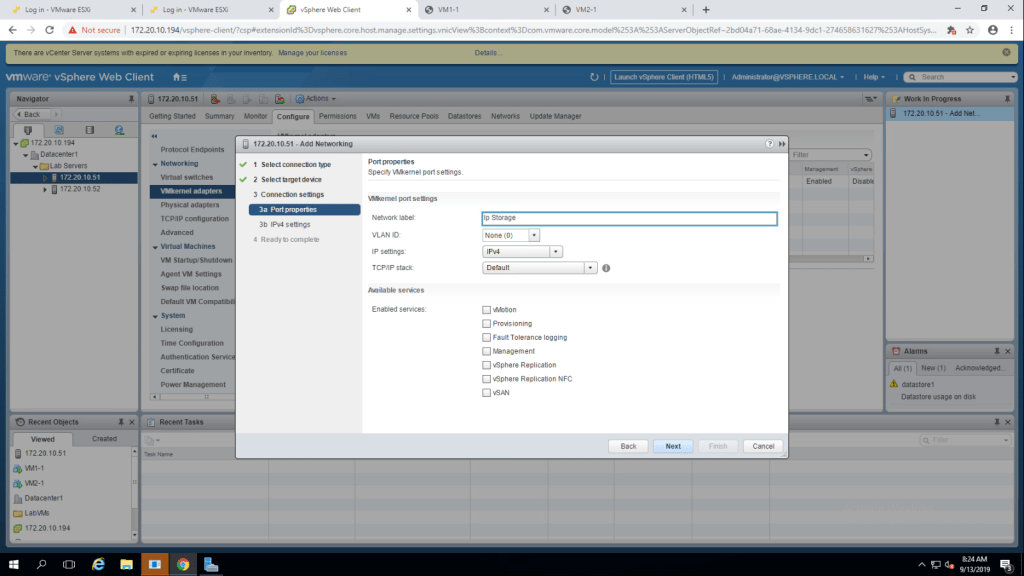
4. As network lable , give IP Storage and use IPv4 settings and click next.
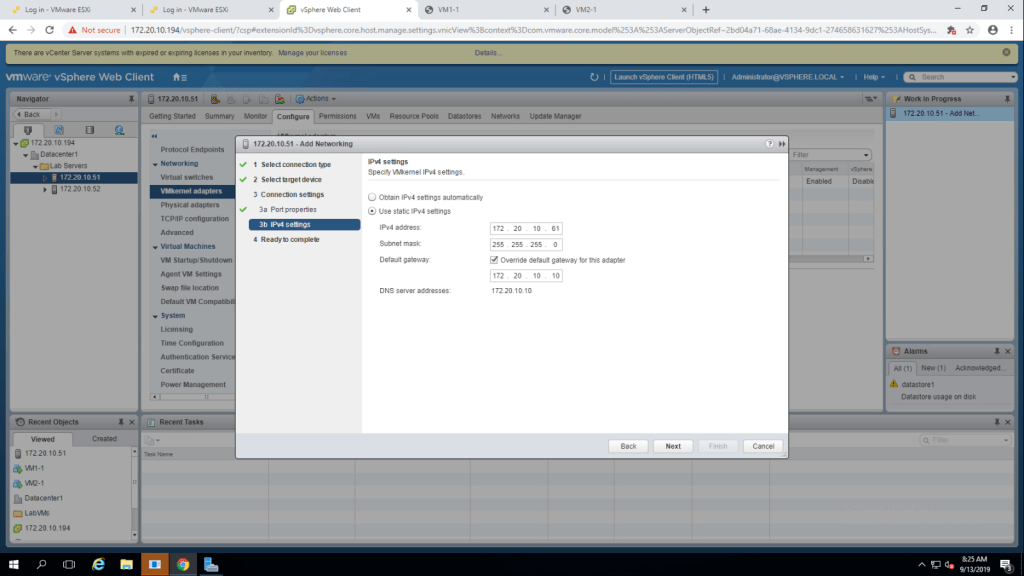
5. Give the IP address, 172.20.11.61 , Default Gateway 172.20.11.10 and click next. and then in the next window click finish.
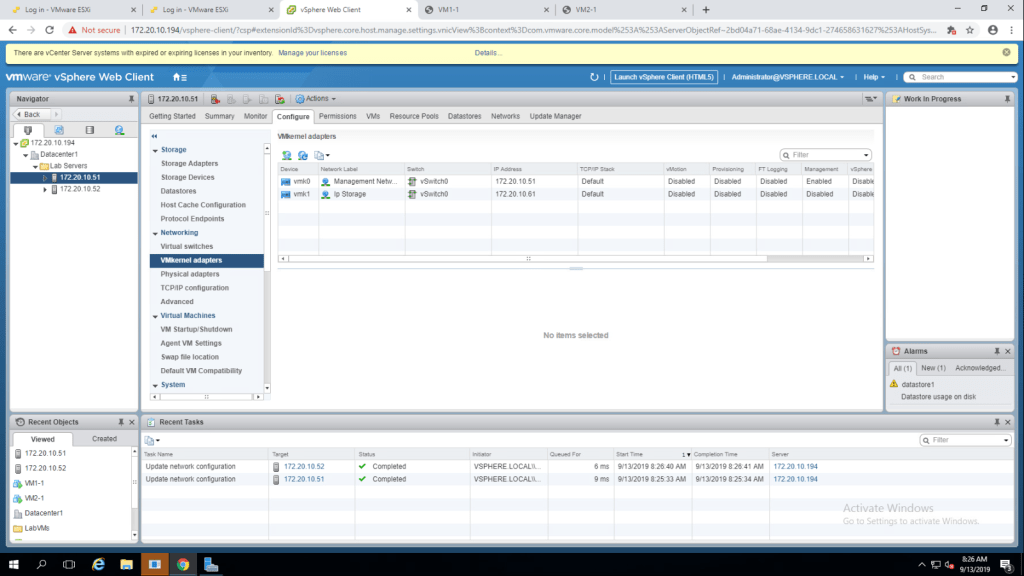
Repeate the task for second esxi host, for this use the IPv4 172.20.11.62
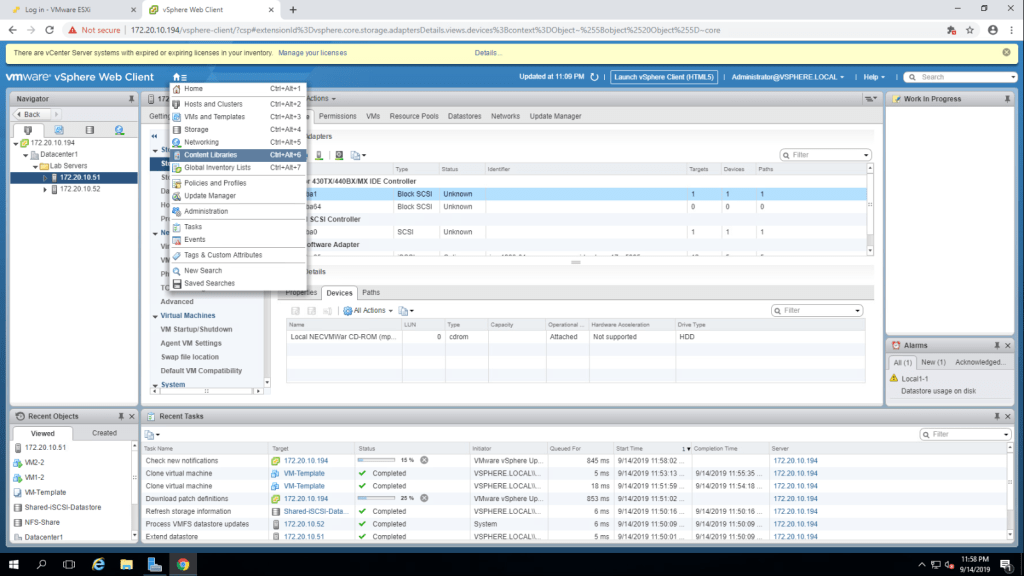
TASK-2 Configure the iSCSI Storage Adapter and connect it to the Storage.
- Select 172.20.10.51 -> Storage -> Storage Adapters

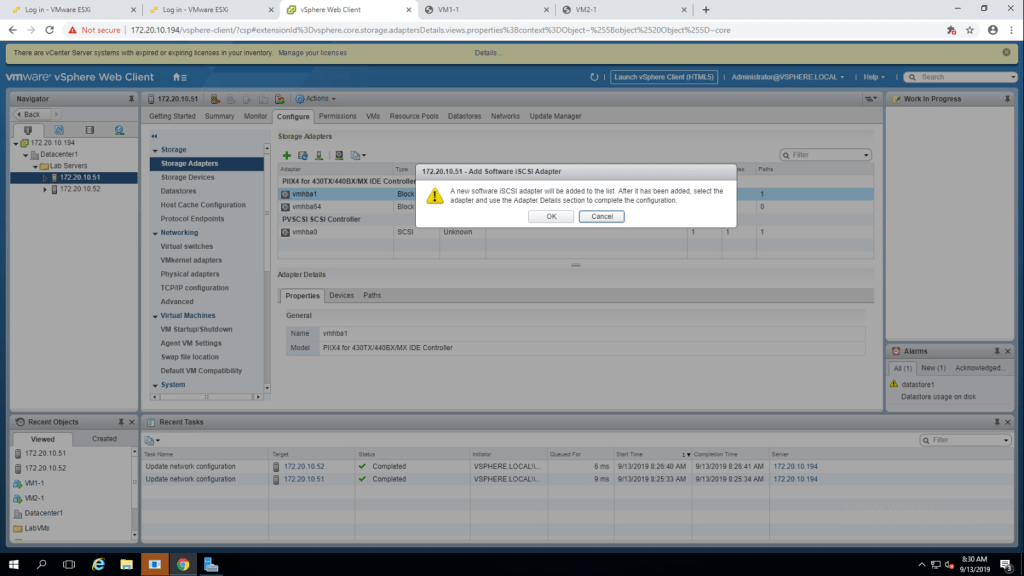
2. Select software iSCSI adapter -> Add new Storage Adapter -> Select iSCSI adapter.
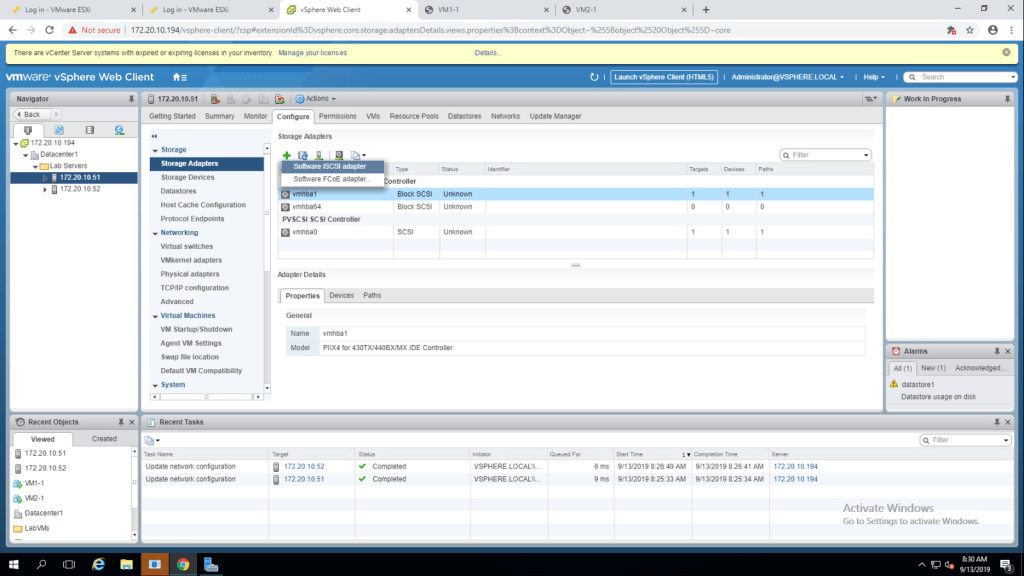
3. Click on OK.
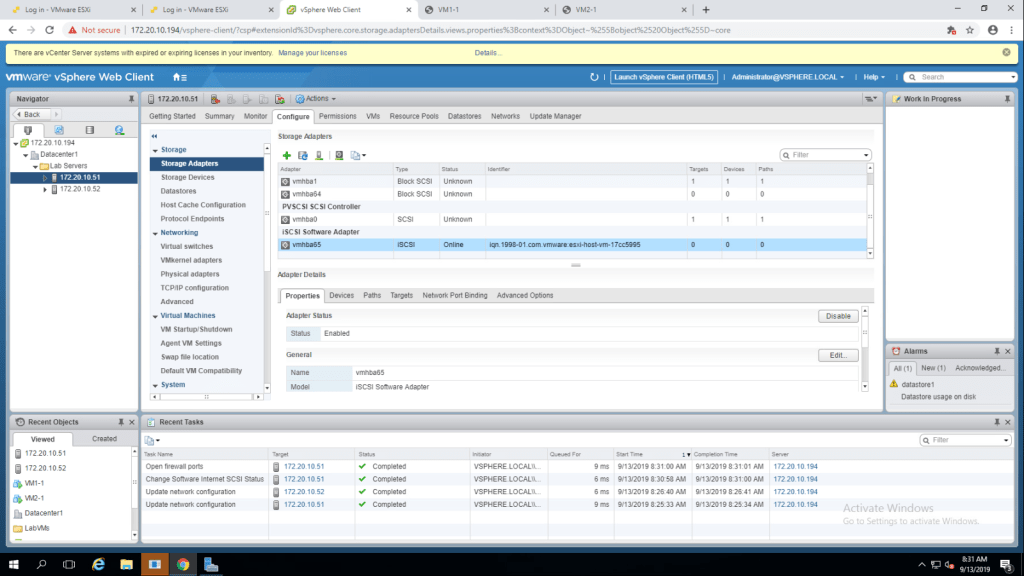
4. Select the latest created iSCSi software adapter and click on properties. and check that adapter status is eabled/online.
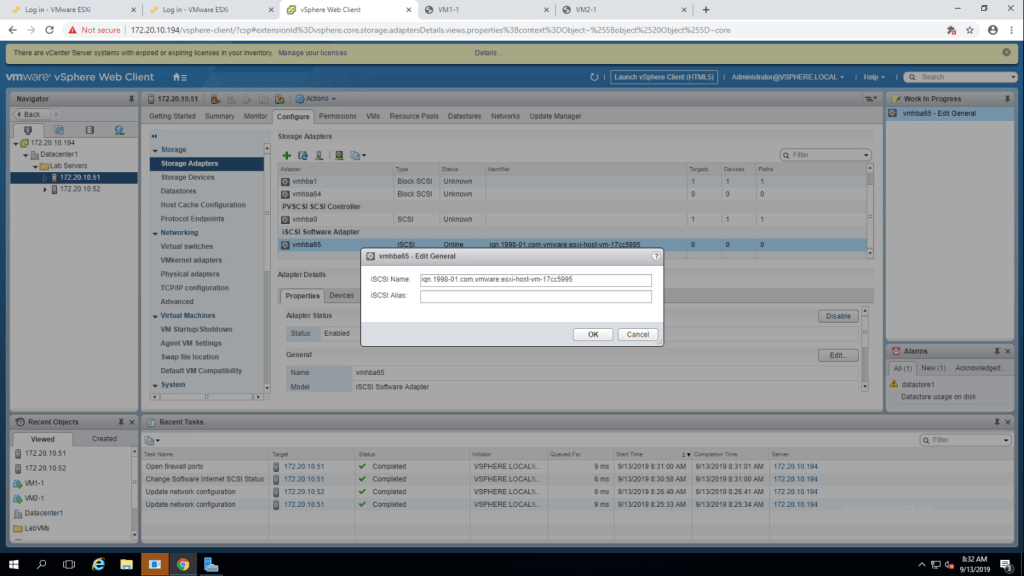
5. Click on edit, check the iSCSI name and click on ok. (172.20.10.51)

6. Click on edit, check the iSCSI name and click on ok. (172.20.10.52)
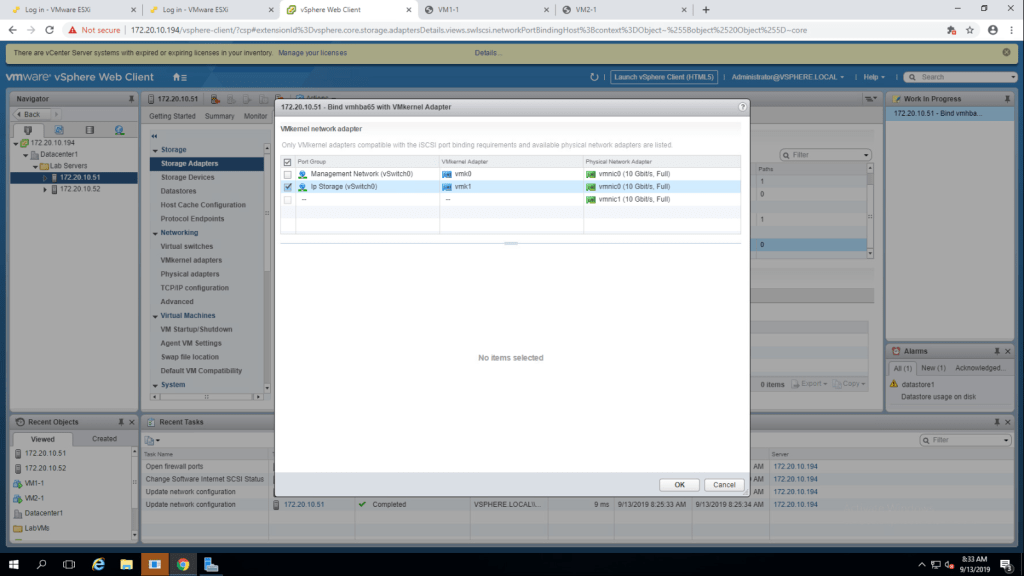
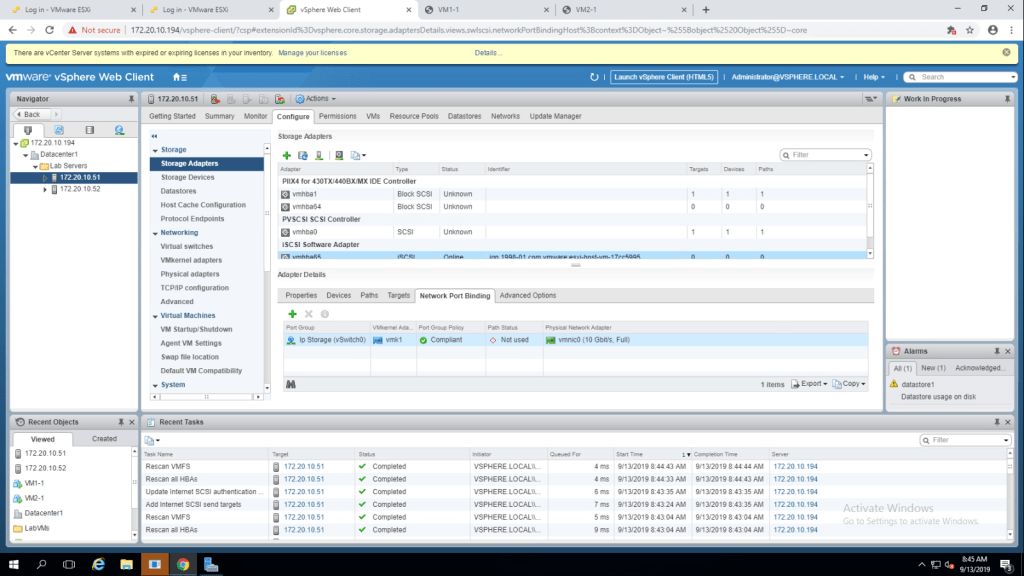
7. Click on Add, in the network Port Binding tab, select the ip storage check box and click ok.
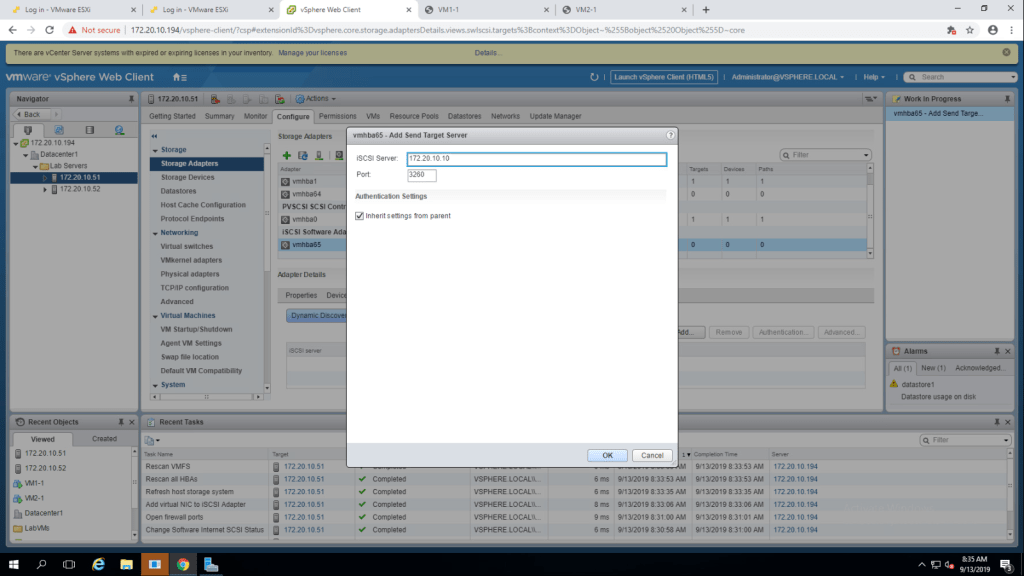
8. Go to Dynamic Discovery and click Add.
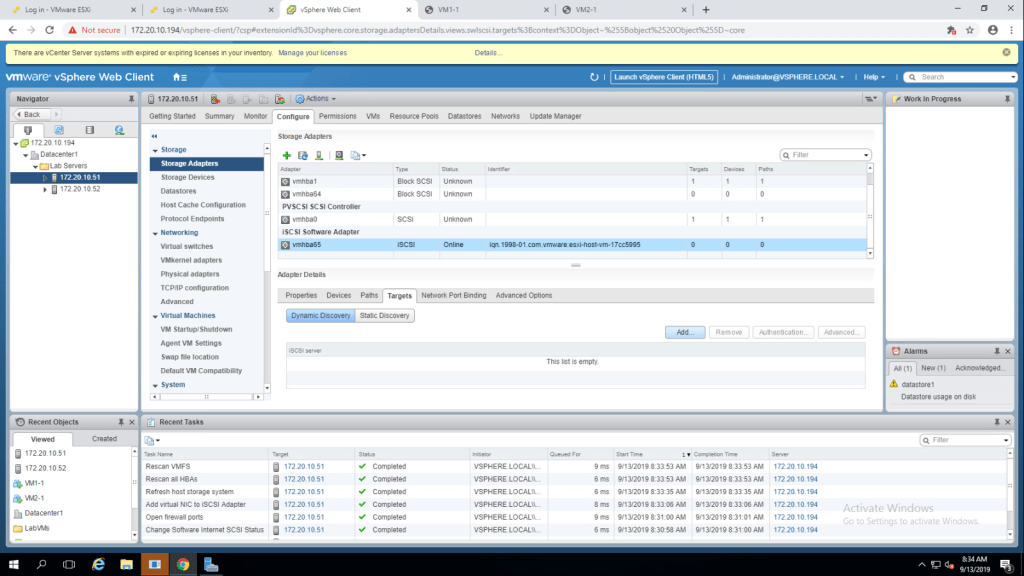
9. Give IP Address 172.20.10.10 and click OK.
10. Rescan all storage adapters and click OK to complete the task.
11. Check the devices tab.
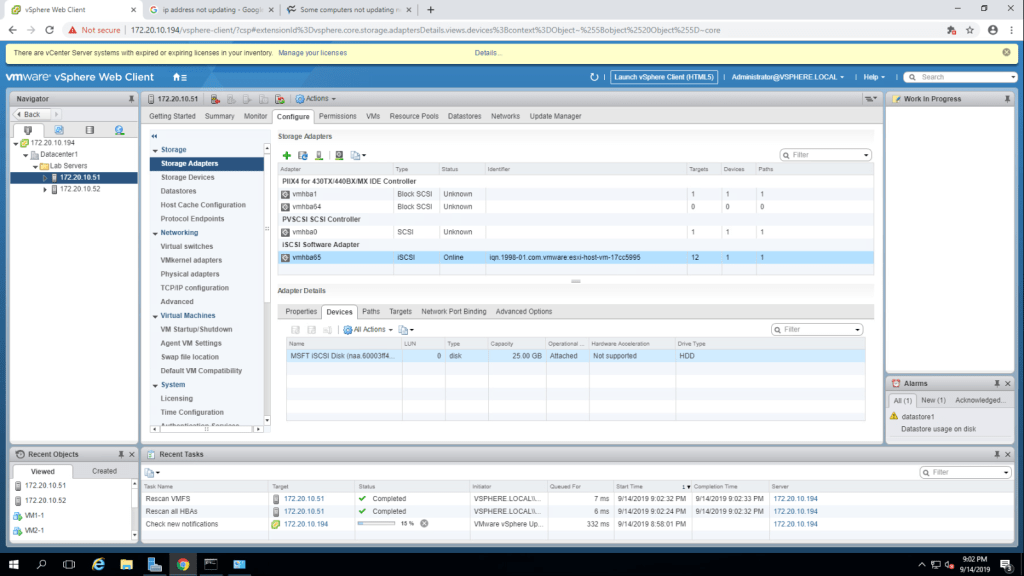
LUN Number : 0
Capacity : 25GB
Operational State : Attatched
Hardware Acceleration : Not Supported
Repeat the same task for esxi-2(172.20.10.52)
Lab-7 Using Standard Switches
TASK-1 View the Standard Switches Configuration.
- Go to the configure tab -> Virtual Switches.
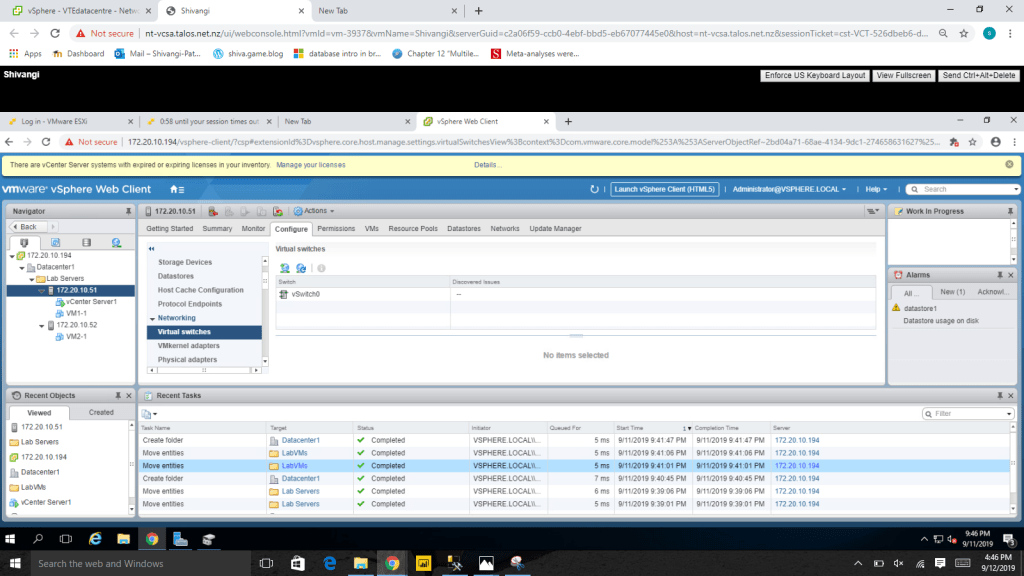
Q.1 What is the name of the default standard switch? Ans vSwitch0
Q.2 Which Physical adapter is the default standard switch is connected to? Ans vmnic1
Q.3 Which network is your virtual machine connected to? Ans VM Network
Q.4 Which network are connected to the default standard switch? Ans Management Network, VM Network
TASK-2 Create a standard switch with a Virtual Machine Port Group.
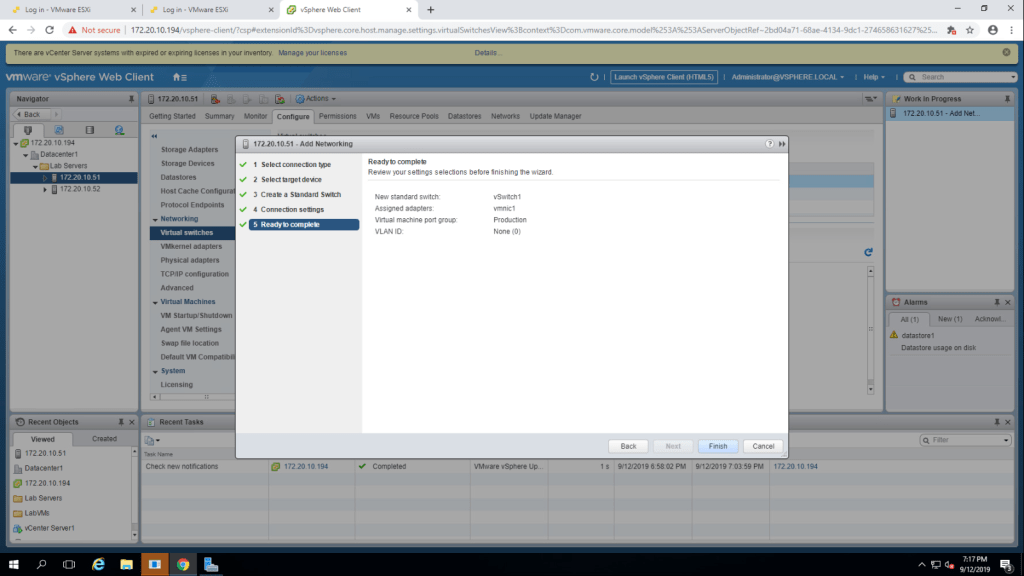
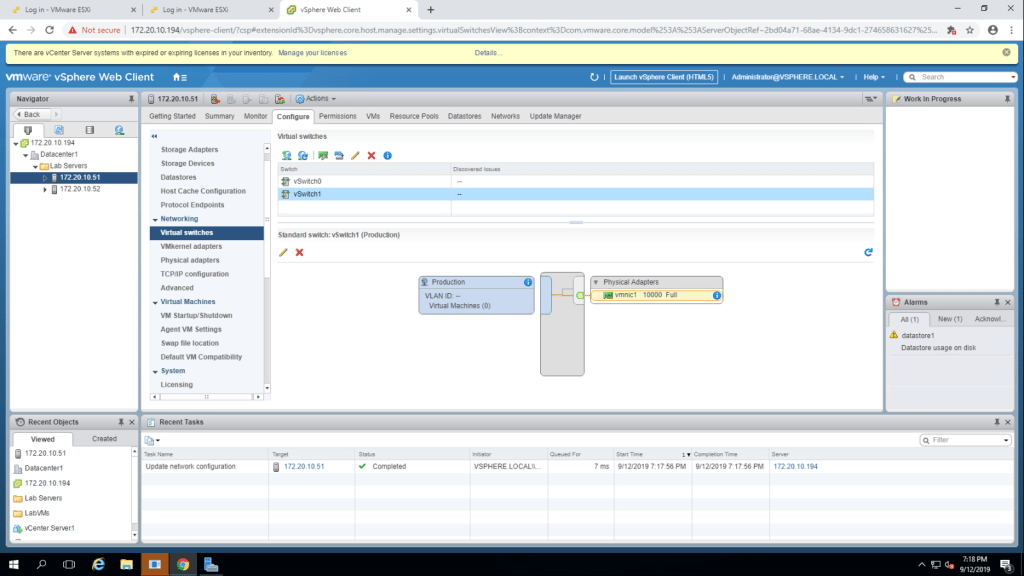
1.select esxi host -> configure -> Networking -> Virtual Switches -> Add host Networking. Select Virtual Machine Port Group for a Standard Switch and click next.
2. Select New Standard Switch and click next
3. Click on add adapter and select vmnic1 and click OK.
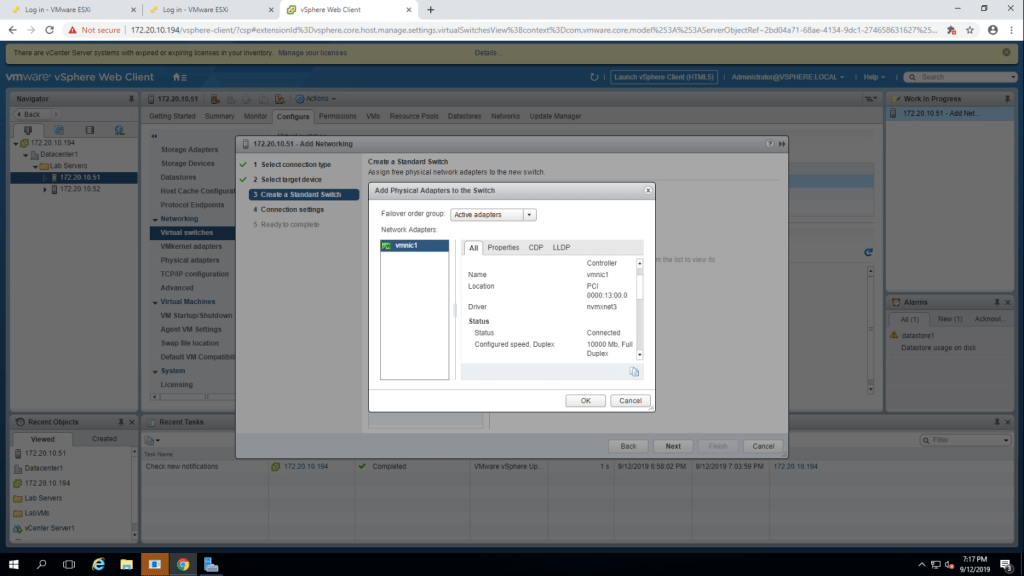
4. Select Production as Network Label and click next.

5.Click on finish.
6. The newly created switch, vSwitch1 is visible in the middle pane.
TASK-3 Attach Your Virtual Machine to the New Virtual Machine Port Group.
We can not perform this task as DHCP Server is not configured.
Lab-6 Creating Folders in vCenter Server Appliances.
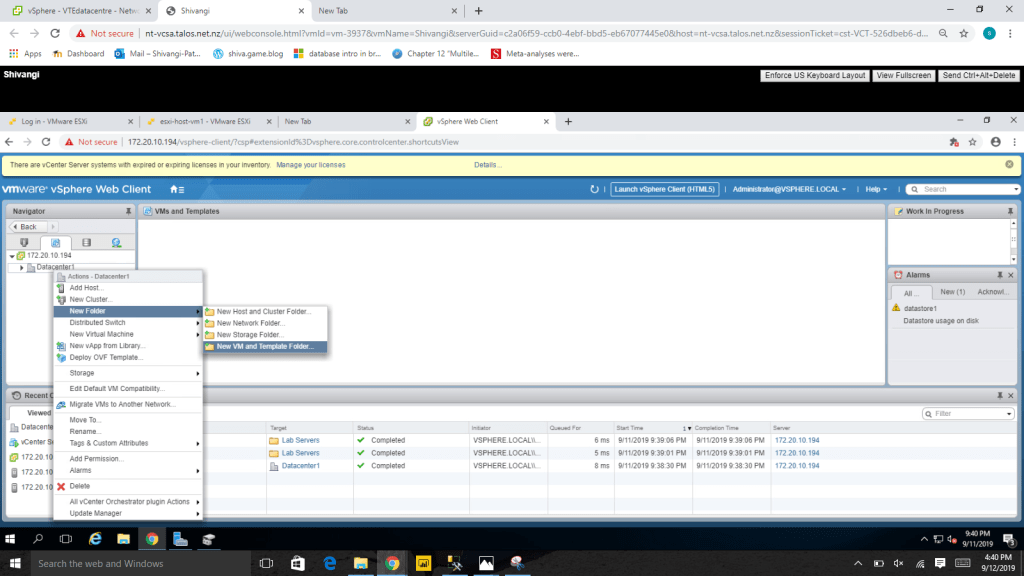
TASK-1 Create a Host and Cluster Folder.
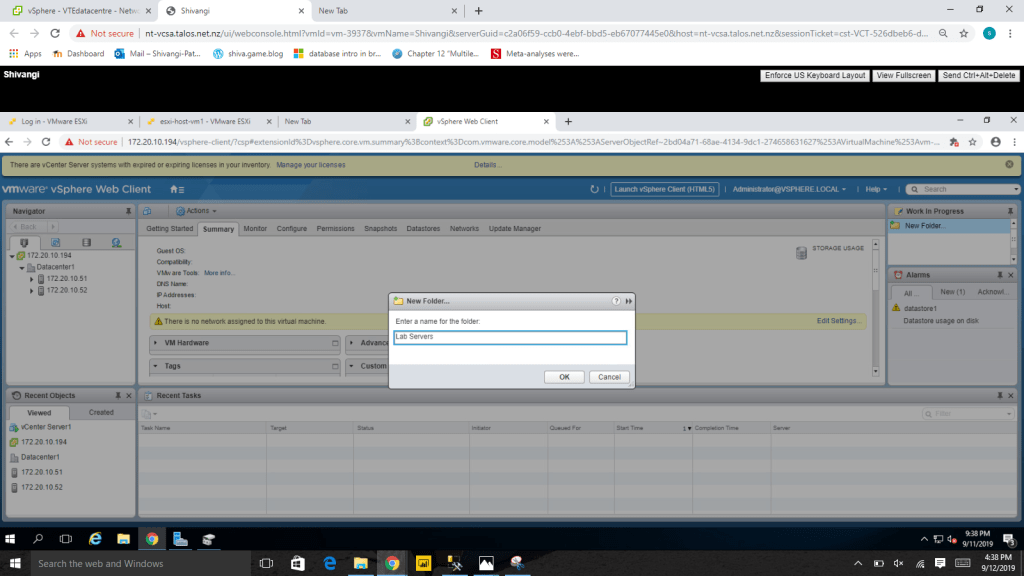
- Right click on Datacenter -> New Folder -> New Host and Cluster Folder. Give the name Lab Servers and click OK.
2. Drag both the esxi to lab server folder and check in the recent tasks, it is visible that the task has been successfully completed.

TASK-2 Create Virtual Machine and Template Folder.
- Right Click on Datacenter1 -> New Folder -> New VM and Template Folder. Create a folder named Templates.
2. You can see the folder Templates has been created. Now right click on the folder and review the menus.
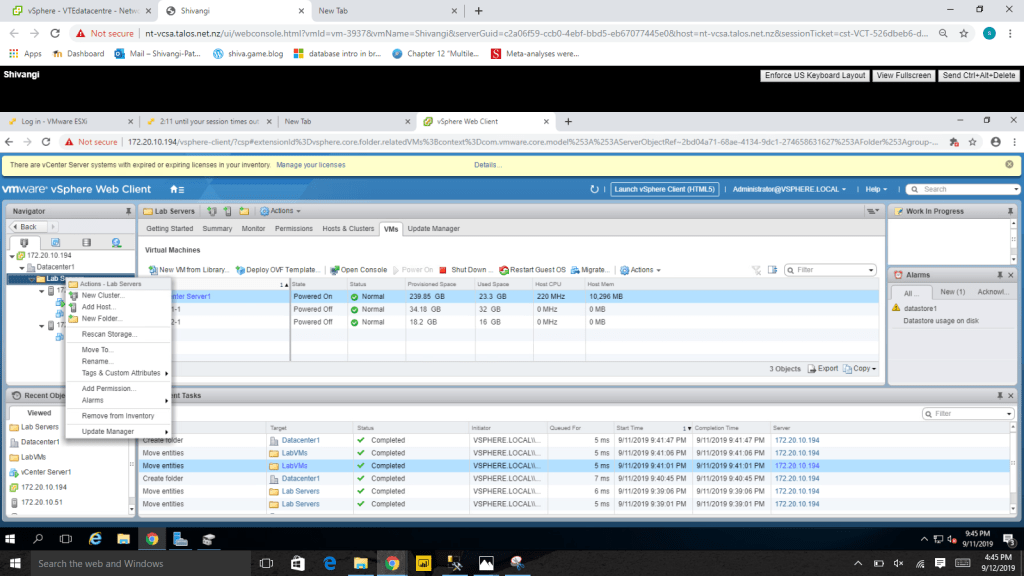
Q.What is the difference between the menu commands in the drop down menus of LabVMs Folder and the LabServers Folder?
ANS : In LabServers , menus are related to LabVMs and in LabVMs menus are related to virtual machines.
Lab-5 Navigating the vSphere Clients.

Q. sa-esxi-01 : Hypervisore= , Logical Processors= , NICs=
Lab-4 Working with vCenter Server
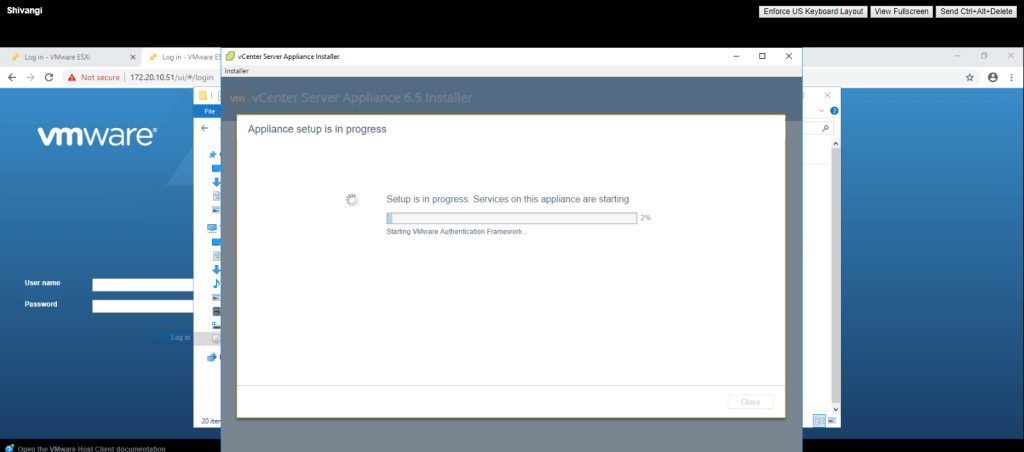
TASK-1 Deploy vCenter Server Appliance
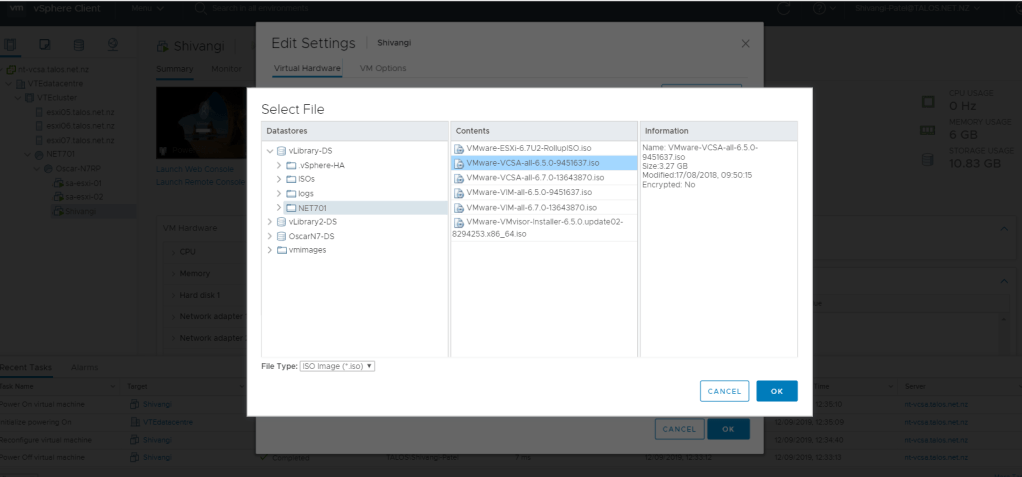
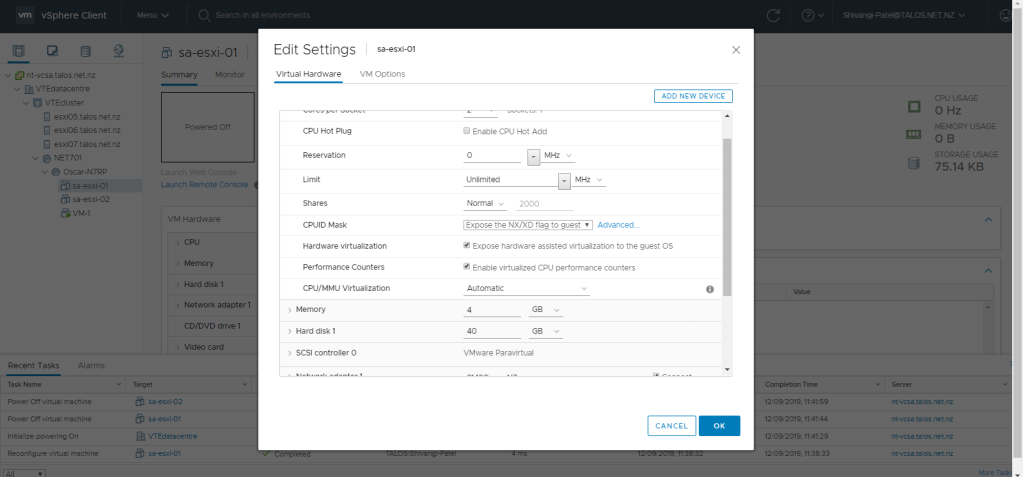
- Go to the Edit Settings of Server 16 and browse the class file into cd/dvd disk1 and make sure that the hardware visualization and performance counters checkbox are selected and click OK.
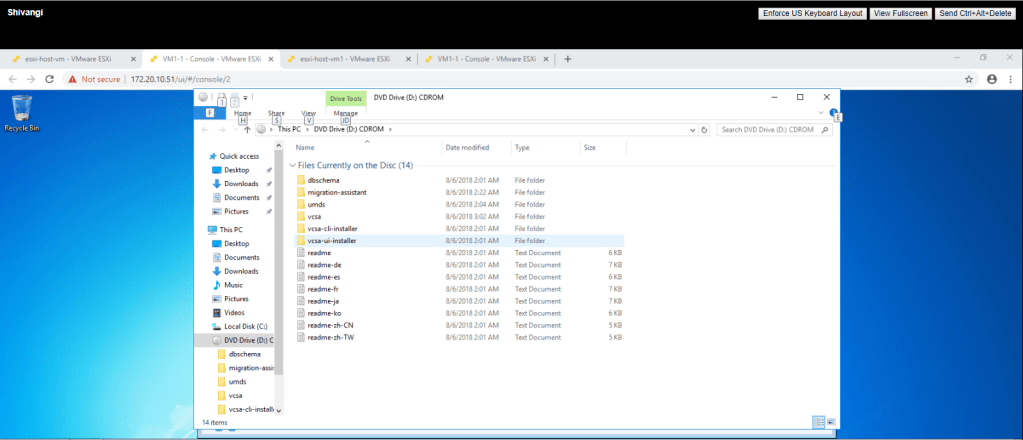
2. launch web console of your virtual machine and go to the DVD Drive D: -> vcsa-ui-installer.
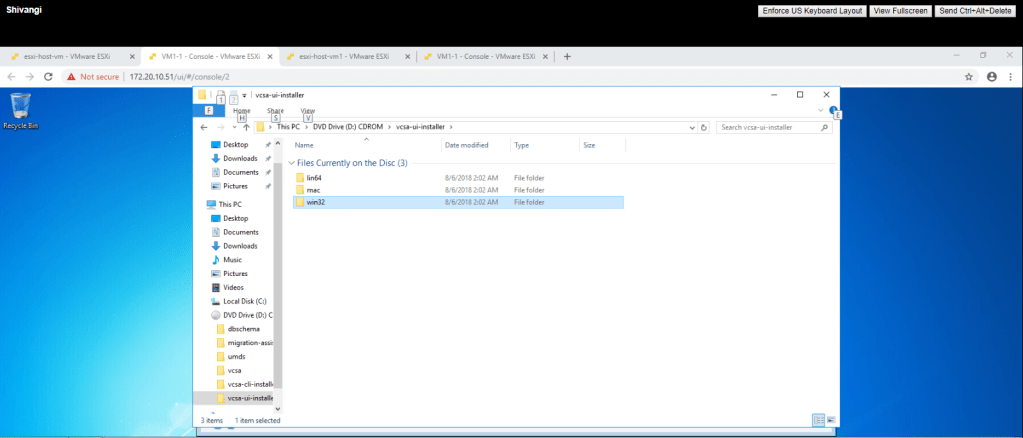
3. Go to Win32.
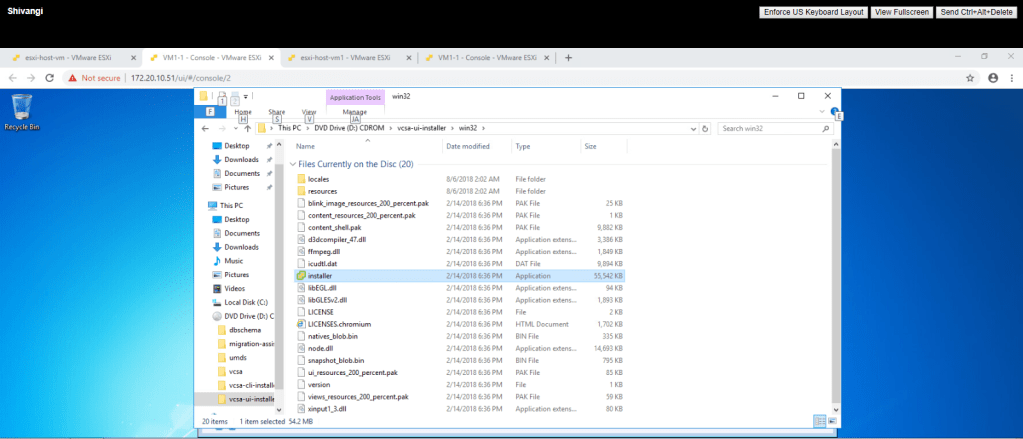
4. Double click on the installer file.
5. click on Install.
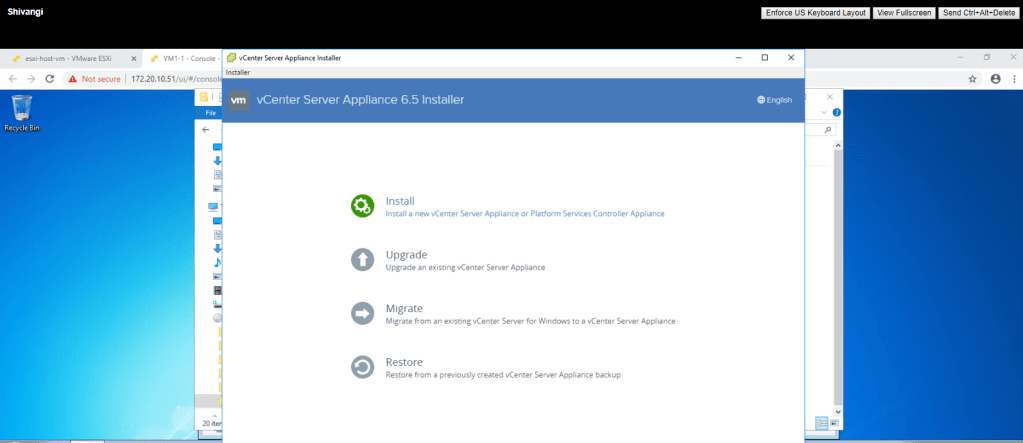
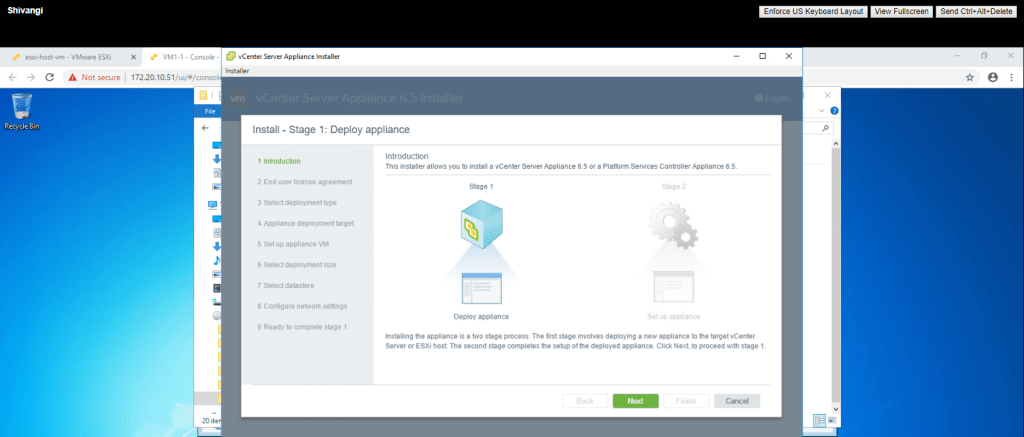
6. Simply click next.
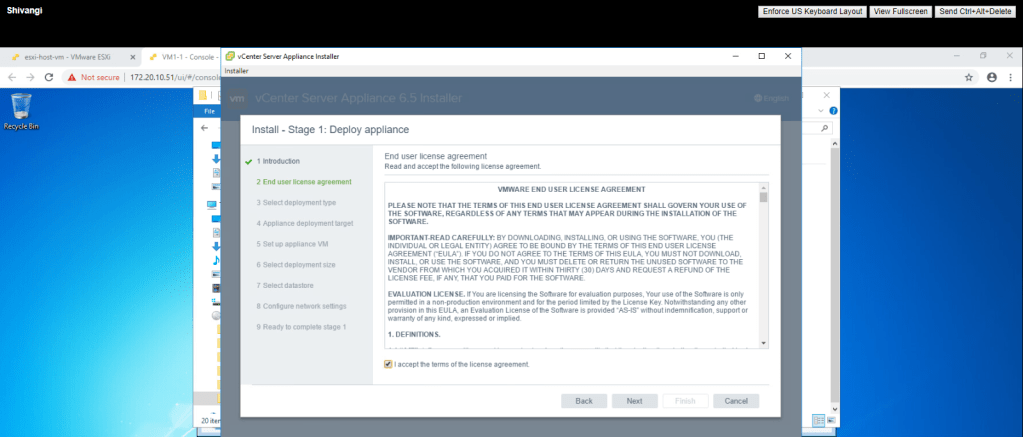
7. Accept the licence agreement and click next.
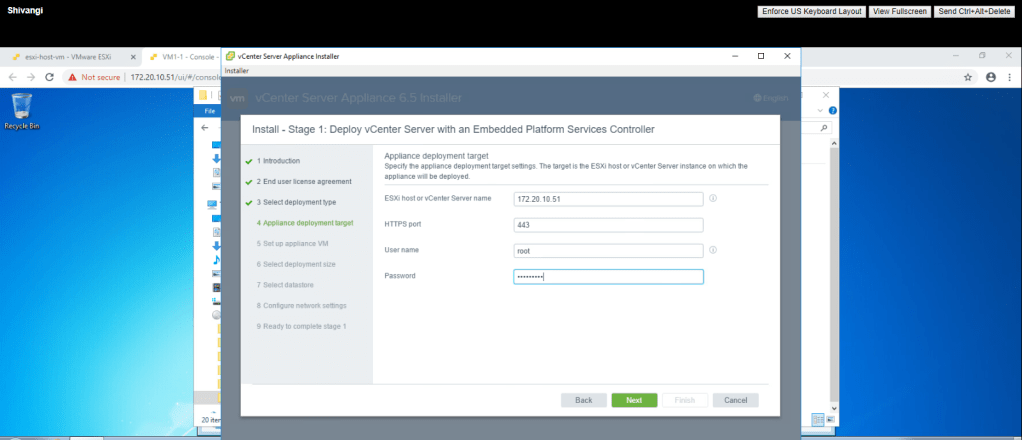
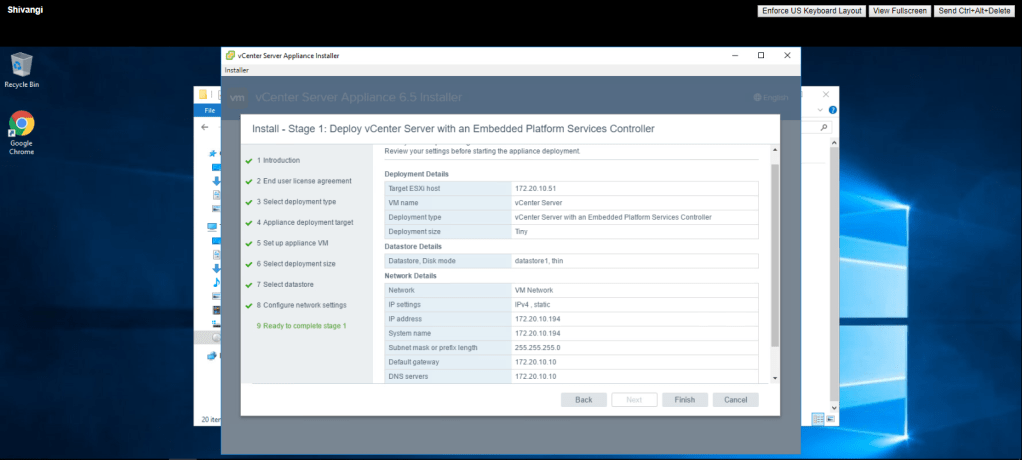
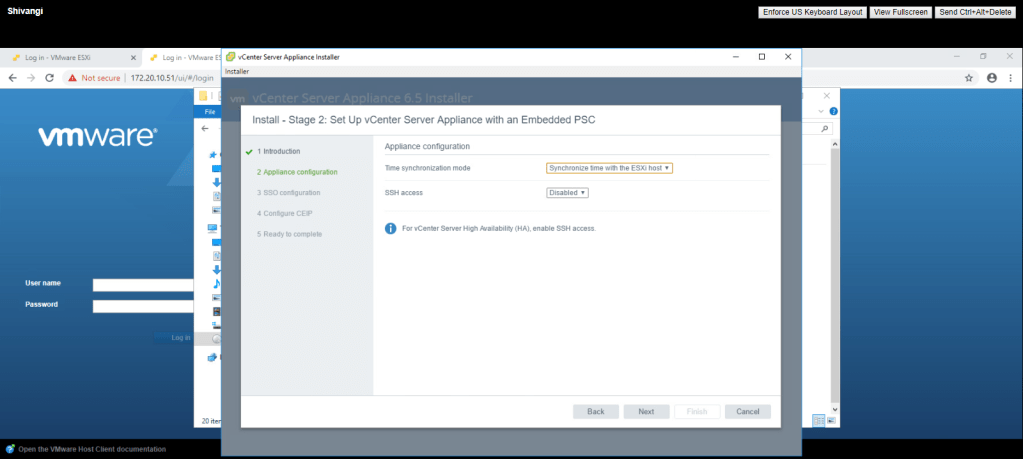
8. Select vCenter Server with an Embedded Platform Services Controller and click next.

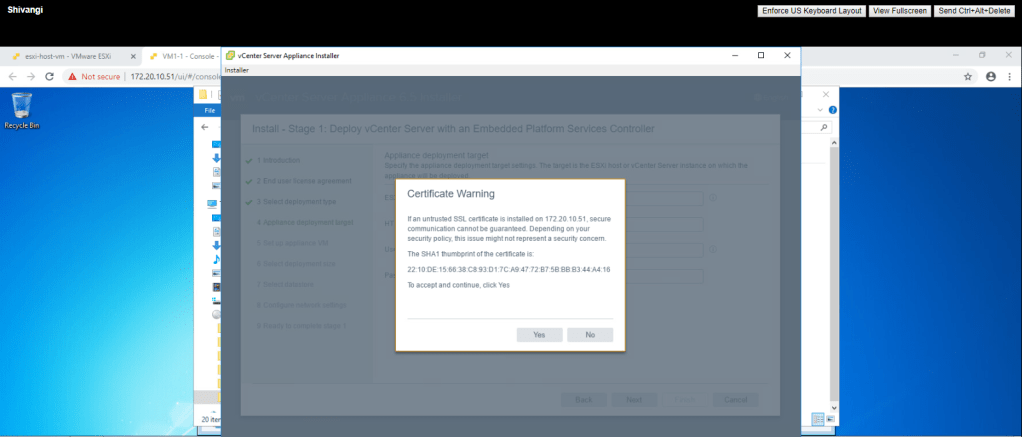
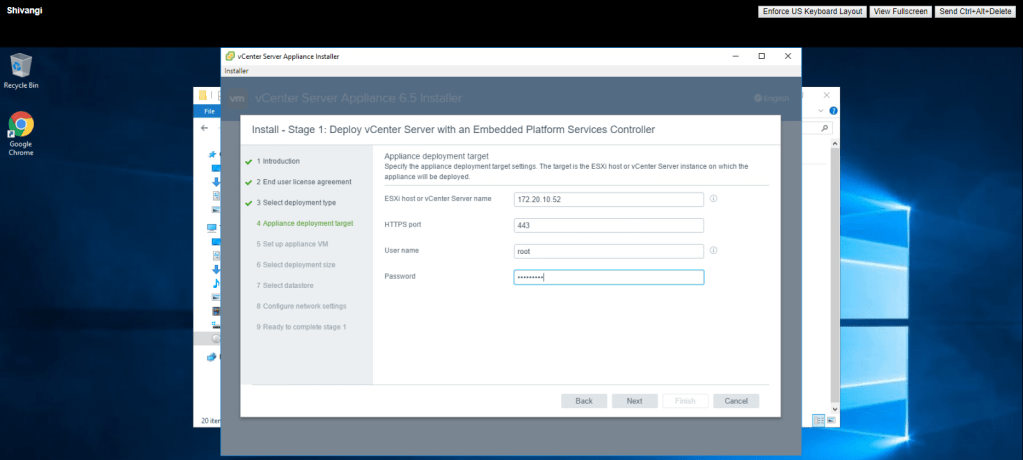
9. Give the IP address of the ESXi host on which you want to create a vcenter server. here, I am using my first esxi host 172.20.10.51, give username and password and click next.
10. CLick yes.
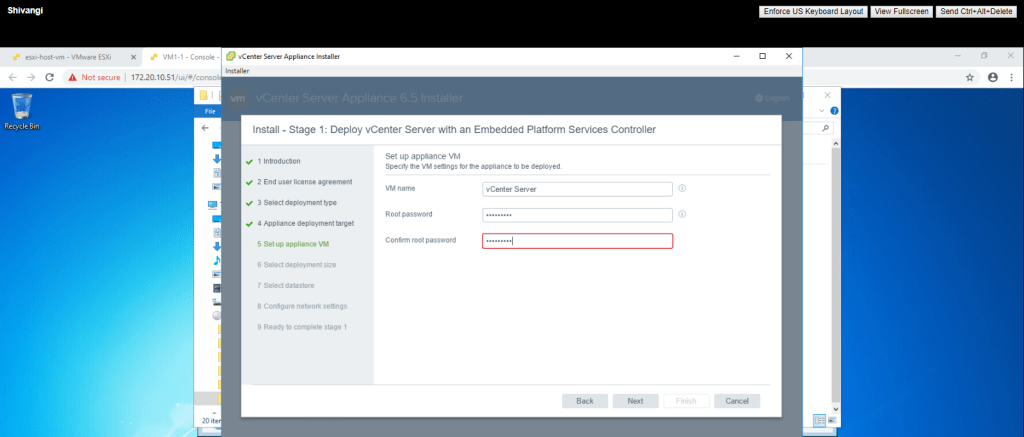
12. Set up VM name and password and click next.
13. Select tiny and click next.

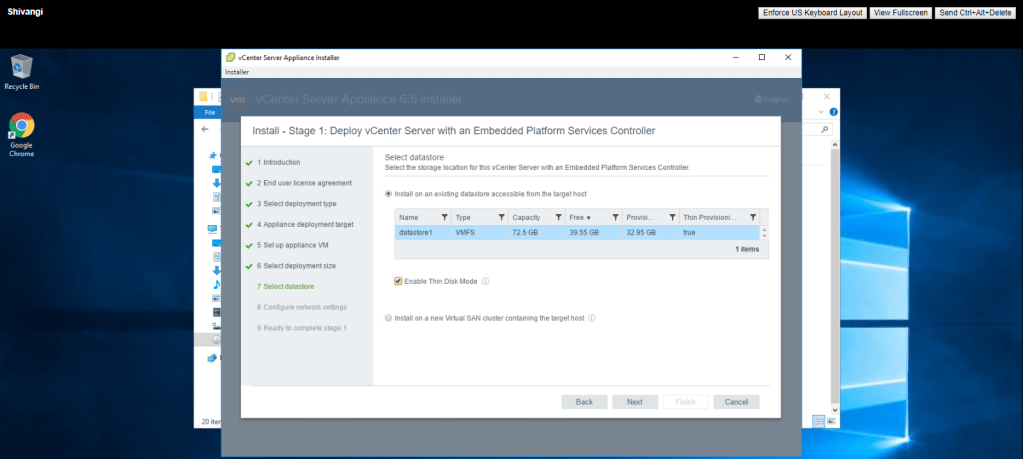
14. Select the datastore and enable thin disk mode then click next.
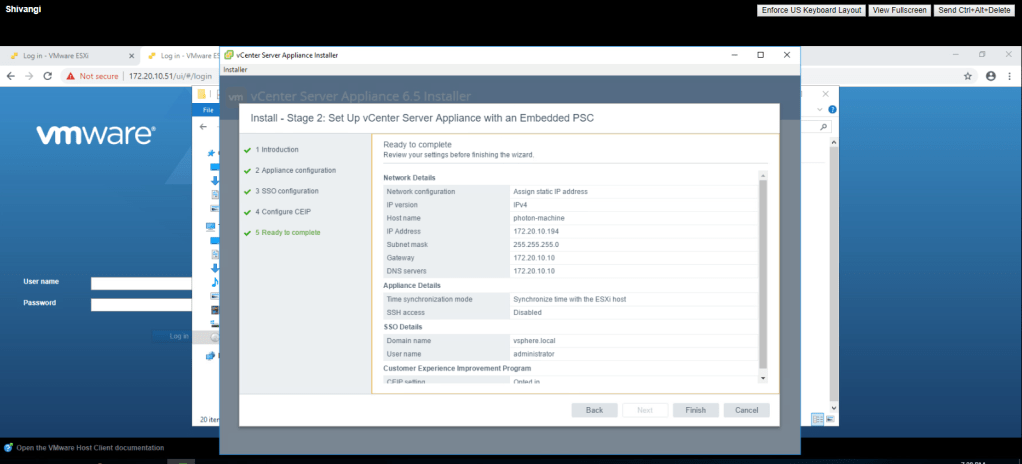
15. Give the IP address of vCenter server 172.20.10.194, Subnet Mask 255.255.255.0, Default Gateway 172.20.10.10 and DNS Server 172.20.10.10 and then next.

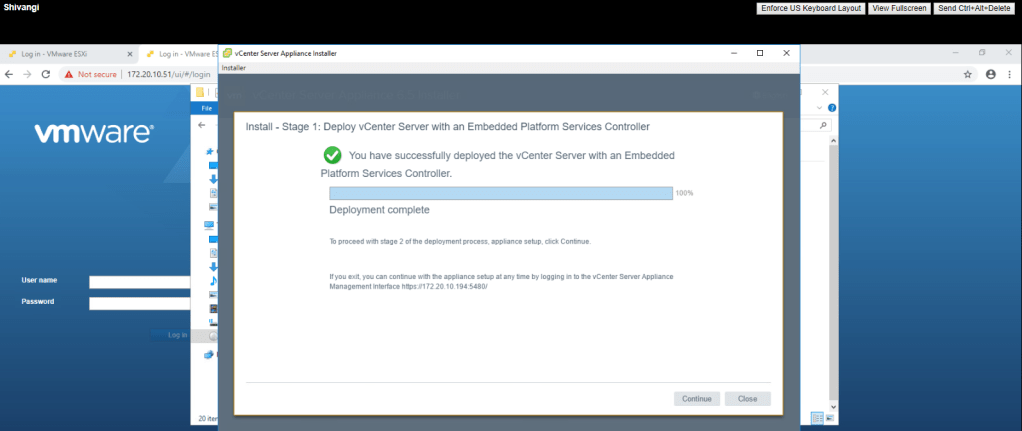
16. Summarize the information and click on finish button.
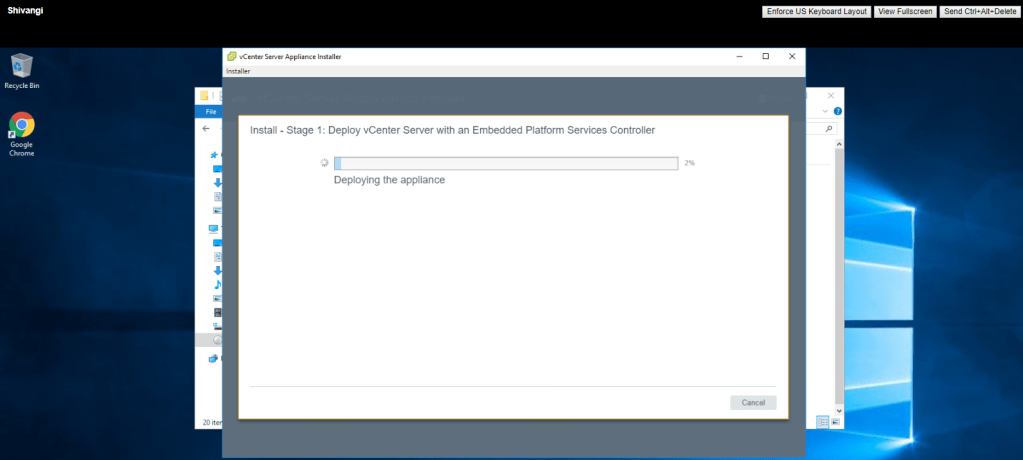
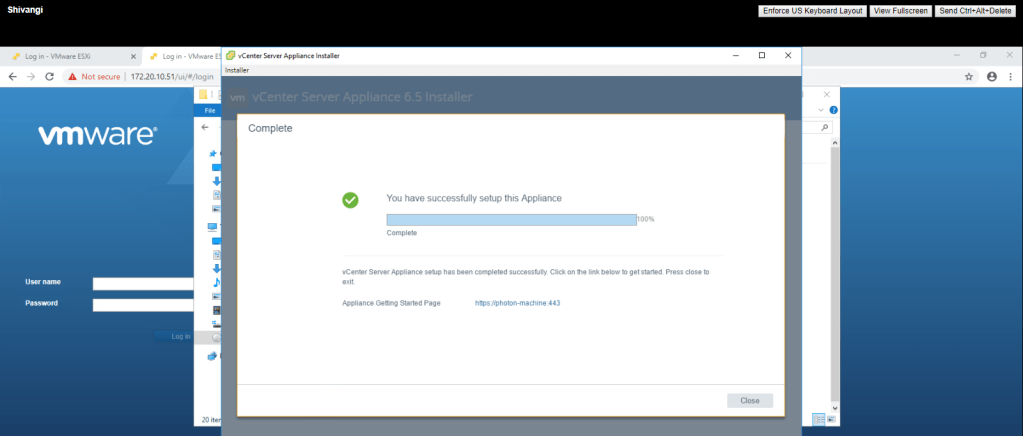
17. When the deployment completes, click on continue.
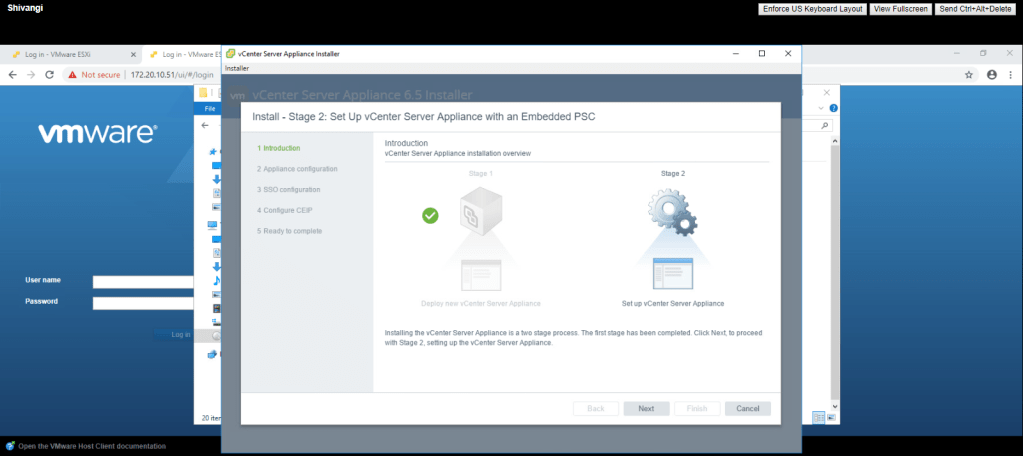
18. Create a new SSO domain. and give password then click next.
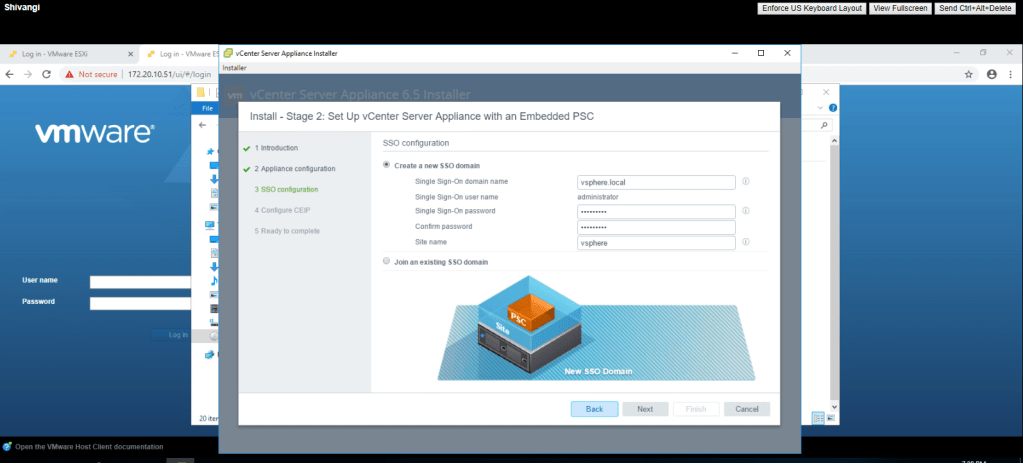
19. Click on finish.
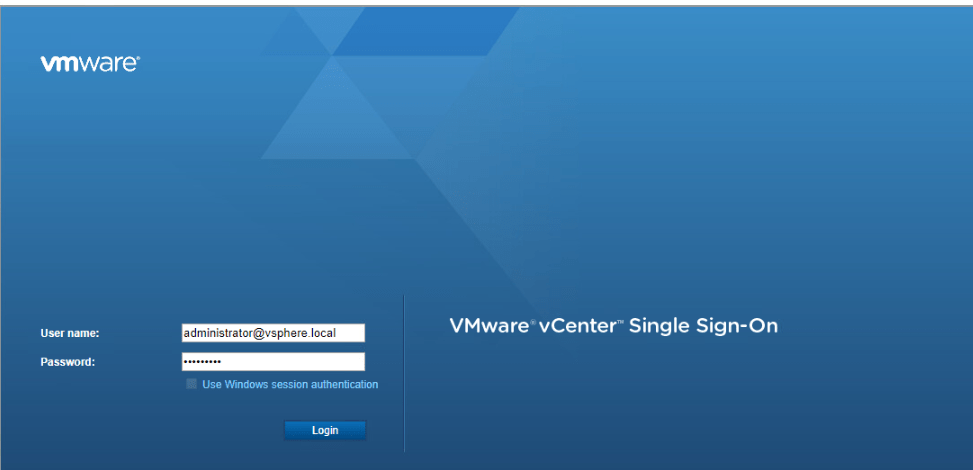
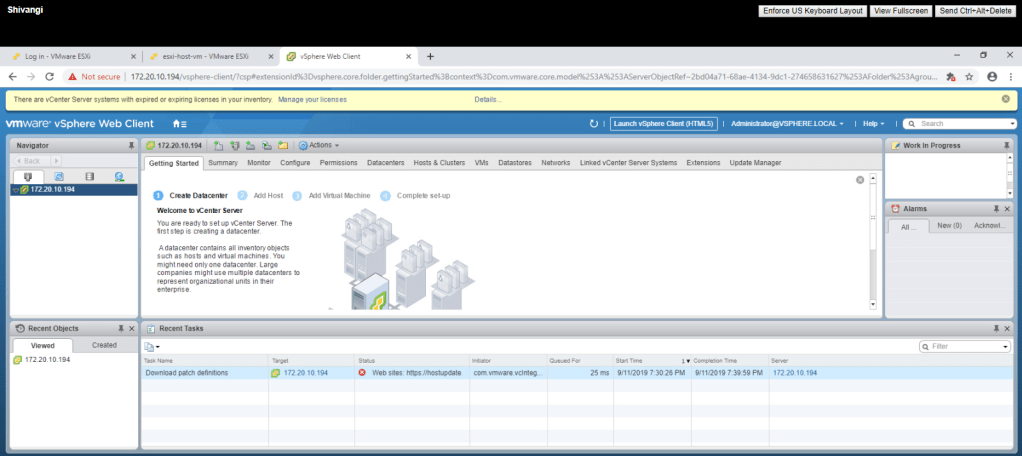
20. Type 172.20.10.194 in the search bar and press enter. Then log in into vCenter server using the user credentials.
TASK-2 Access and Configure vCenter Server Appliances.
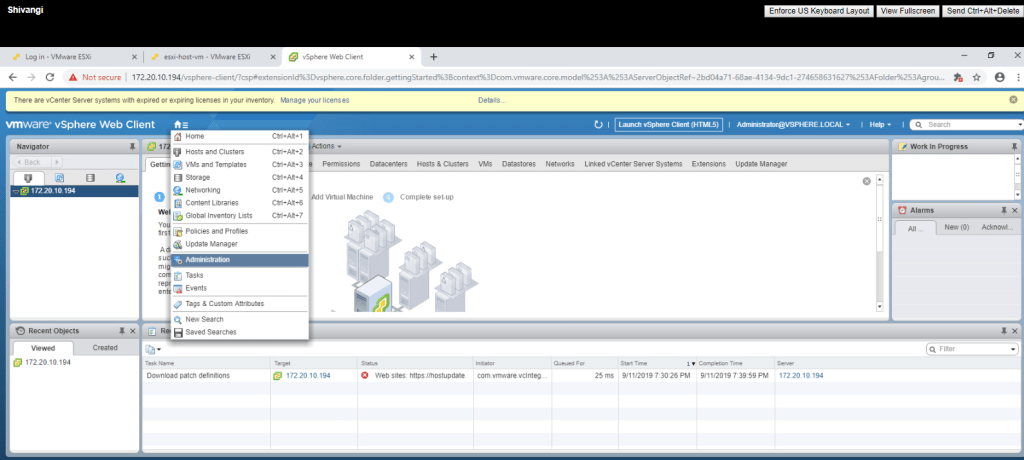
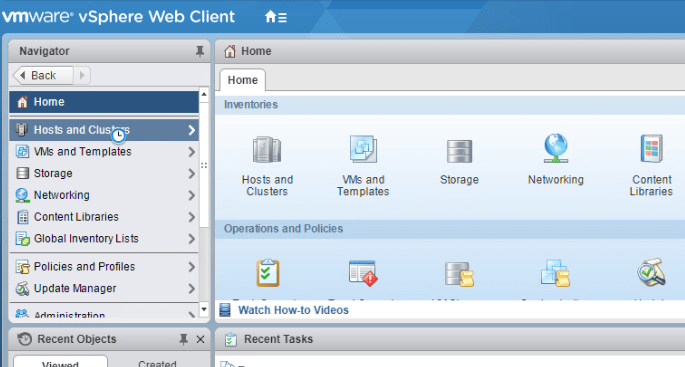
- Click on Home icon and select administration.
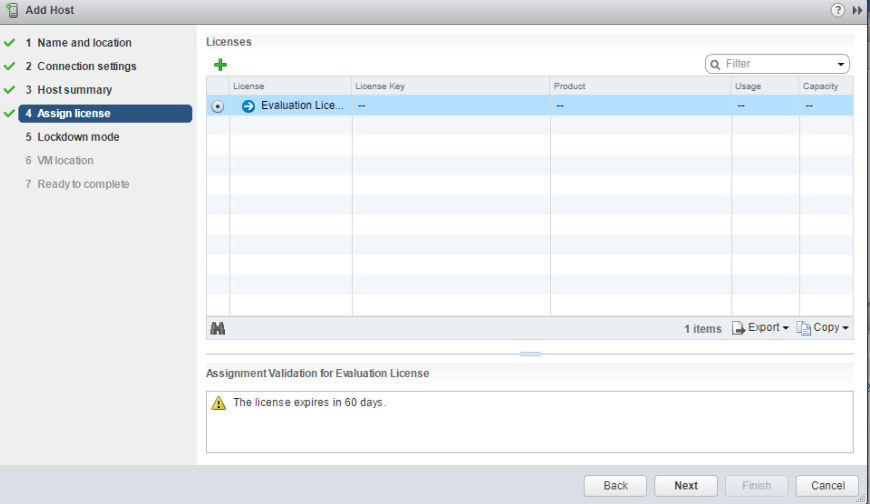
2. Go to licences -> Create new licences.
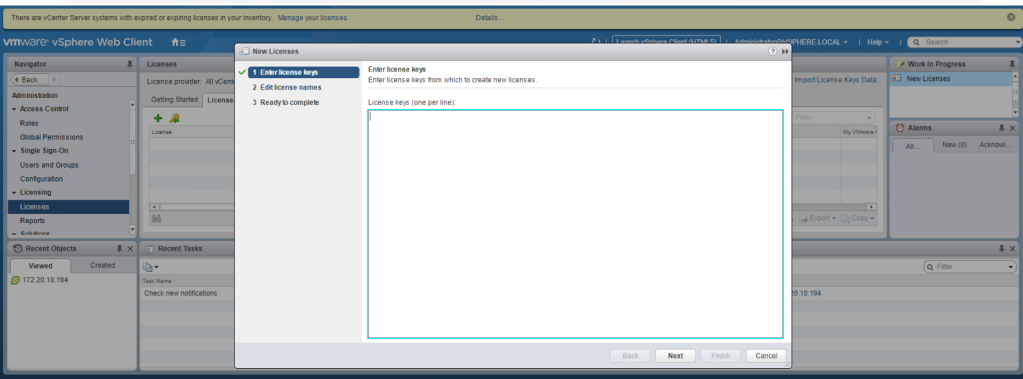
Here, we can not create licence as we don’t have that privileges.
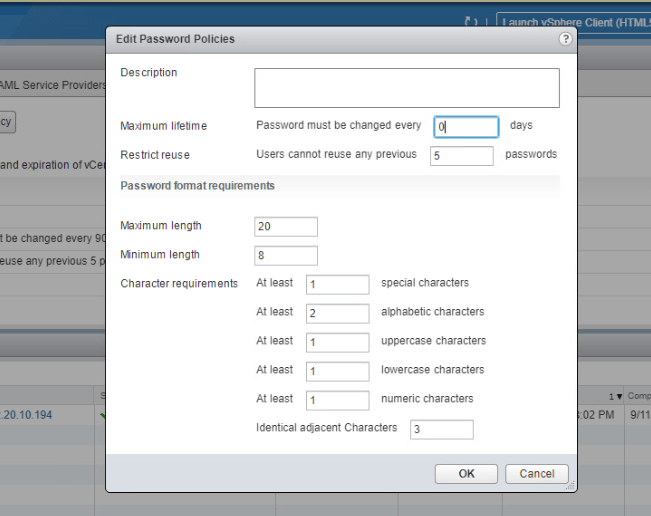
3. Home -> Administration -> Single Sign-on -> Configuration -> Password policies & then click on edit.
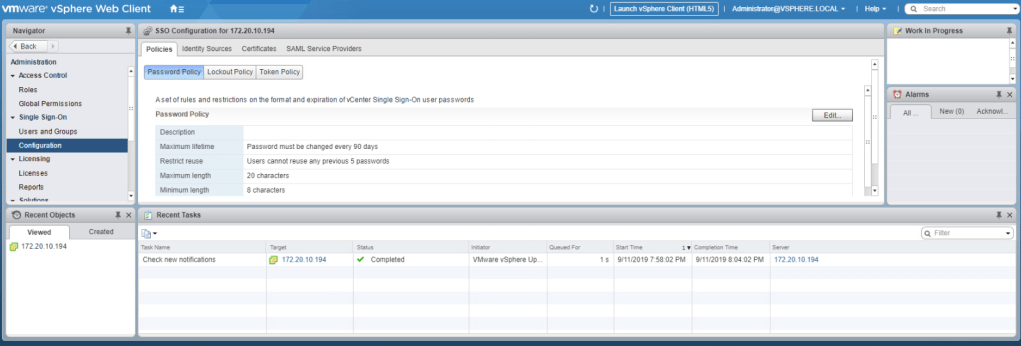
4. Enter 0 days in the maximum lifetime textbox and then save the changes.
5. Select Hosts and Clusters.
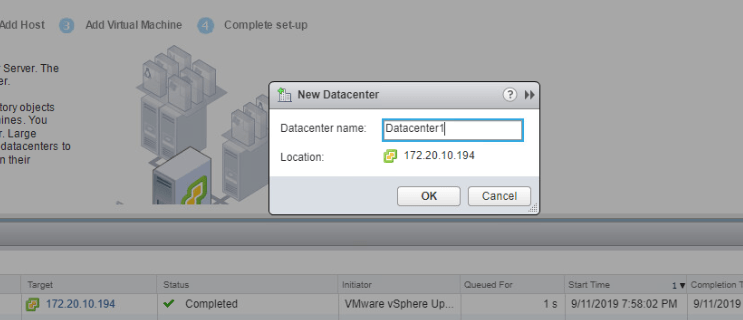
6. Right click on vCenter server and select new database.
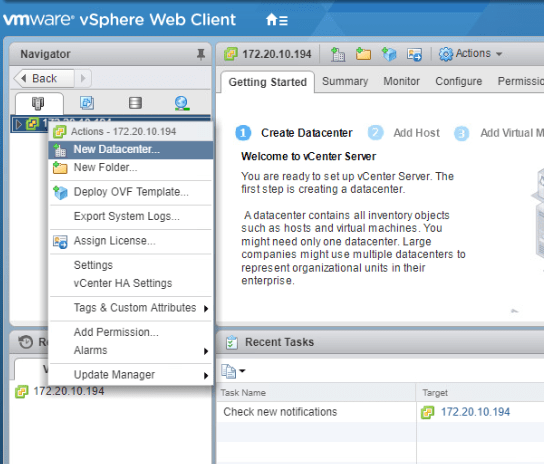
7. Give the name Datacenter1 and click ok.
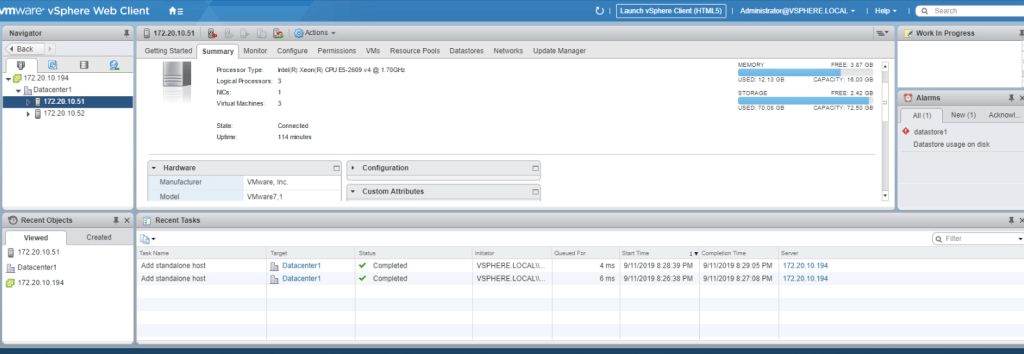
TASK-3 Add your ESXi host to the vCenter server inventory.
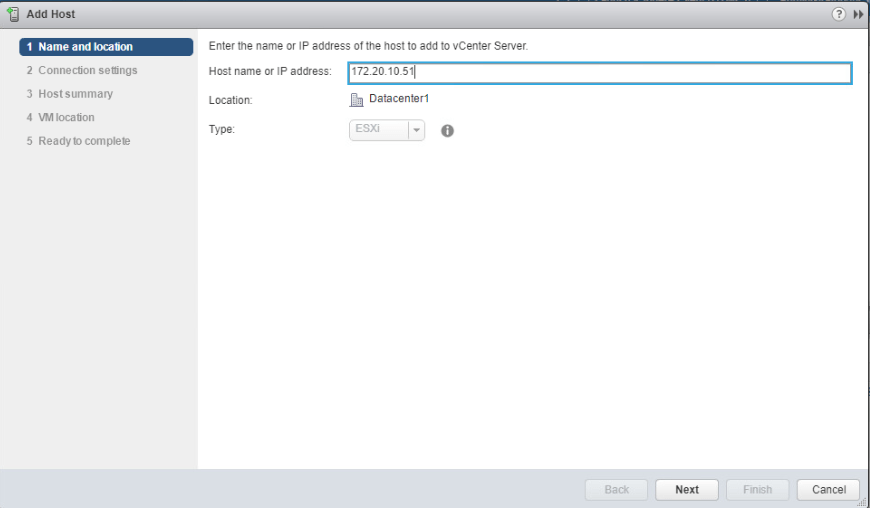
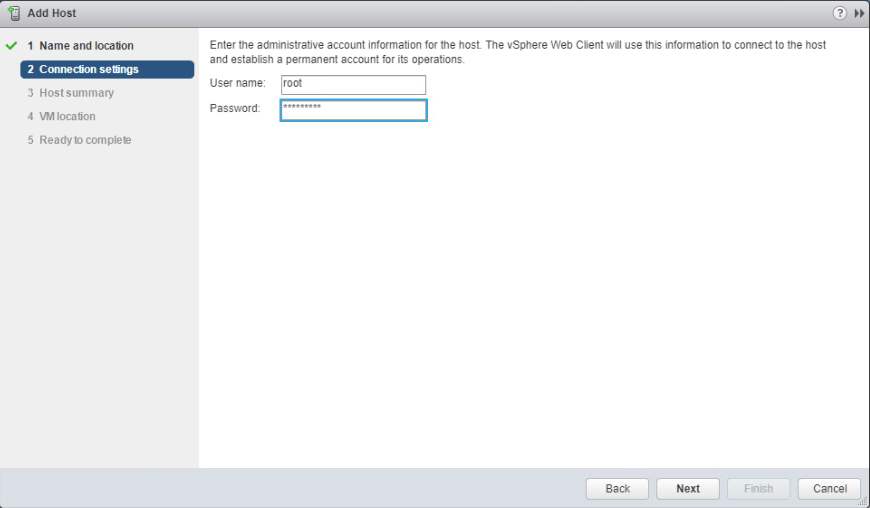
- Select Add Host by right clicking on the Datacenter1.
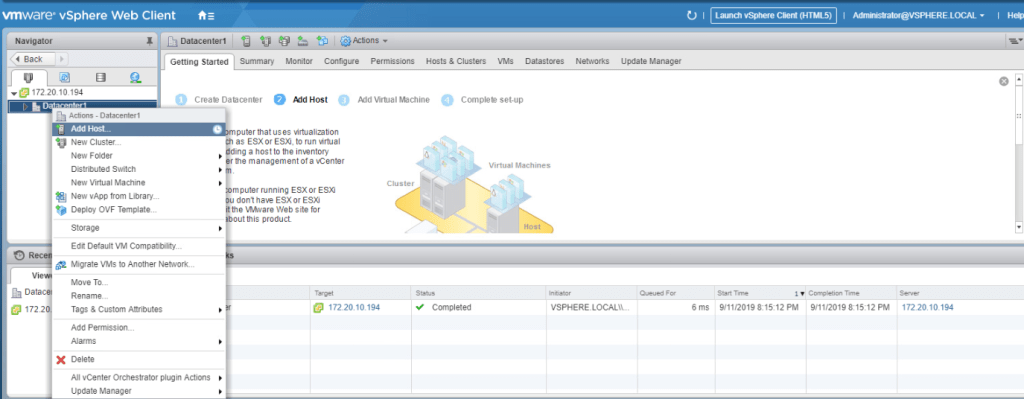
2. Give the Host name or IP address to add that host into vcenter server and click next.
Select the location(datacenter1) which we created in the above task and then next.
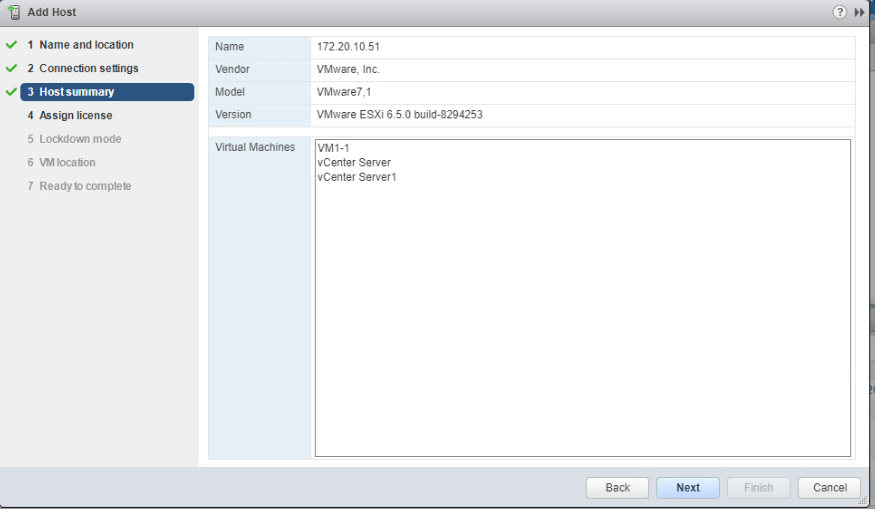
Summarize the information and click finish.
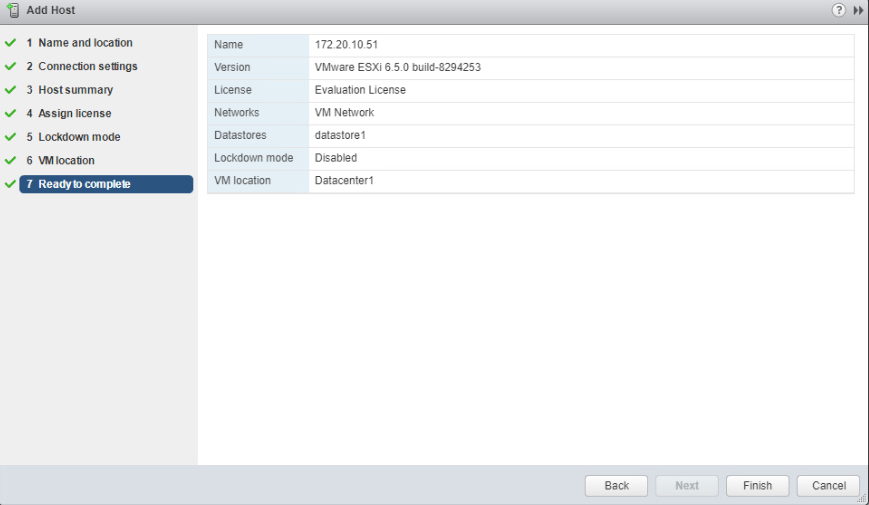
Repeat the same steps to add second esxi host into vcenter server inventory. after that the both esxi hosts will be listed in the datacenter1 panel.
TASK-4 Configure the ESXi hosts as NTP clients.
- Select 172.20.10.51(first esxi host) and then go to configure tab, then choose Time Configuration and click on edit button.
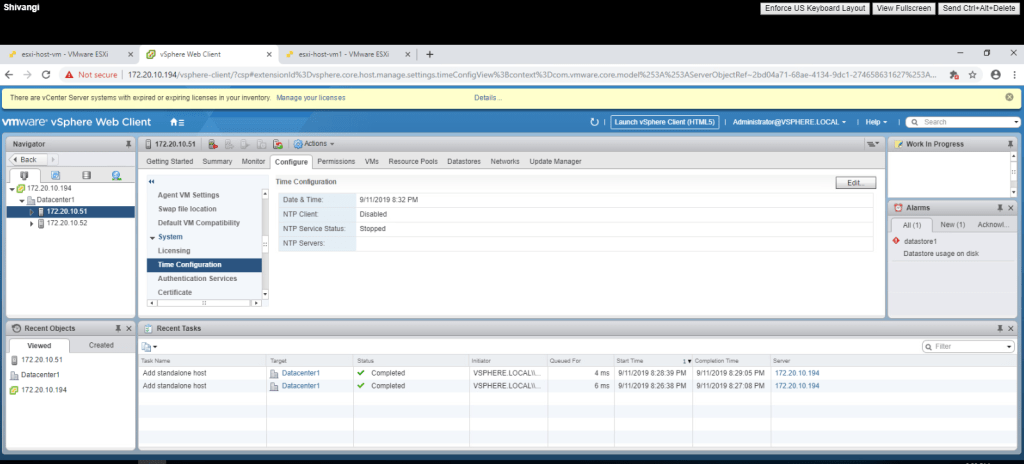
2. Click on Network Time Protocol radio button and give the ip address 172.20.10.10. in the NTP servers box and then click ok.
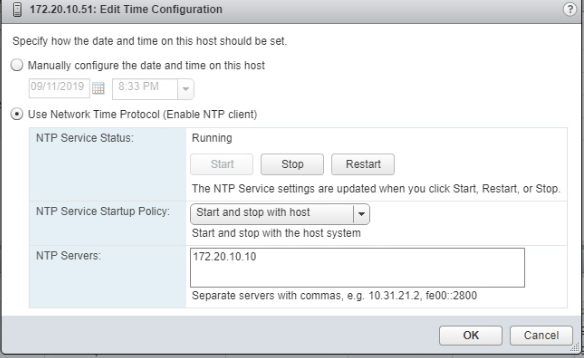
Repeat the task for second esxi host (172.20.10.52).
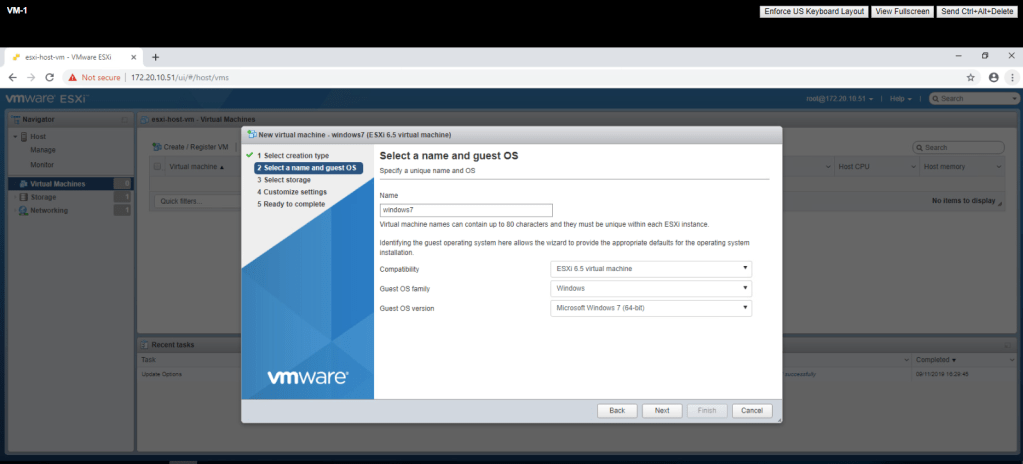
Lab-3 Deploying and COnfiguring a Virtual Machine
TASK-1 Create a Virtual Machine.
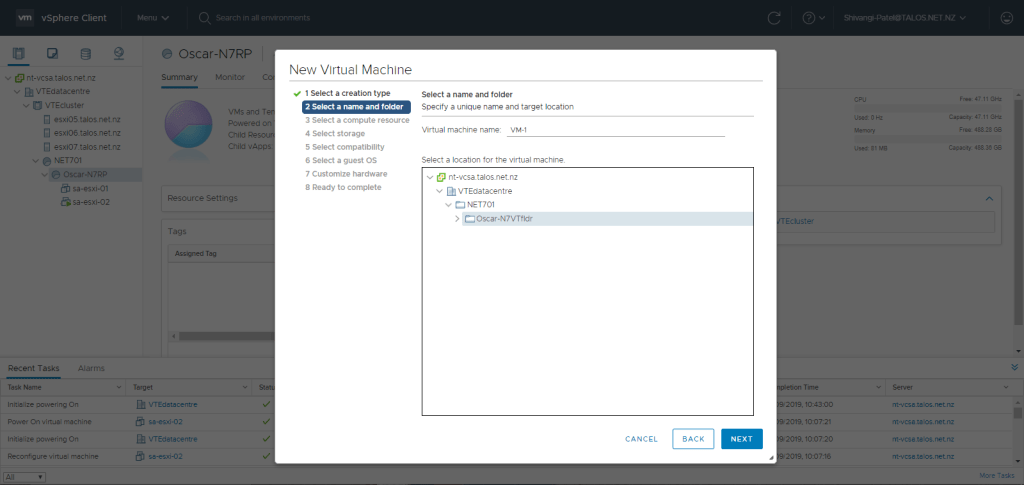
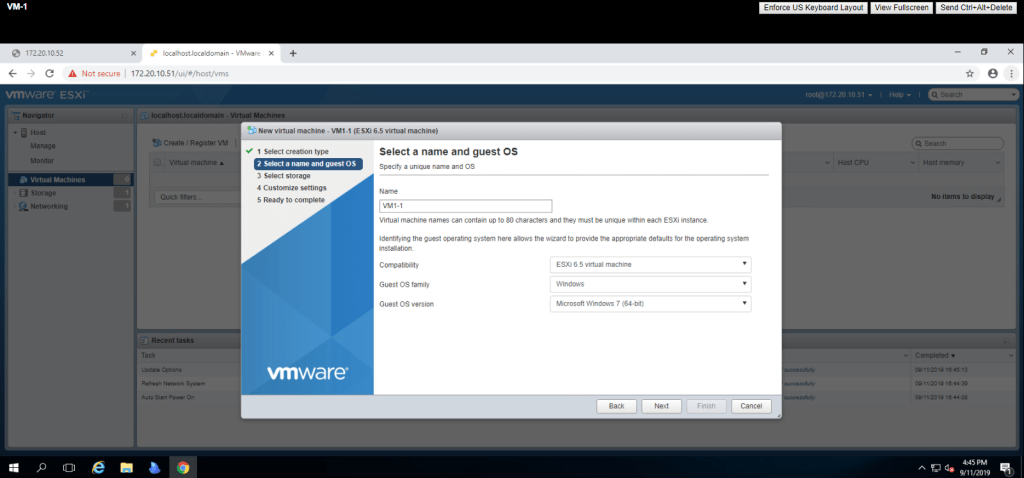
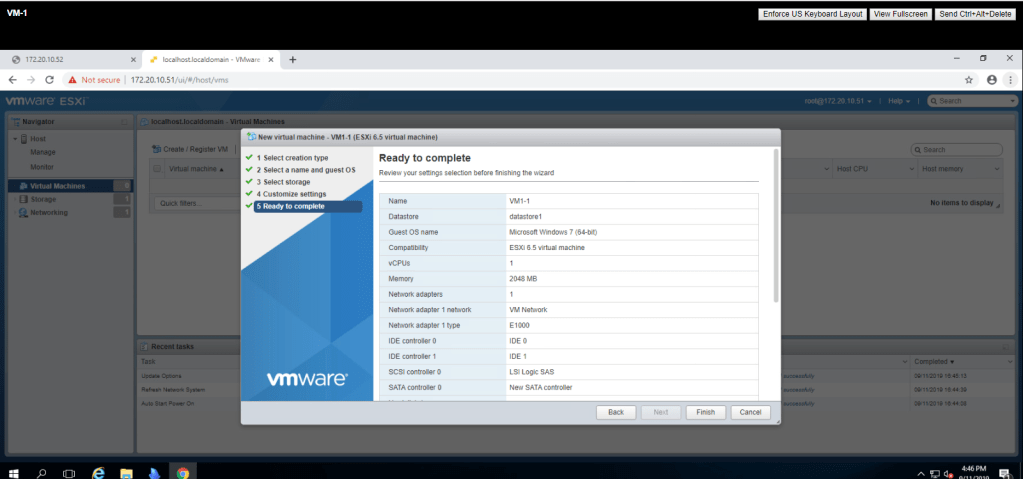
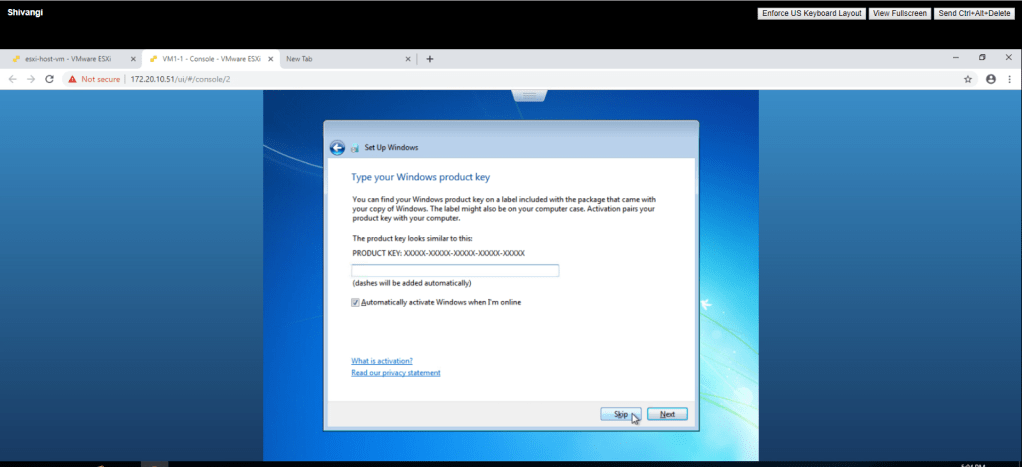
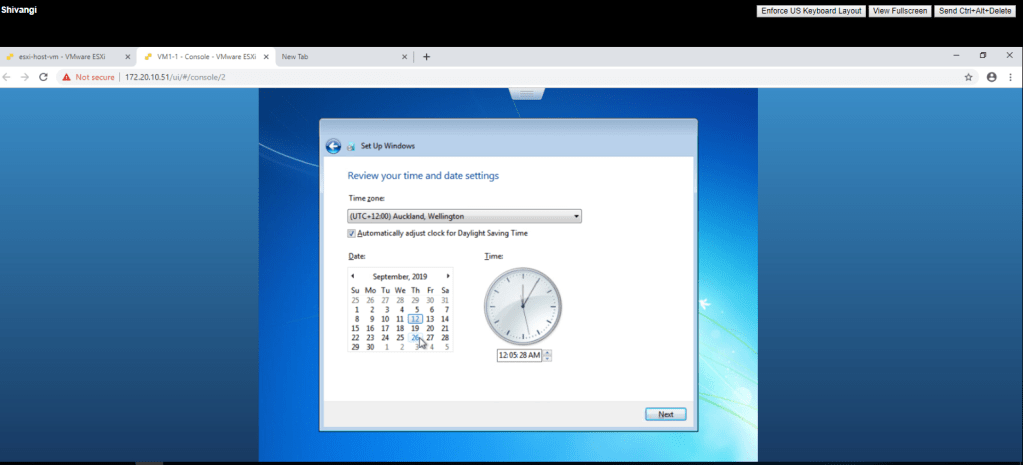
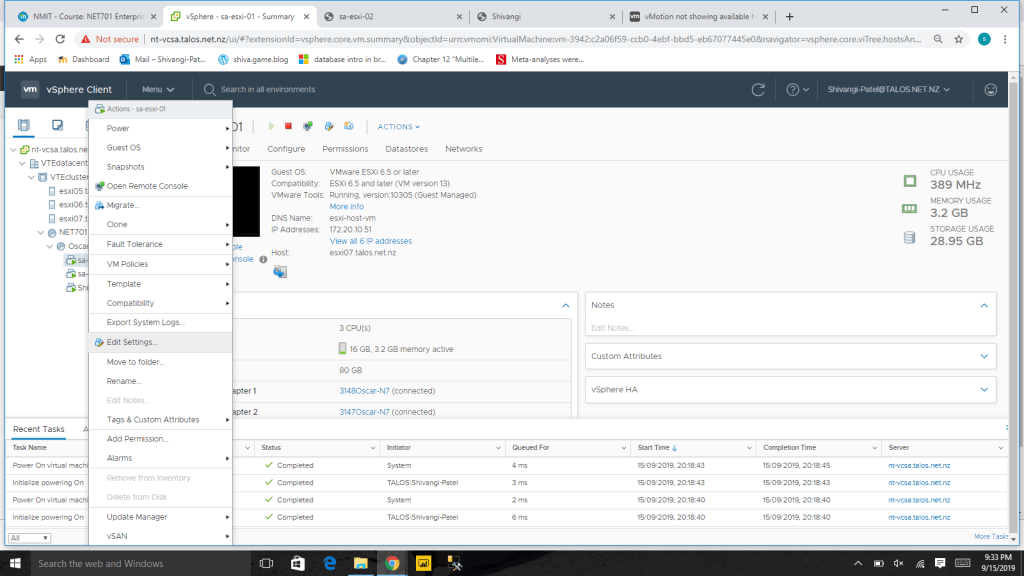
- Right Click on Oscar-N7RP and select Create / Register VM. It will show the New Virtual Machine wizard, click next and then in second step give a name to virtual machine (VM1-1) and select the location. click next.
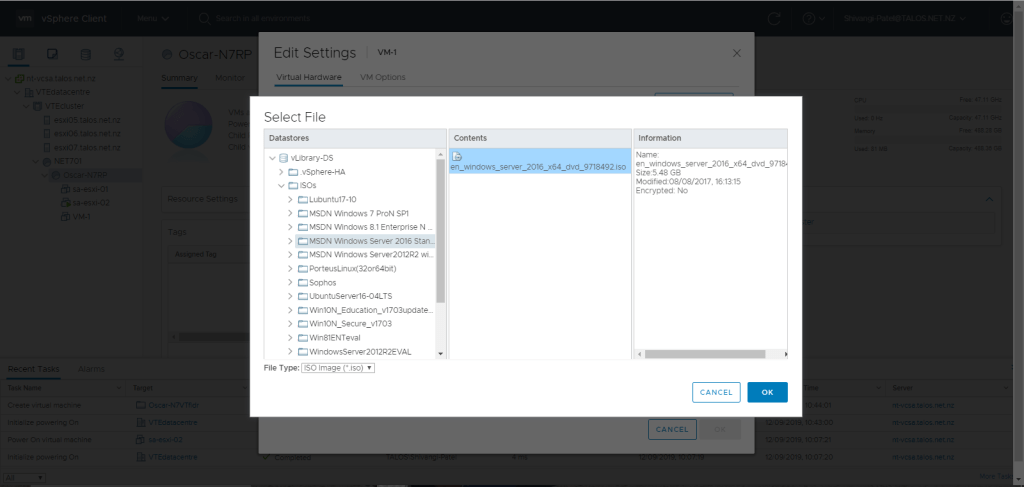
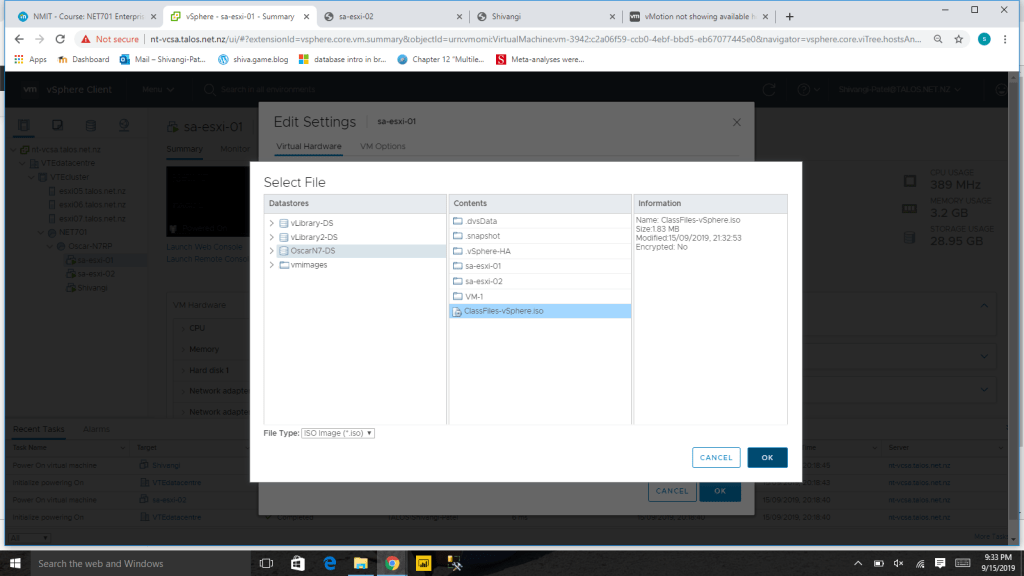
2. Go to Edit settings of VM1-1 and select the appropriate iso file and click ok.then power on the virtual machine and launch console.
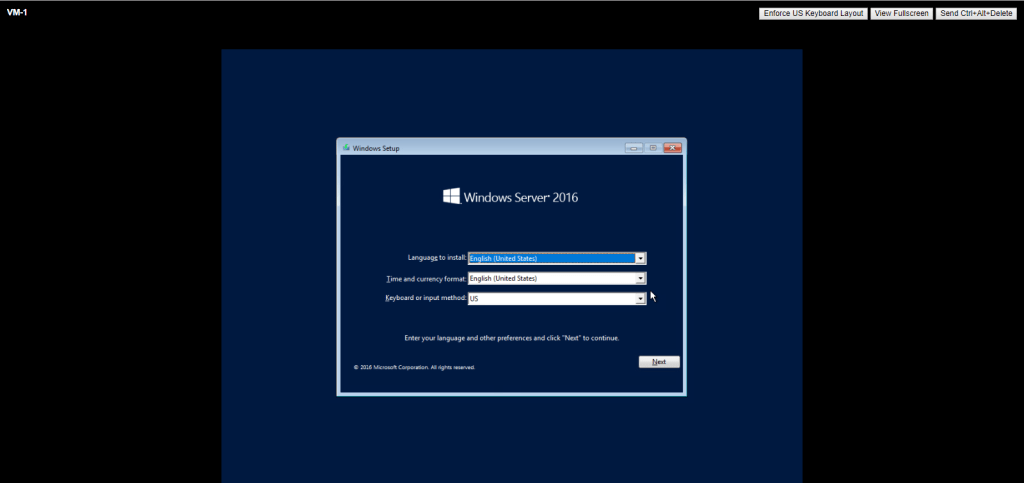
3. Select language and click next.
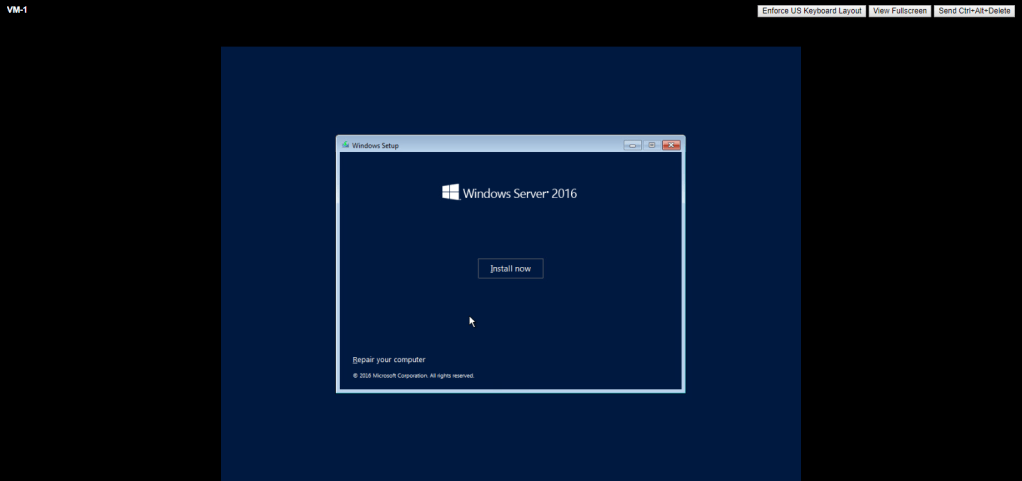
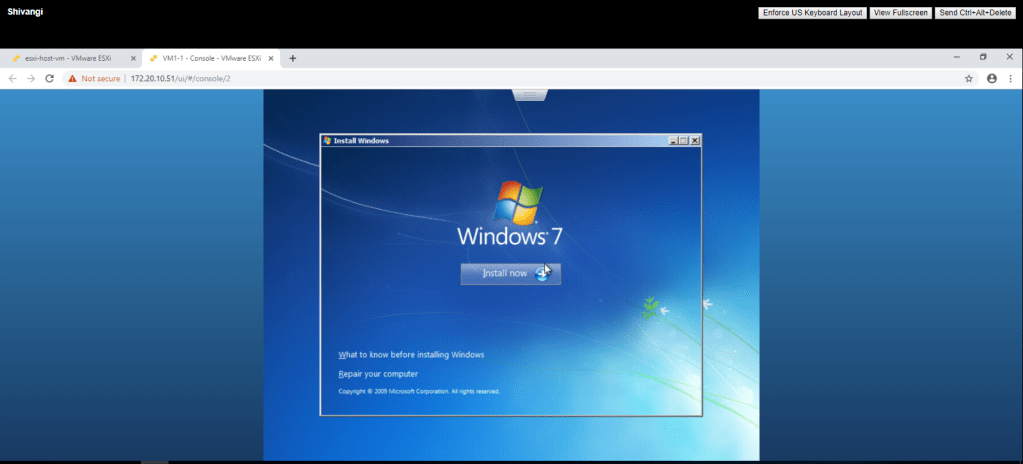
4. Click Install Now.
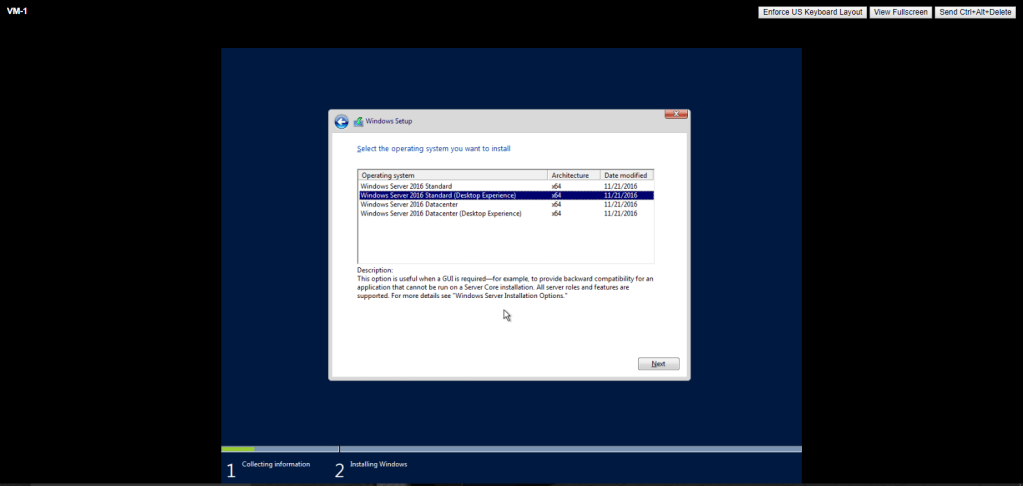
5. Select Windows Server 2016 Standard (Desktop Experience) and then next.
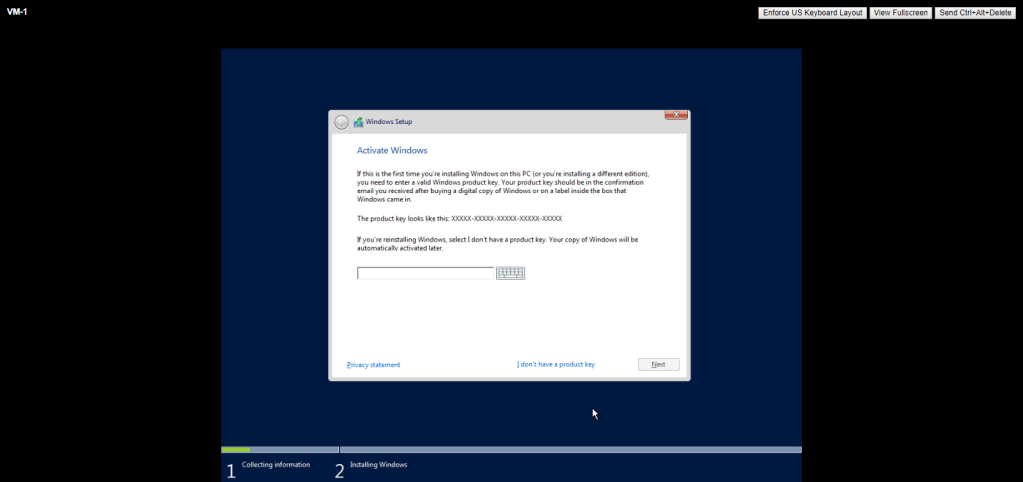
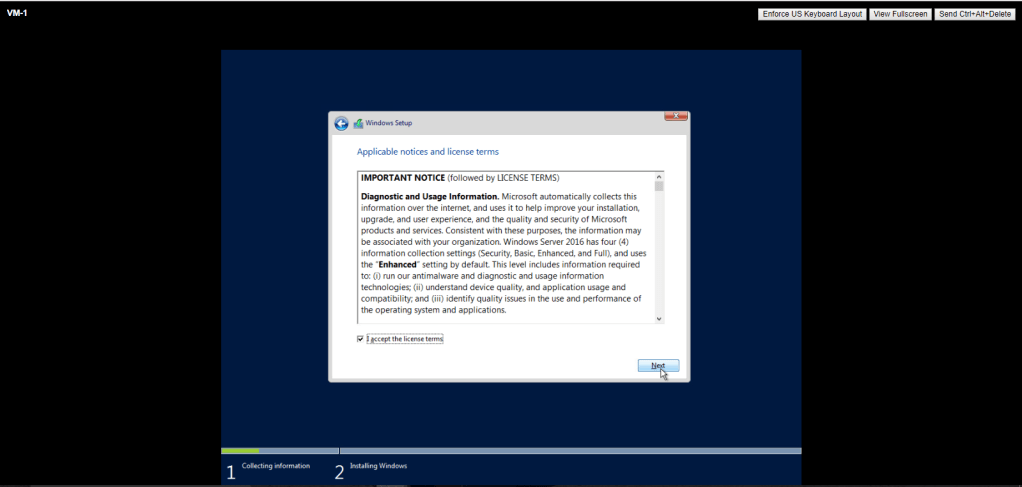
6. Check on I accept the licence terms and then next.
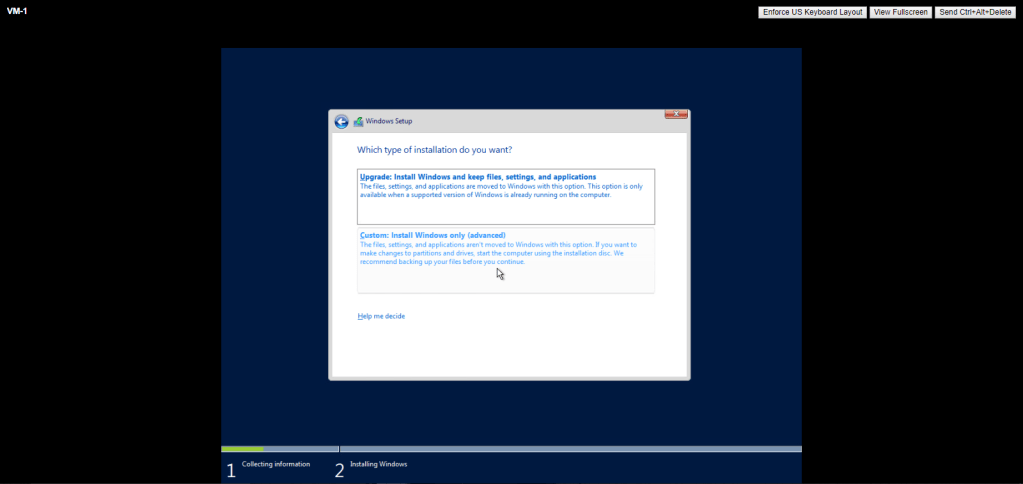
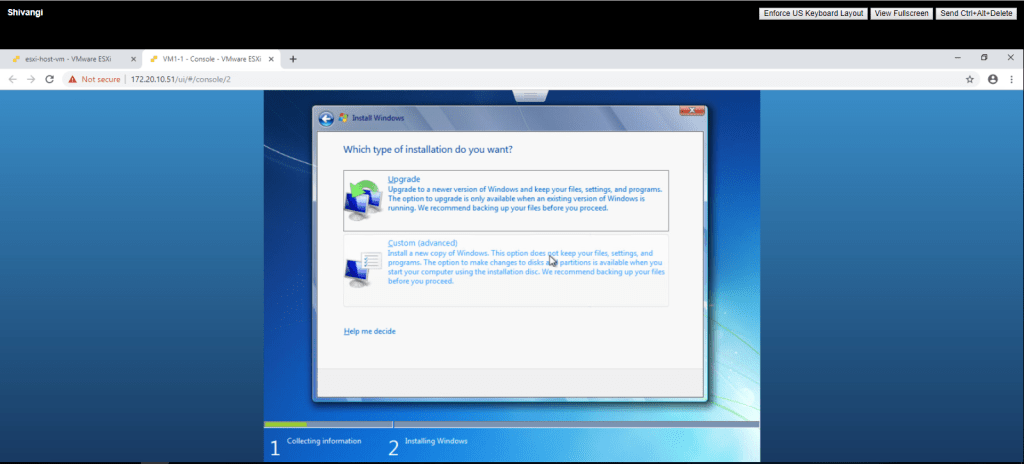
7. Select Custom Install
8. Select the disk and click on next.


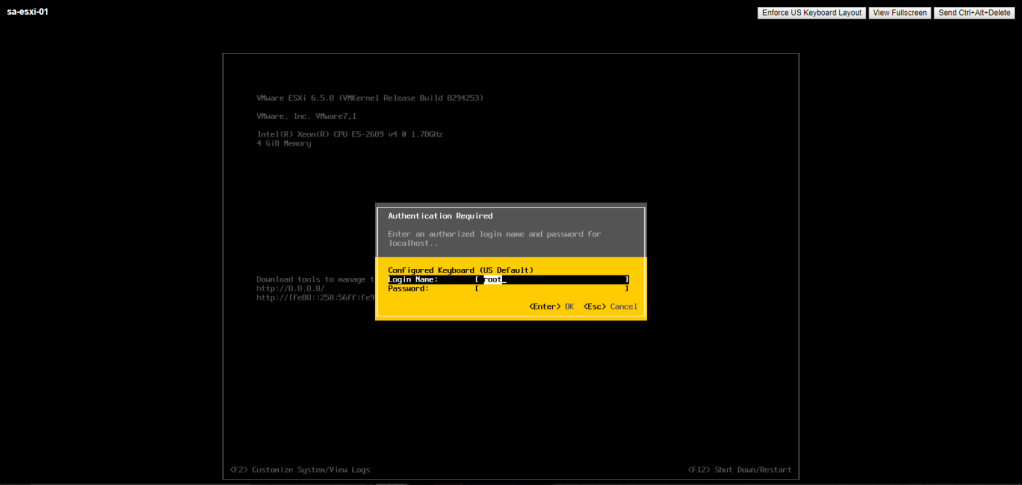
Now login into your esxi host using root username and password.
Repeat the same task to create a virtual machine on second esxi host.
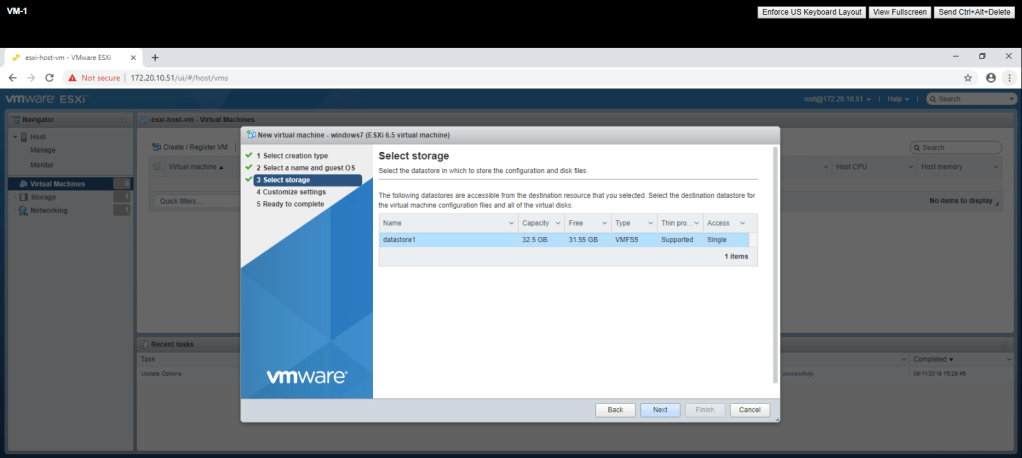
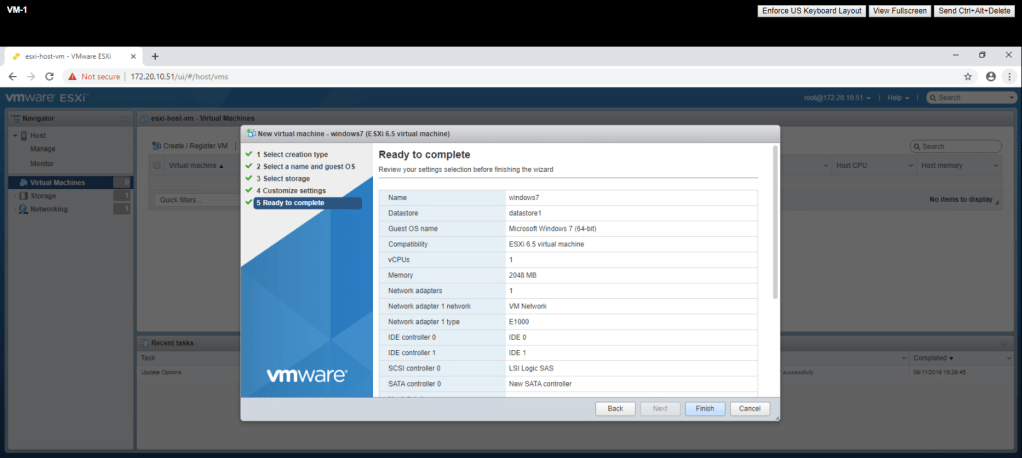
TASK-2 Install a guest Operating System and disable Windows updates.
- Select create a new virtual machine and click next.
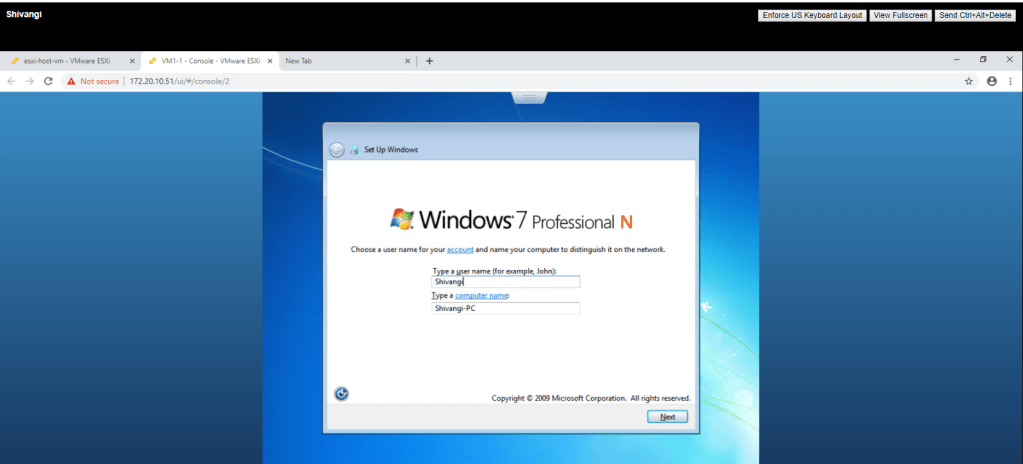
2. Type a name for virtual machine and click next.
3. Select the datastore1 and then next.
4. Expand the memory, if you want and then Click next.
5. Click on finish.
Repeat the same steps for second esxi host.
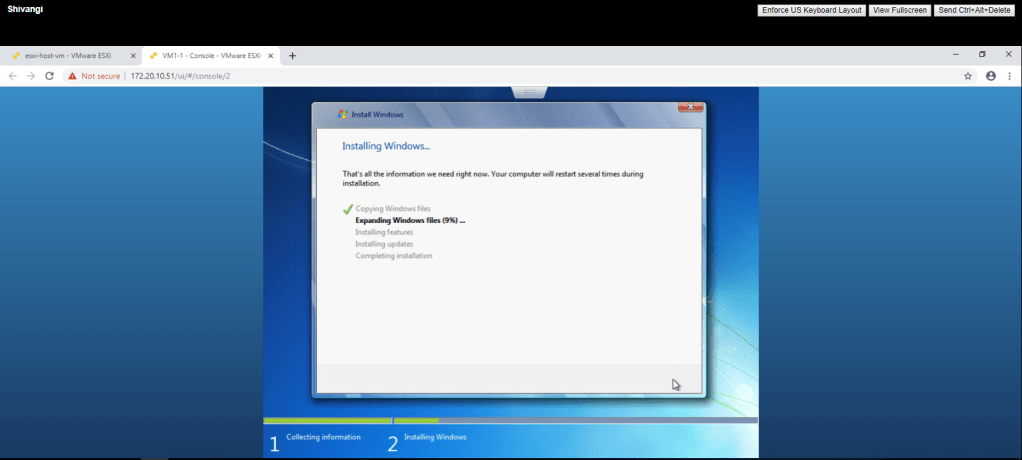
Power on the virtual machine and then launch console. it will start the installation process.

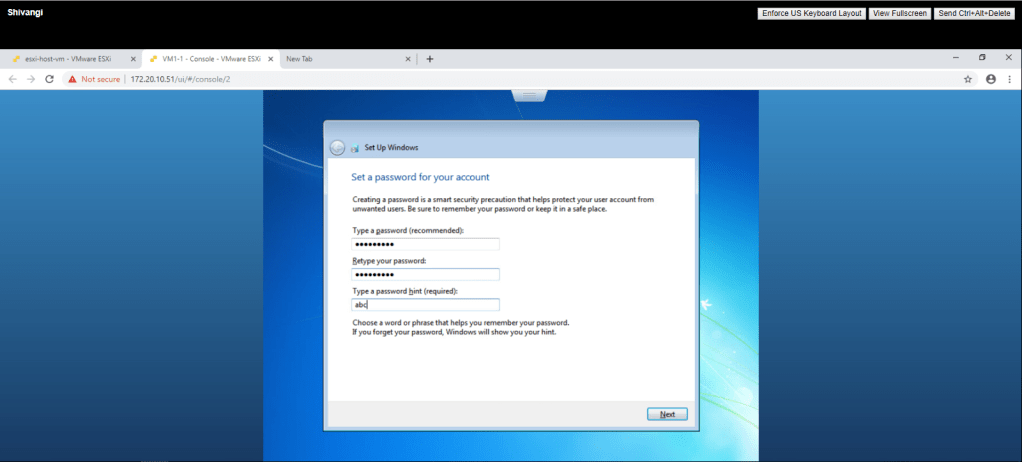

Then click on start button and type ‘windows update’ in the search box and then go to change settings and select ‘never check for updates’ option.
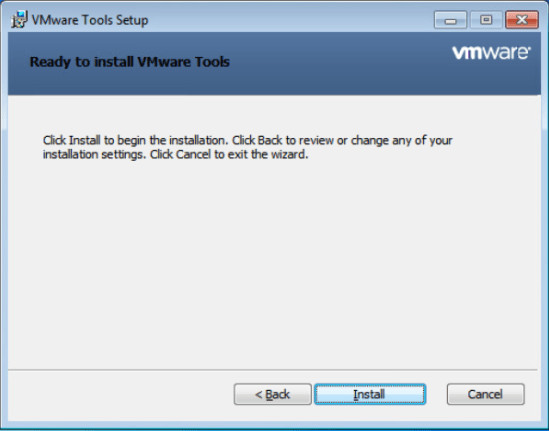
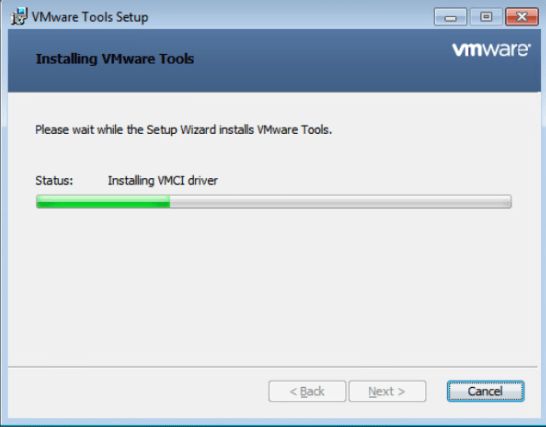
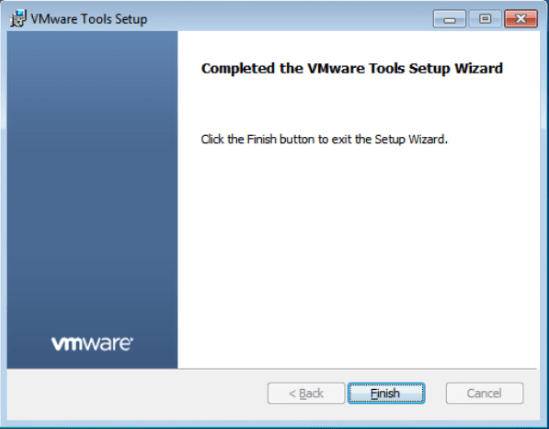
TASK-3 Install VMware Tools.
Following is the process for installing VMware Tools.
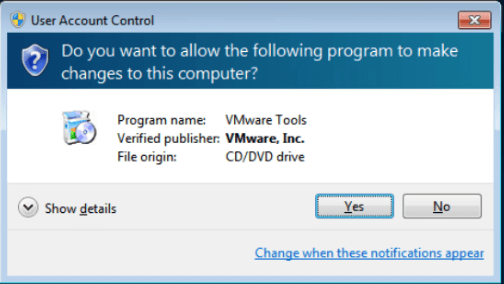
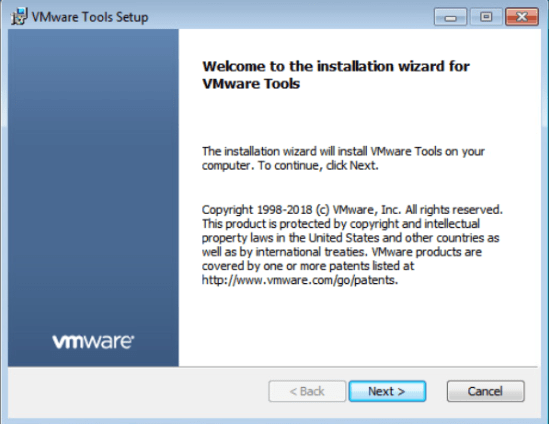
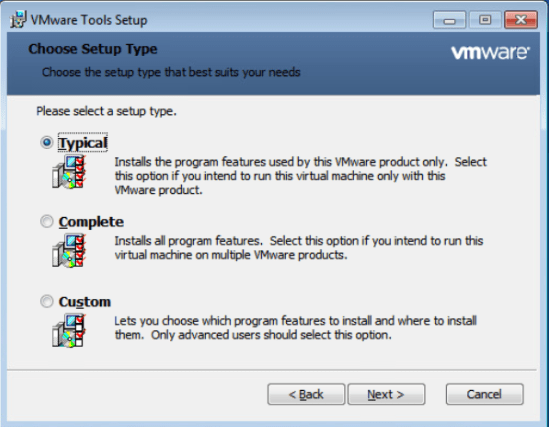
Task-4 Install Files.
- Browse the ClassFiles-vSphere.iso
Then Go to edit settings of VM1-2 and select Client Device from the drop down menu of CD/DVD drive1
Launch console for VM1-2 and then Open DVD drive D

Then copy the CPUBUSY and IOMETER files to desktop.
Repeat the same task for VM2-1 for second esxi .
Lab-2 Configuring ESXi Hosts
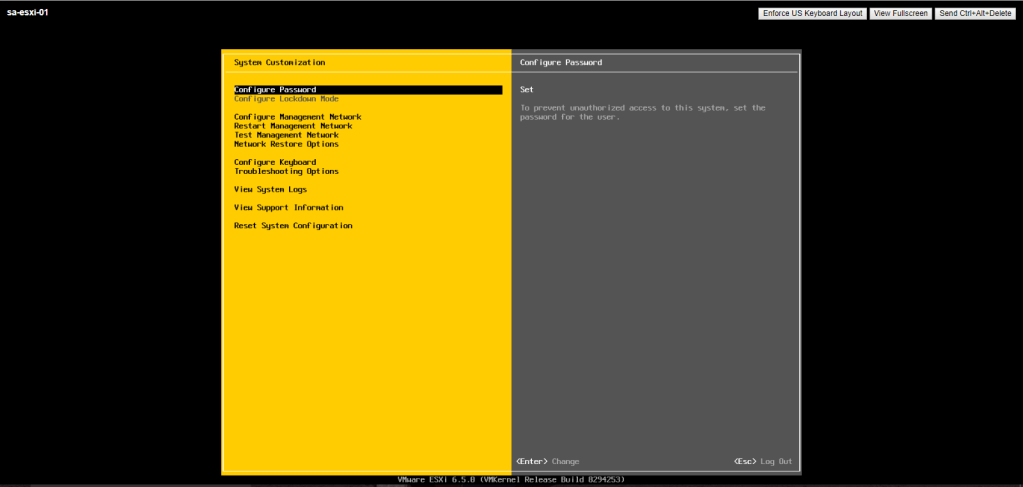
TASK-1 Examine the Option in the DCUI .
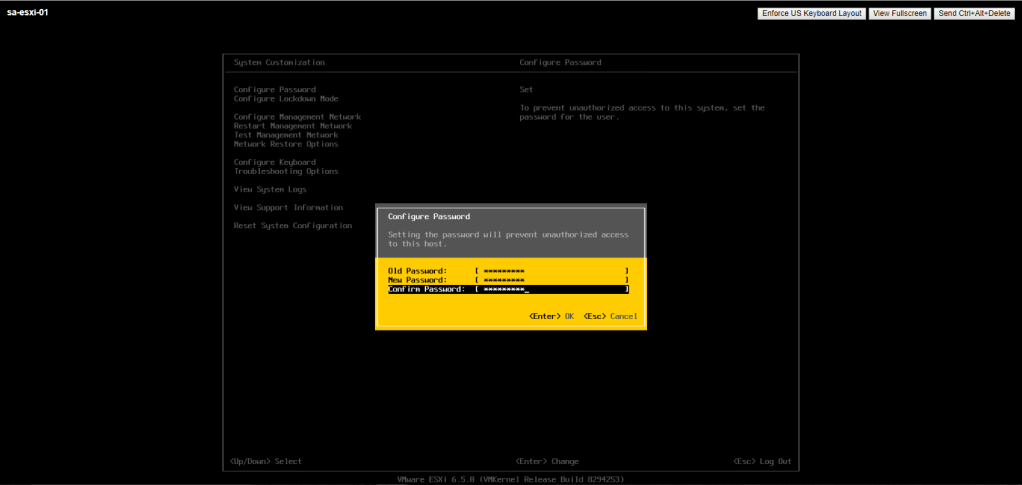
- Press F2 to customize the system logs, go to configure password.
2. Type an old password and give new password & then press enter.
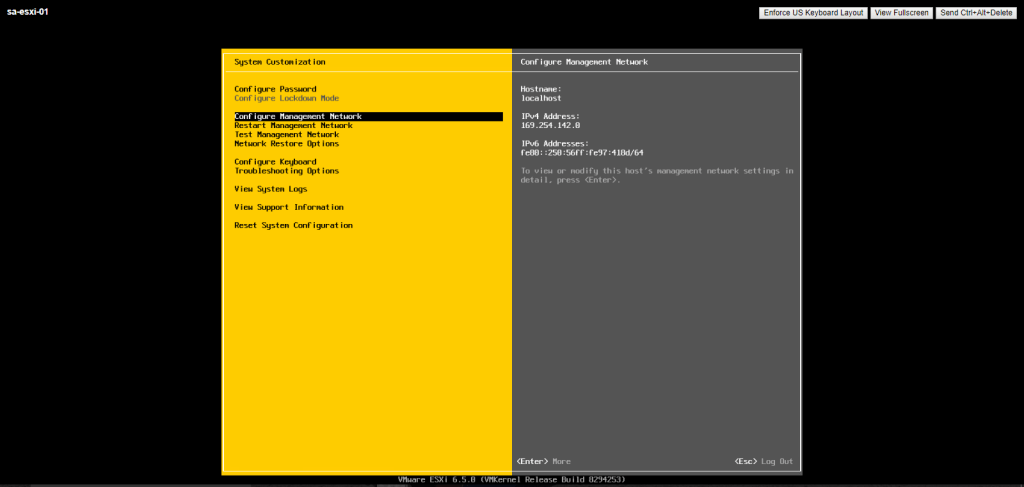
TASK-2 Configure the Management Network.
4. Now go to configure management network.
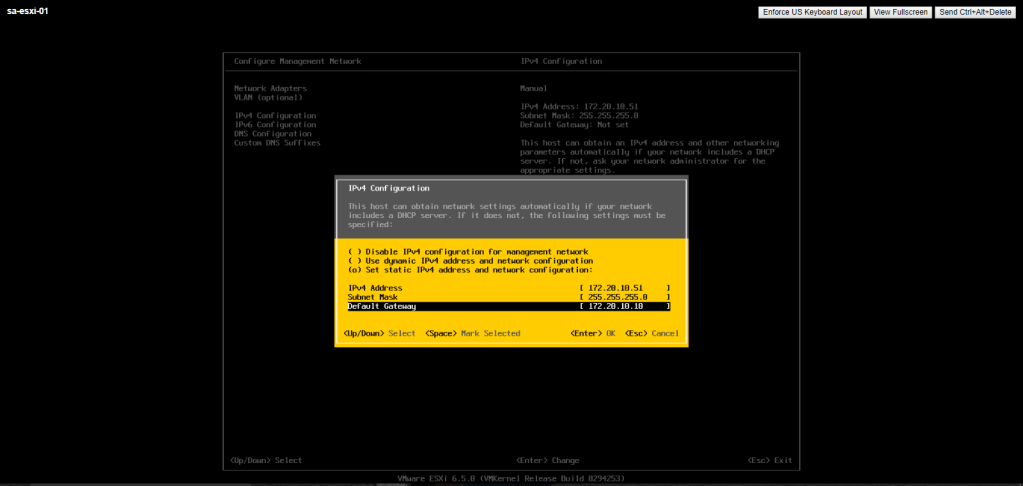
5. Give IPv4 address 172.20.10.51, Subnet Mask 255.255.255.0, Default Gateway 172.20.10.10 and then enter.
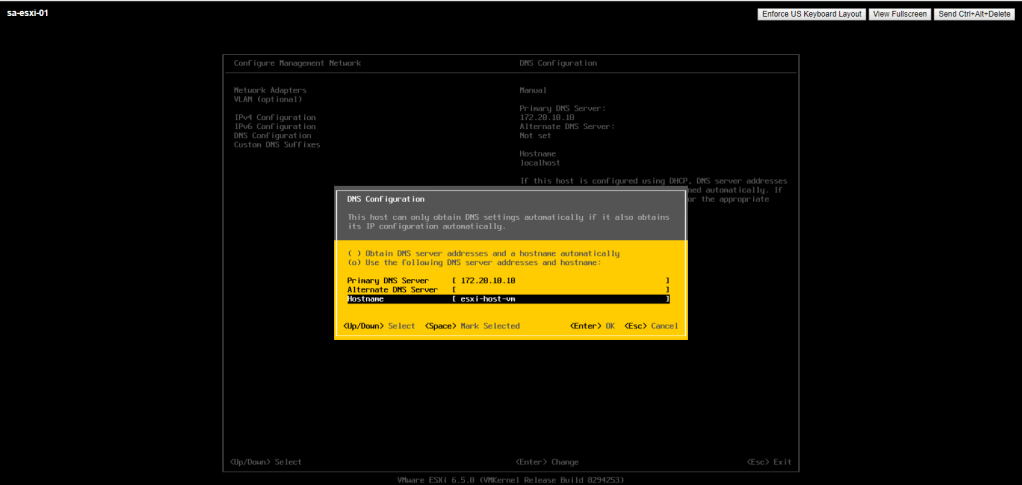
6. Now go to DNS Configuration and in the hostname textbox, type esxi-host-vm and then press enter to save the changes.
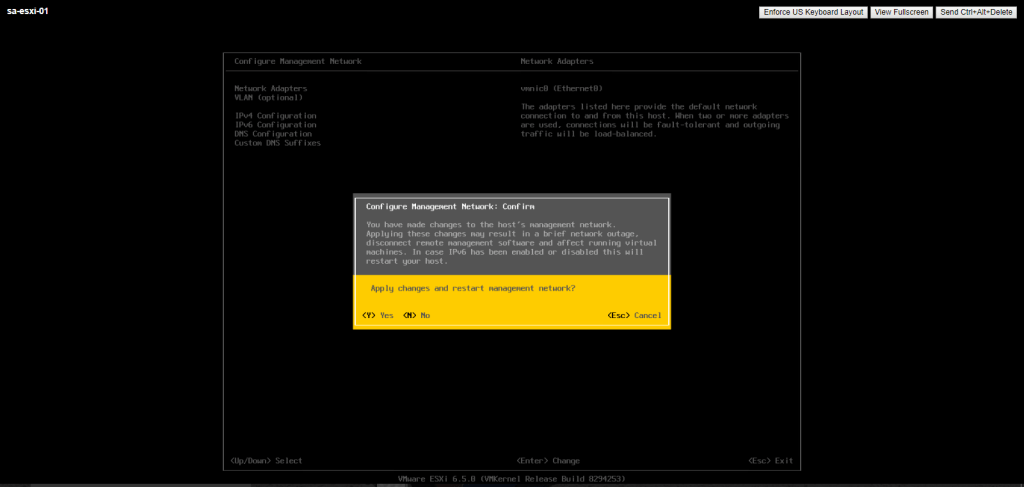
7. The confirmation message is prompted, press Y to continue.
TASK-3 Enable SSH.
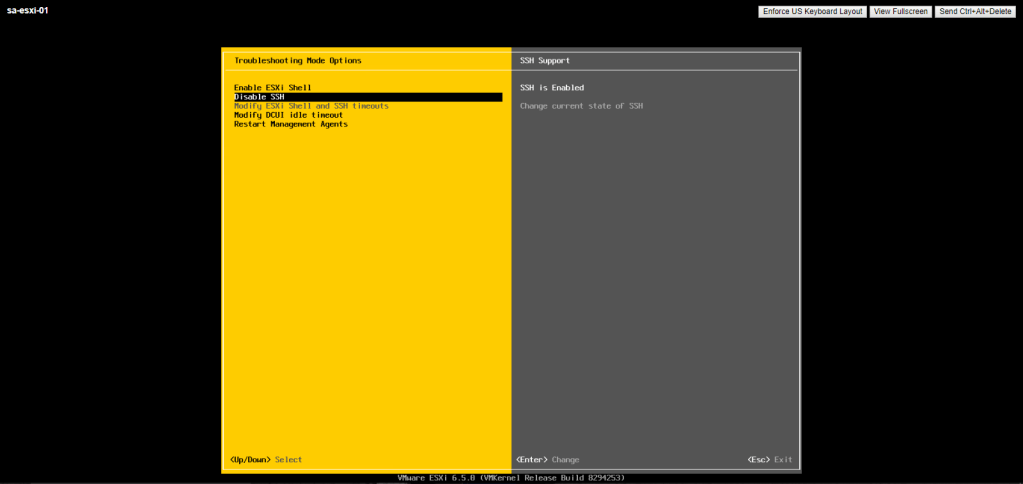
- Go to troubleshooting Options.
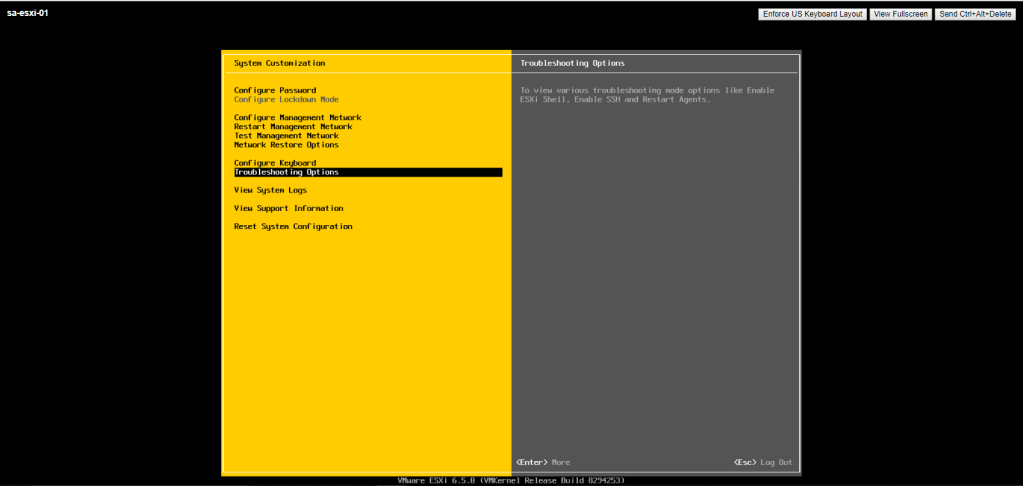
2. Using arrow key enable SSH support and then press esc to return to the main options page.
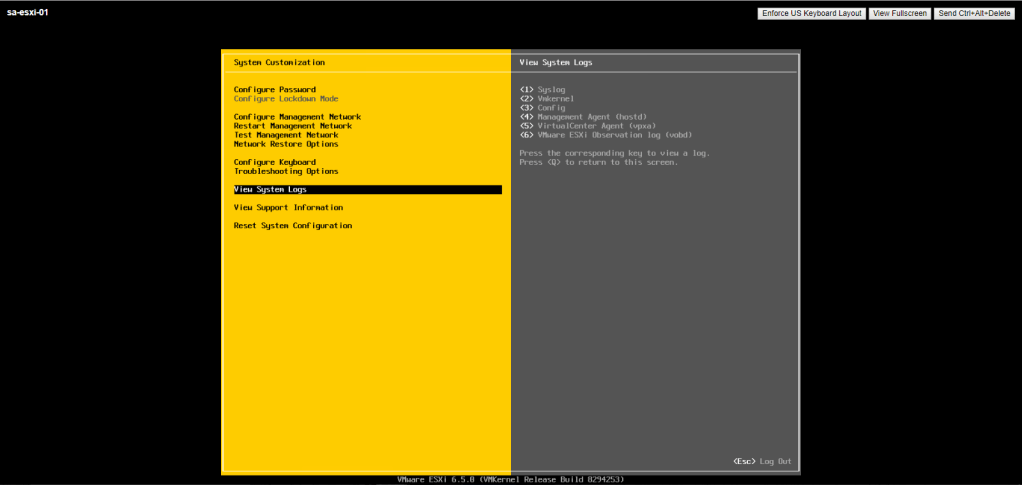
TASK-4 View System Logs.
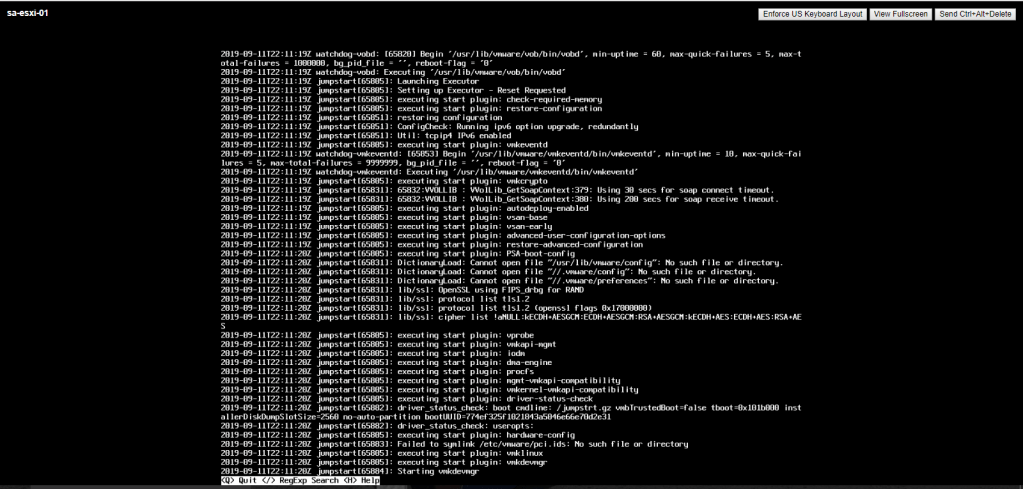
select ‘View System Logs’ and then press 1 to display the host syslog.
2. Review the system log and then press Q to quit.
Note: Repeat the same lab for sa-esxi-02.
Lab-1 Installing ESXi
TASK-1 Access Your Student Desktop.
- Click on the link given in virtual teaching environment to connect to the lab environment.

2. Select ‘LAUNCH VSPHERE CLIENT (HTML5) and login to student desktop.

TASK-2 Install ESXi.
3. Right click on OSCAR-N7RP, then select create a new virtual machine. click next.
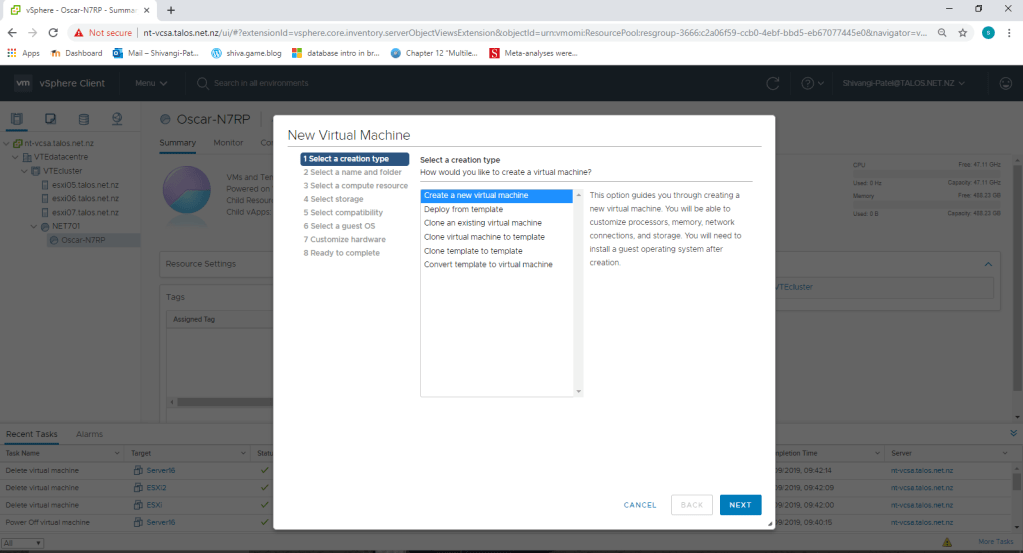
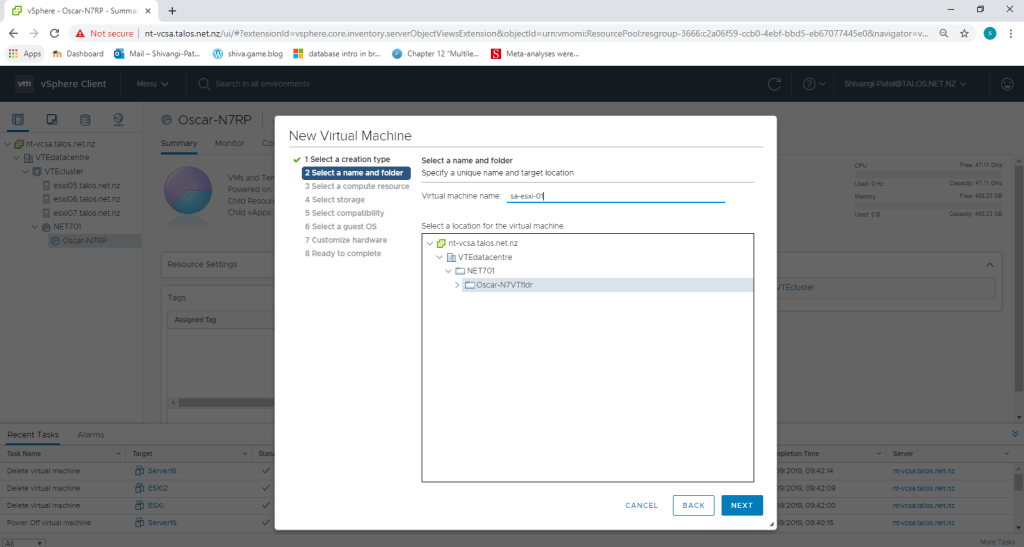
4. Give a name ‘sa-esxi-01’ to virtual machine and select the location. for me the location is Oscar-N7VTfldr. click next.
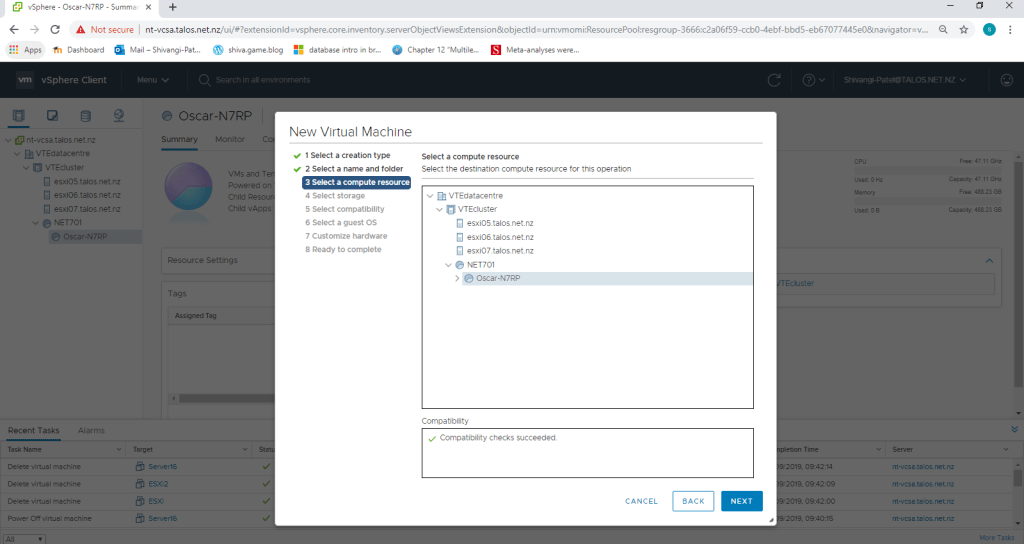
5. Select Computer Resource. (Oscar-N7RP) & then next.
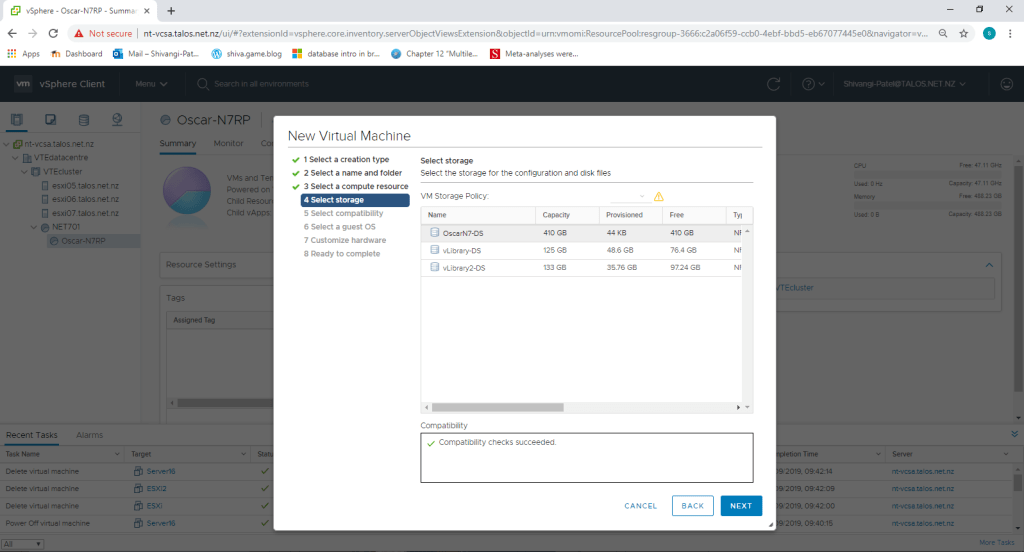
6. Choose a storage for configuration and disk files. It will show the compatibility check succeeded and then click next.
7. Select Compatible with ‘ESXI 6.5 or later’ and next.
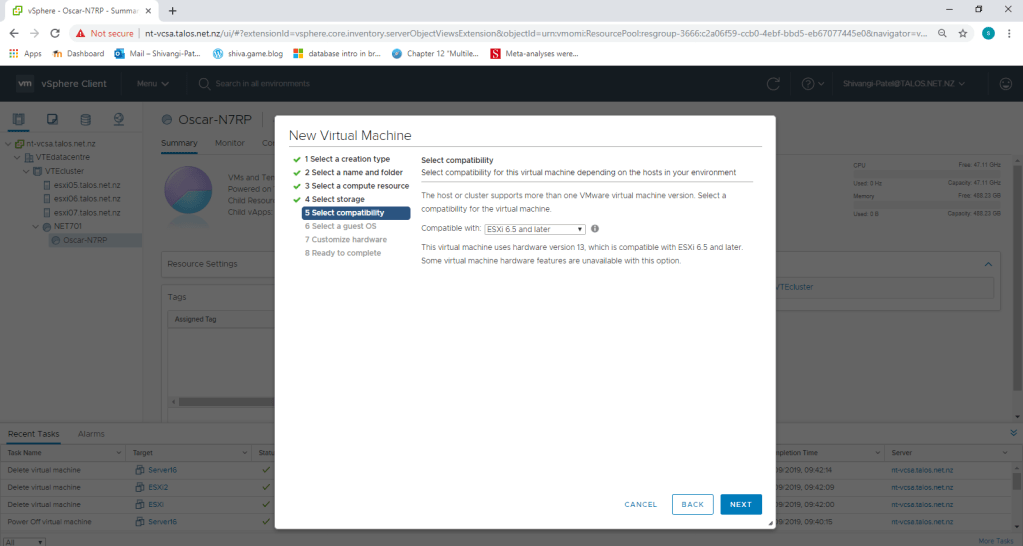
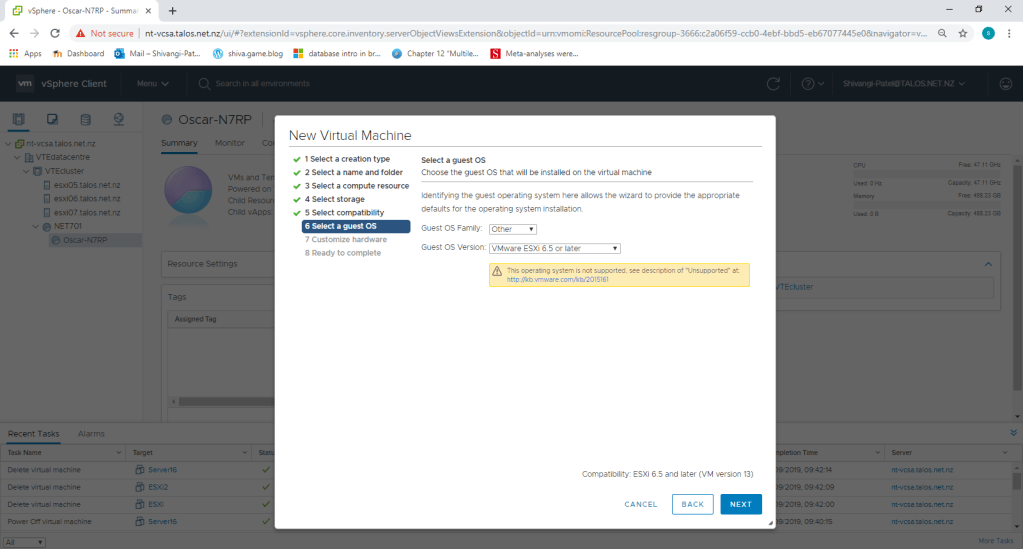
8. Choose guest OS family and version from the drop down menu and click next.
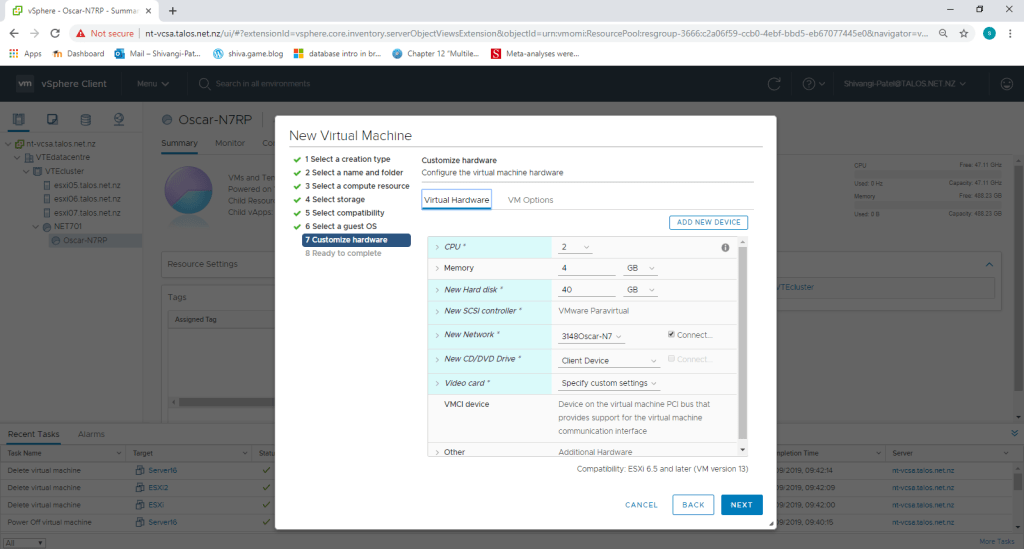
9. If you want to change the memory and CPU settings, you can change it in customize Hardware step. Right now its not necessary, so I am just clicking next.
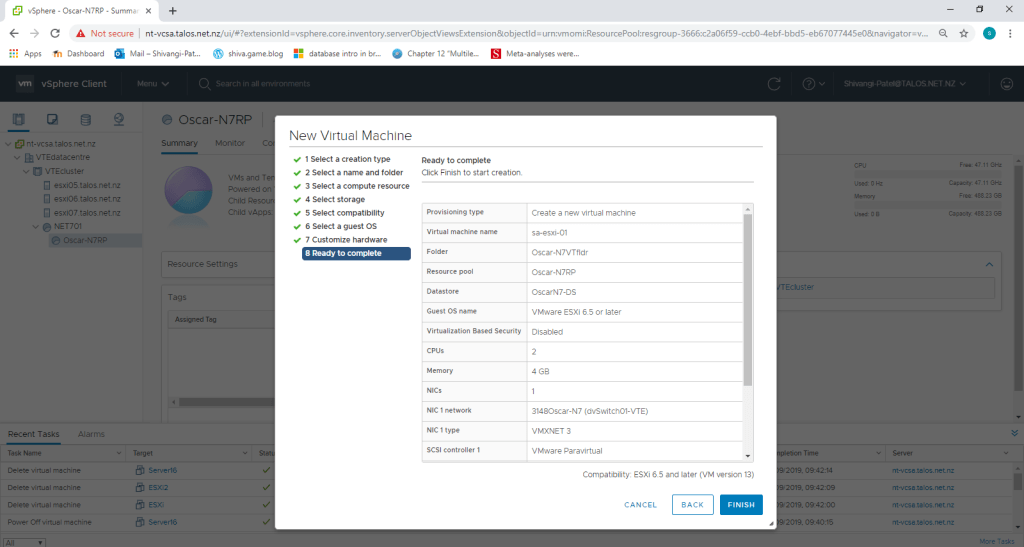
10. Check the summary of the virtual machine and click finish.
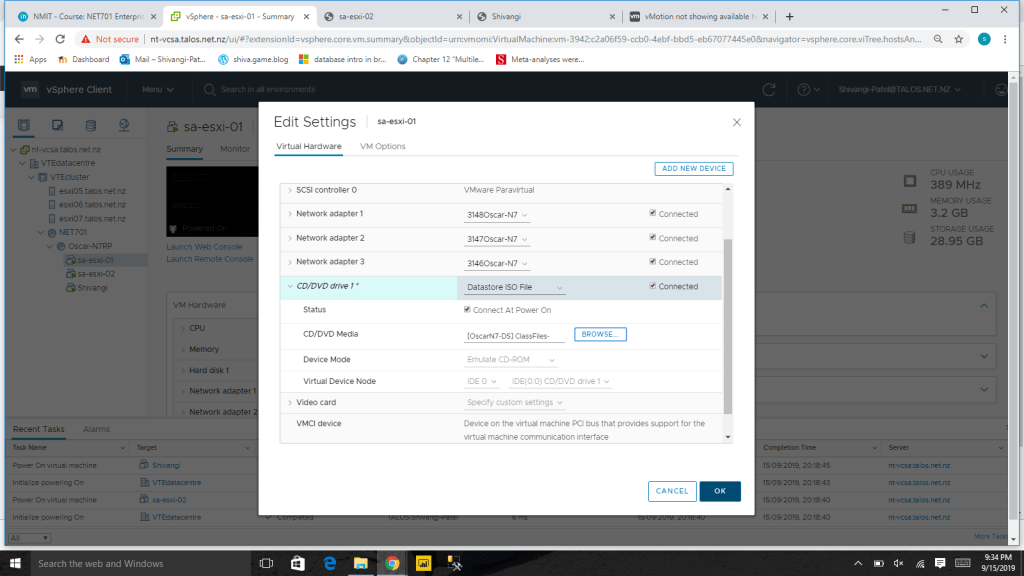
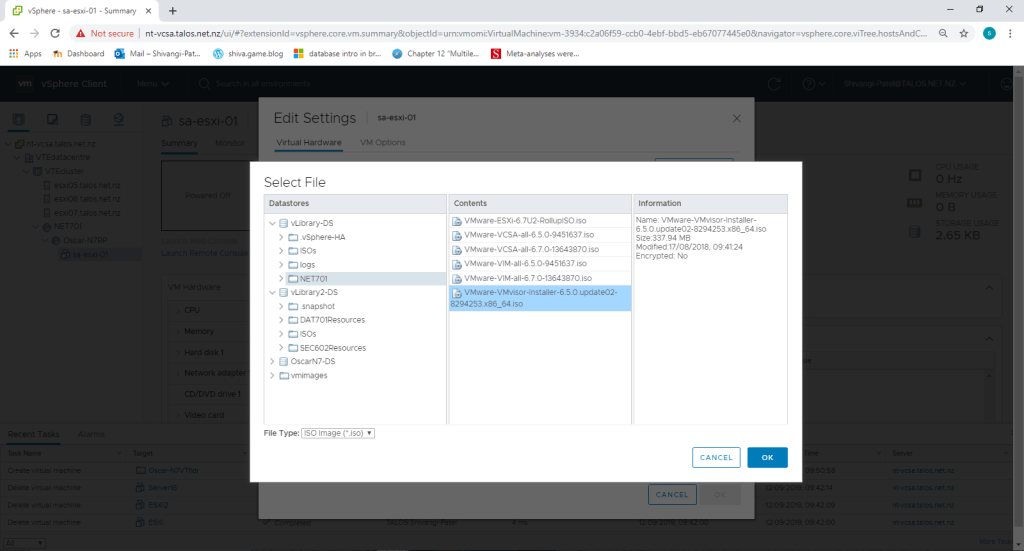
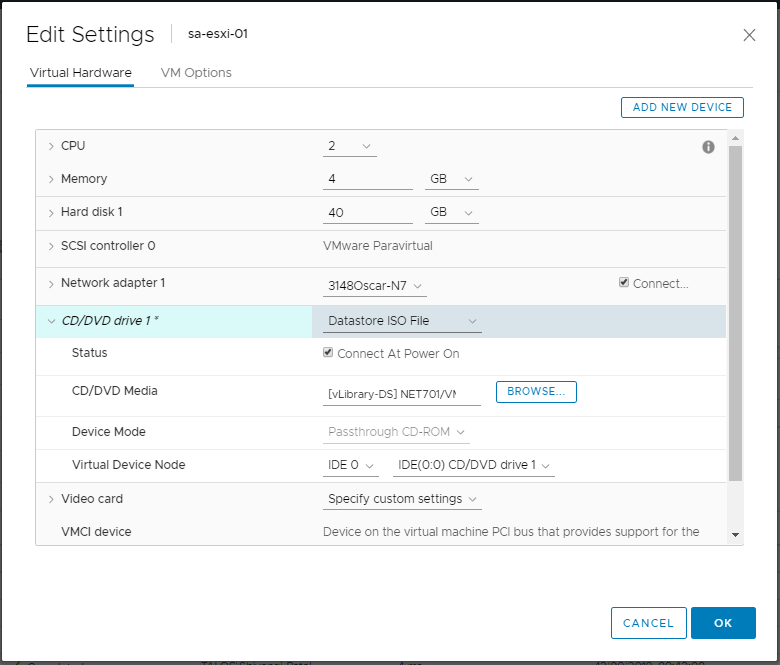
11. Now go to the edit settings of the created virtual machine and from cd/dvd drive select datastore file from the drop down list and then browse the appropriate iso file for that virtual machine.
12. Make sure that the check box, connect at power on is checked.
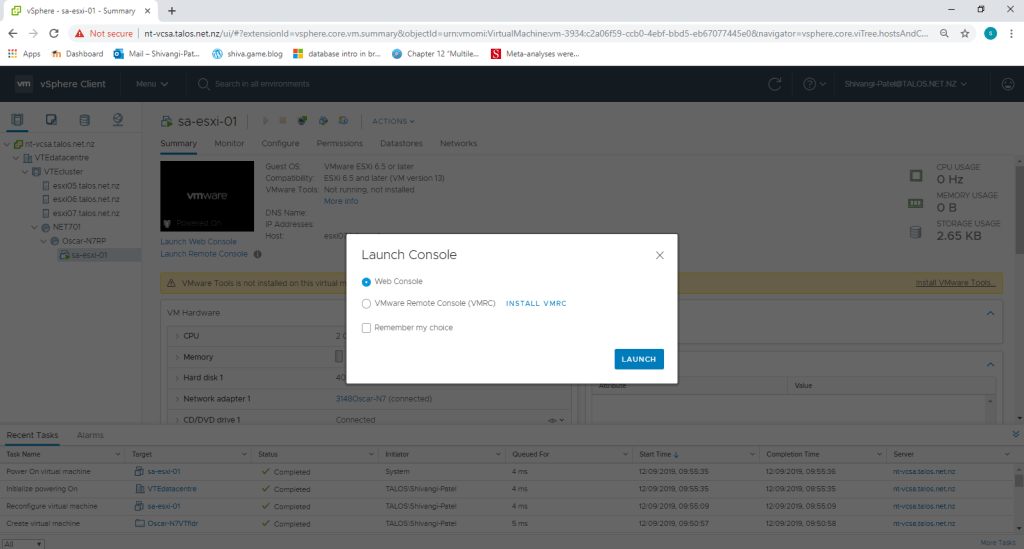
13. Now Power on the virtual machine sa-esxi-01 and then launch console, select web console and then click on launch.
14. It will start the installation process for sa-esxi-01.
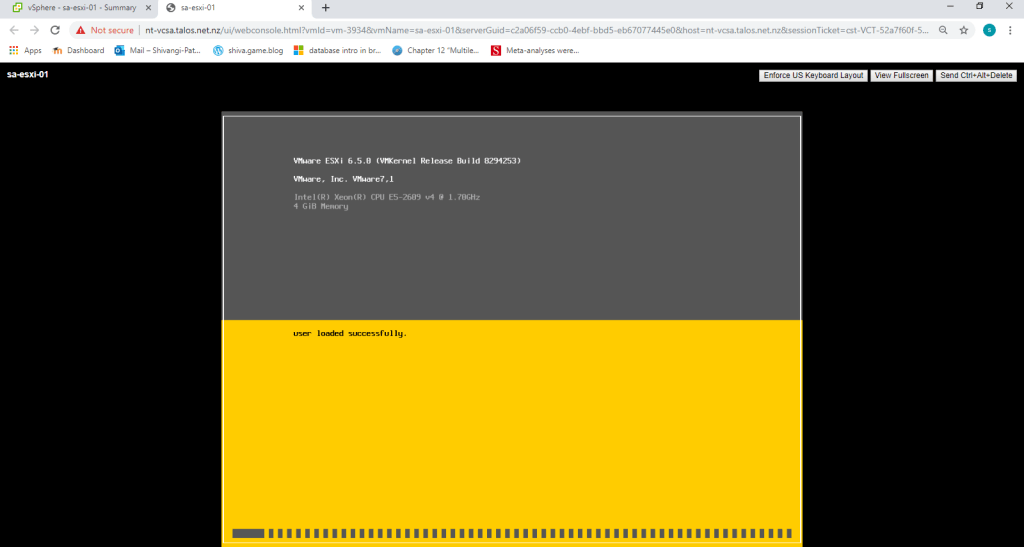
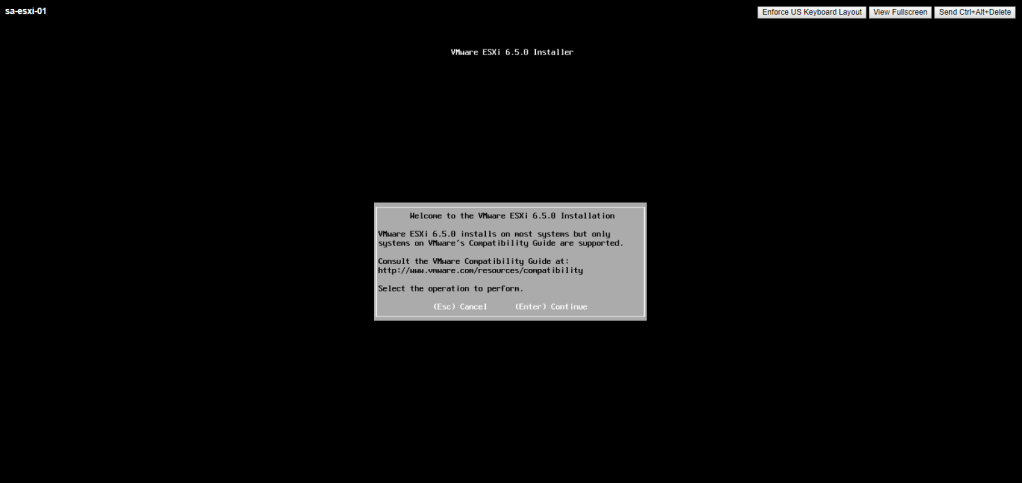
15. Press Enter key to continue the setup.
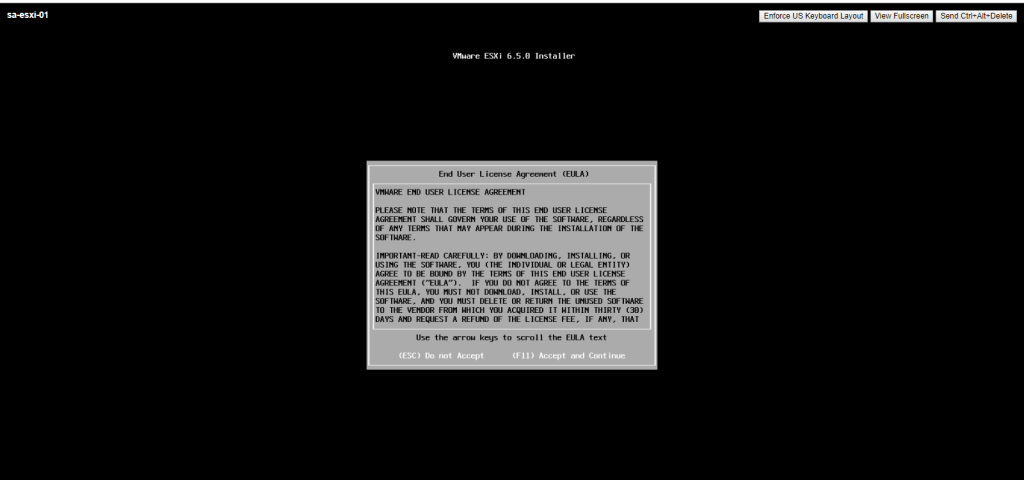
16.Press F11 to accept the end user licence agreement.
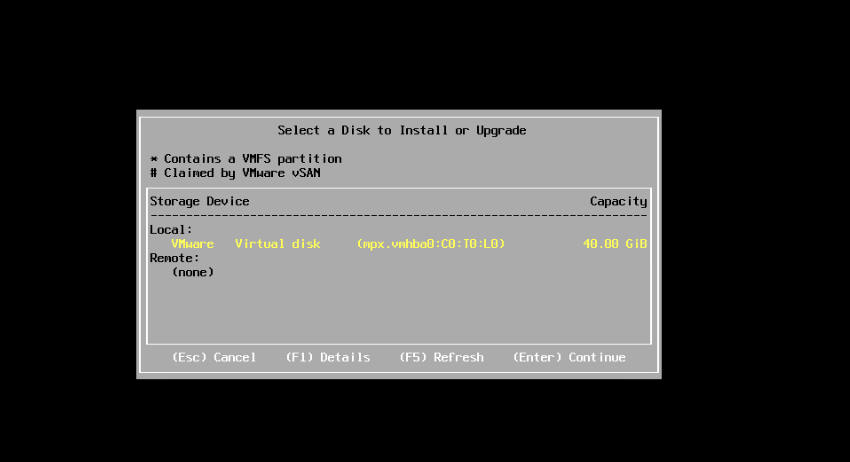
17. It will start scanning for storage devices, select virtual disk and press enter to continue.
18. Select Key-Board layout(US-Default).

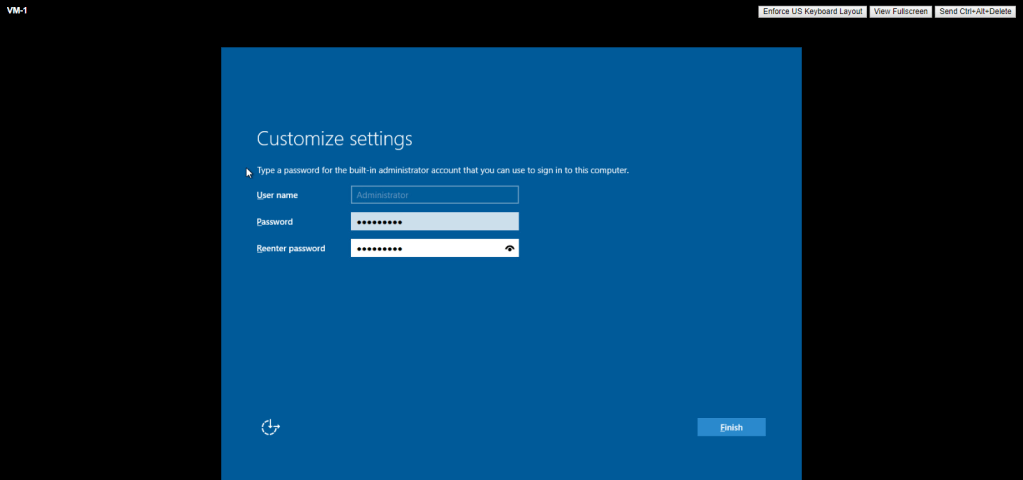
19. Set up a root password.

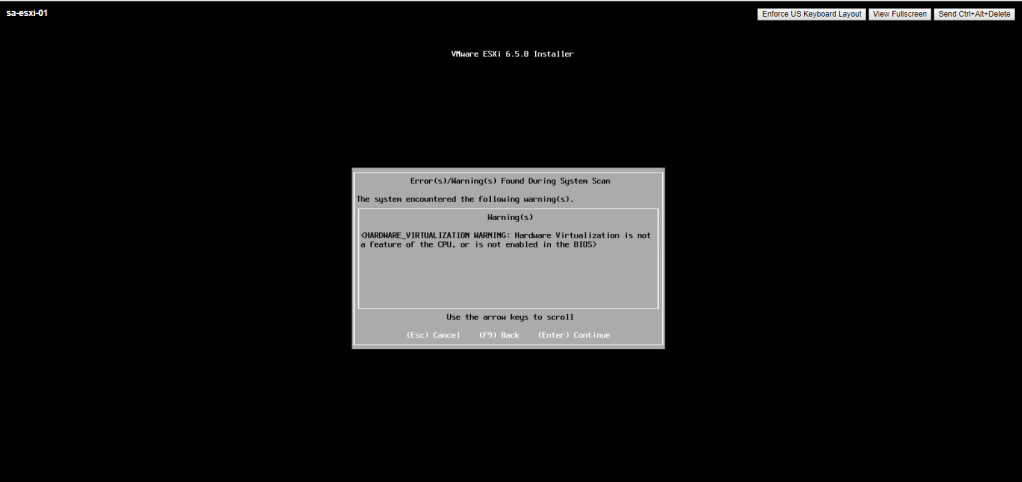
20. It will show the errors /warnings during system scan. press enter to continue.
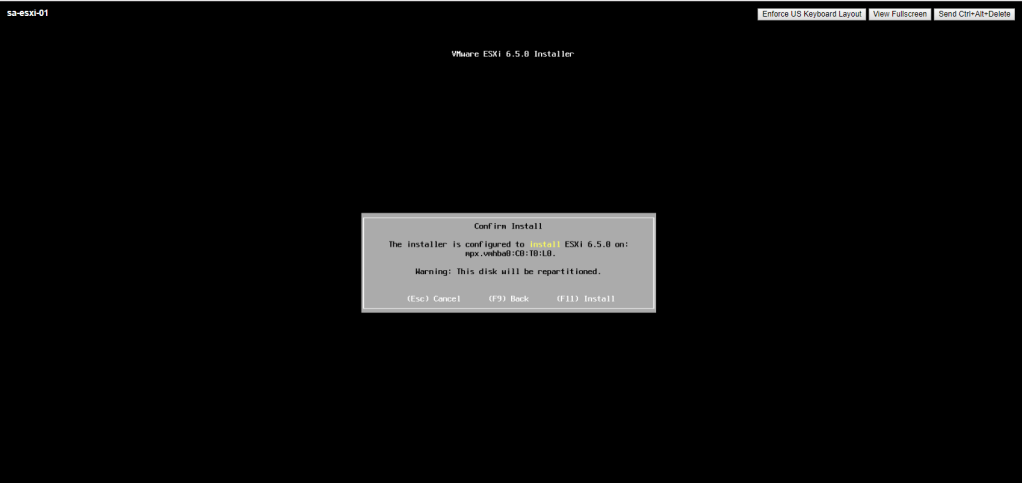
21. Press F11 to confirm the installation.
22. Once it is installed, login as root user.
Note: Install another ESXi named sa-esxi-02 using the same steps.
